Tensorflow Object Detection
前言
本文主要介绍如何利用官方库tensorflow/models/research/objection
并通过faster rcnn resnet 101(以及其他)深度学习框架
训练自己的数据集,并对训练结果进行检测和评估
准备工作
1. 准备自己的数据集
数据集文件目录如下
datas/datas/img/xml/disk_label_map.pbtxtimg/目录下为数据集图片

xml/目录下为图片对应的信息
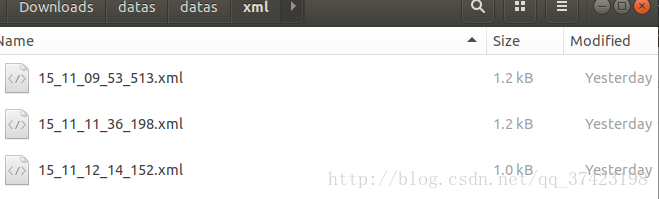
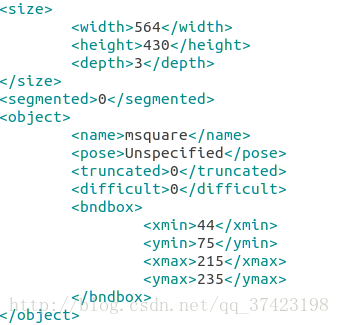
15_11_09_53_513.xml
<?xml version="1.0" encoding="utf-8"?>
<annotation><folder>datas</folder><filename>jpg</filename><source><database>Unknown</database></source><size><width>564</width><height>430</height><depth>3</depth></size><segmented>0</segmented><object><name>rect</name><pose>Unspecified</pose><truncated>0</truncated><difficult>0</difficult><bndbox><xmin>255</xmin><ymin>47</ymin><xmax>460</xmax><ymax>170</ymax></bndbox></object><object><name>rice</name><pose>Unspecified</pose><truncated>0</truncated><difficult>0</difficult><bndbox><xmin>81</xmin><ymin>165</ymin><xmax>246</xmax><ymax>330</ymax></bndbox></object>
</annotation>
(其中object为检测到的物体,name代表物体类别与disk_label_map.pbtxt中指定的一致,bndbox检测到的区域)
disk_label_map.pbtxt
item {id: 1name: 'rice' }item {id: 2name: 'soup' }item {id: 3name: 'rect' }item {id: 4name: 'lcir' }item {id: 5name: 'ssquare' }item {id: 6name: 'msquare' }item {id: 7name: 'lsquare' }item {id: 8name: 'bsquare' }item {id: 9name: 'ellipse' }2.安装tensorflow-gpu
- 官网下载对应版本,安装nvidia-driver:https://www.nvidia.com/Download/index.aspx
- 安装cuda8.0,tensorflow只支持到cuda8.0: https://developer.nvidia.com/cuda-80-ga2-download-archive
- 安装cudnn6.0,更高的版本也不行:https://developer.nvidia.com/rdp/cudnn-download
- 安装virtualenv隔离的tensorflow-gpu(python)运行环境(virtualenv隔离不是必要)
$ sudo apt-get install python-virtualenv
$ virtualenv --system-site-packages tensorflow (在~目录下创建独立运行环境)
$ source ~/tensorflow/bin/activate (激活tensorflow运行环境,以后每次运行该环境下的项目,都要激活)
$ pip install --upgrade tensorflow-gpu
通过import tensorflow验证安装
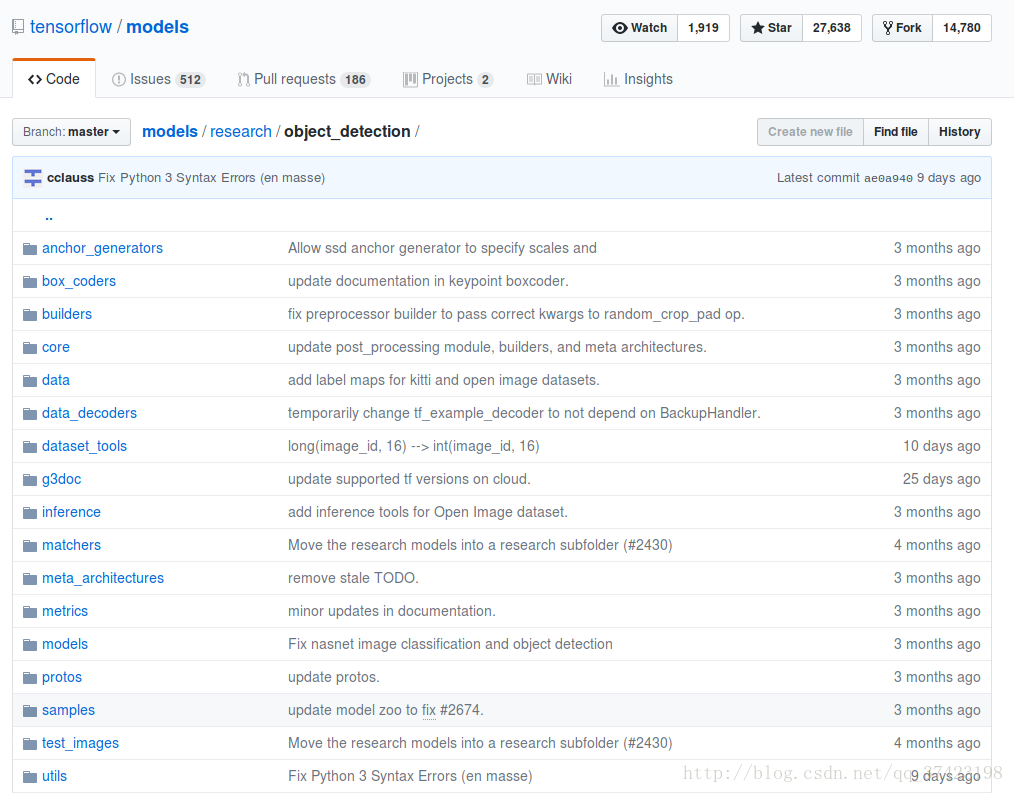
3.下载tensorflow/models仓库
$ git clone https://github.com/tensorflow/models.git下载速度较慢,建议翻墙
之后把下载好的文件解压到~/tensorflow/目录下
4.安装object_detection项目
安装依赖库
$ sudo apt-get install protobuf-compiler
$ sudo pip install pillow
$ sudo pip install lxml
$ sudo pip install jupyter
$ sudo pip install matplotlib
编译protobuf
# From tensorflow/models/research/
protoc object_detection/protos/*.proto --python_out=.
局部运行时,把library加入PYTHONPATH
# From tensorflow/models/research/
export PYTHONPATH=$PYTHONPATH:`pwd`:`pwd`/slim
测试安装是否成功
python object_detection/builders/model_builder_test.py5.下载faster rcnn resnet101 coco model
下载地址:
https://github.com/tensorflow/models/blob/master/research/object_detection/g3doc/detection_model_zoo.md
faster_rcnn_resnet101_coco_2017_11_08.tar.gz
需要用到数据集的model.ckpt文件
训练工作
1.处理训练集
对于训练过程中图像像素越大可能训练神经网络参数消耗的CPU,占用的内存就会越大,
一般4核,8G训练500*500左右像素大小的几百张图片比较适合
压缩图片大小:(将datas数据集复制一份命名为datas1放置于与datas同目录下)
jpg_compression.py
# /home/user/Downloads/datas/jpg_compression.py
from PIL import Image
import os
import sys# Define images type to detect
valid_file_type = ['.jpg','.jpeg']
# Define compression ratio
SIZE_normal = 1.0
SIZE_small = 1.5
SIZE_more_small = 2.0
SIZE_much_more_small = 3.0def make_directory(directory):"""Make dir"""os.makedirs(directory)def directory_exists(directory):"""If this dir exists"""if os.path.exists(directory):return Trueelse:return Falsedef list_img_file(directory):"""List all the files, choose and return jpg files"""old_list = os.listdir(directory)# print old_listnew_list = []for filename in old_list:f, e = os.path.splitext(filename)if e in valid_file_type:new_list.append(filename)else:pass# print new_listreturn new_listdef print_help():print """This program helps compress many image filesyou can choose which scale you want to compress your img(jpg/etc)1) normal compress(4M to 1M around)2) small compress(4M to 500K around)3) smaller compress(4M to 300K around)4) much smaller compress(4M to ...)"""def compress(choose, src_dir, des_dir, file_list):"""Compression Algorithm,img.thumbnail"""if choose == '1':scale = SIZE_normalif choose == '2':scale = SIZE_smallif choose == '3':scale = SIZE_more_smallif choose == '4':scale = SIZE_much_more_smallfor infile in file_list:filename = os.path.join(src_dir, infile)img = Image.open(filename)# size_of_file = os.path.getsize(infile)w, h = img.sizeimg.thumbnail((int(w/scale), int(h/scale)))img.save(des_dir + '/' + infile)if __name__ == "__main__":src_dir, des_dir = sys.argv[1], sys.argv[2]if directory_exists(src_dir):if not directory_exists(des_dir):make_directory(des_dir)# business logicfile_list = list_img_file(src_dir)# print file_listif file_list:print_help()choose = raw_input("enter your choice:")compress(choose, src_dir, des_dir, file_list)else:passelse:print "source directory not exist!"
运行命令
python jpg_compression.py \
> --src_dir=/home/user/Downloads/datas1/datas/img/
> --des_dir=/home/user/Downloads/datas/datas/img/
根据压缩图片比例改变xml文件内容
因为xml文件有记录对应图像像素大小,以及检测物体区域位置,所以要更改这些值
modify_xml.py(缩小的是三倍)
from PIL import Image
from xml.dom import minidom
import os
import sysif __name__ == "__main__":src_dir, des_dir = sys.argv[1], sys.argv[2]file_list = os.listdir(src_dir)for file_name in file_list:xml_name = os.path.join(src_dir, file_name)with open(xml_name, 'r') as fh:dom = minidom.parse(fh)root = dom.documentElement# print root.nodeNamesizeNode = root.getElementsByTagName('size')[0]# print size.nodeNamewidthNode = sizeNode.getElementsByTagName('width')[0]value = widthNode.childNodes[0].nodeValue.encode('gbk')value_int = int(value)/3value = str(value_int)value = value.decode('utf-8')widthNode.childNodes[0].nodeValue = value#print widthNode.childNodes[0].nodeValueheightNode = sizeNode.getElementsByTagName('height')[0]value = heightNode.childNodes[0].nodeValue.encode('gbk')value_int = int(value)/3value = str(value_int)value = value.decode('utf-8')heightNode.childNodes[0].nodeValue = valueobjectNodes = root.getElementsByTagName('object')for idx,subNode in enumerate(objectNodes):bndboxNode = subNode.getElementsByTagName('bndbox')[0]#print bndboxNodeminxNode = bndboxNode.getElementsByTagName('xmin')[0]val = minxNode.childNodes[0].nodeValue.encode('gbk')val_int = int(val)/3val = str(val_int)val = val.decode('utf-8')minxNode.childNodes[0].nodeValue = valminyNode = bndboxNode.getElementsByTagName('ymin')[0]val = minyNode.childNodes[0].nodeValue.encode('gbk')val_int = int(val)/3val = str(val_int)val = val.decode('utf-8')minyNode.childNodes[0].nodeValue = valmaxxNode = bndboxNode.getElementsByTagName('xmax')[0]val = maxxNode.childNodes[0].nodeValue.encode('gbk')val_int = int(val)/3val = str(val_int)val = val.decode('utf-8')maxxNode.childNodes[0].nodeValue = valmaxyNode = bndboxNode.getElementsByTagName('ymax')[0]val = maxyNode.childNodes[0].nodeValue.encode('gbk')val_int = int(val)/3val = str(val_int)val = val.decode('utf-8')maxyNode.childNodes[0].nodeValue = val# print maxxNode.childNodes[0].nodeValuebndboxNode.replaceChild(bndboxNode.getElementsByTagName('xmin')[0], minxNode)bndboxNode.replaceChild(bndboxNode.getElementsByTagName('ymin')[0], minyNode)bndboxNode.replaceChild(bndboxNode.getElementsByTagName('xmax')[0], maxxNode)bndboxNode.replaceChild(bndboxNode.getElementsByTagName('ymax')[0], maxyNode)objectNodes[idx].replaceChild(objectNodes[idx].getElementsByTagName('bndbox')[0], bndboxNode)dom.documentElement.replaceChild(dom.documentElement.getElementsByTagName('object')[idx], objectNodes[idx])sizeNode.replaceChild(sizeNode.getElementsByTagName('width')[0], widthNode)sizeNode.replaceChild(sizeNode.getElementsByTagName('height')[0], heightNode)dom.documentElement.replaceChild(dom.documentElement.getElementsByTagName('size')[0], sizeNode)des_path = os.path.join(des_dir, file_name)# print des_pathf = open(des_path, 'w')dom.writexml(f,encoding = 'utf-8' )f.close()  # print dom.documentElement.getElementsByTagName('size')[0].getElementsByTagName('height')[0].childNodes[0].nodeValue
运行文件
python modify_xml.py \
> --src_dir=/home/user/Downloads/datas1/datas/xml/
> --des_dir=/home/user/Downloads/datas/datas/xml/
2.修改接口文件
首先先熟悉一下这个object_detection项目需要修改的文件的作用
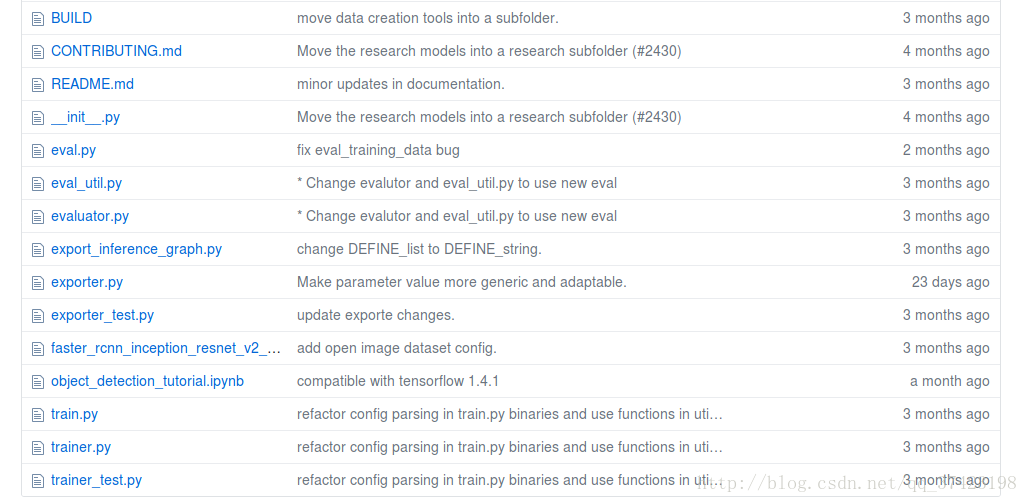
eval.py可执行文件用于测试评估训练数据
train.py可执行文件用于训练给定的record文件中的数据
export_inference_graph.py用于把训练出的ckpt文件转换成pb文件可供测试
samples/config/从中选出训练所用的神经网络框架的配置文件
dataset_tools/create…tf_record.py可执行文件用于把数据集导成record文件待训练
object_detection_tutorial.ipynb在jupyter notebook里运行用于测试,查看图片检验效果
create_disk_tf_record.py
转化数据为train.tfrecords文件
from __future__ import absolute_import
from __future__ import division
from __future__ import print_functionimport hashlib
import io
import logging
import osfrom lxml import etree
import PIL.Image
import tensorflow as tffrom object_detection.utils import dataset_util
from object_detection.utils import label_map_utilflags = tf.app.flags
flags.DEFINE_string('data_dir', '', 'Root directory to dataset')
flags.DEFINE_string('images_dir', '', 'Path to images directory')
flags.DEFINE_string('annotations_dir', '', 'Path to annotations directory')
flags.DEFINE_string('output_path', '', 'Path to output TFRecord')
flags.DEFINE_string('label_map_path', '', 'Path to label map proto')
flags.DEFINE_boolean('ignore_difficult_instances', False, 'Whether to ignore difficult instances')FLAGS = flags.FLAGSdef dict_to_tf_example(data,dataset_directory,image_directory,label_map_dict,ignore_difficult_instances=False):   """Convert XML derived dict to tf.Example proto.Notice that this function normalizes the bounding box coordinates providedby the raw data.Args:data: dict holding PASCAL XML fields for a single image (obtained byrunning dataset_util.recursive_parse_xml_to_dict)label_map_dict: A map from string label names to integers ids.ignore_difficult_instances: Whether to skip difficult instances in thedataset (default: False).Returns:example: The converted tf.Example.Raises:ValueError: if the image pointed to by data['filename'] is not a valid JPEG"""img_path = os.path.join(dataset_directory, image_directory, data['filename'])with tf.gfile.GFile(img_path, 'rb') as fid:encoded_jpg = fid.read()encoded_jpg_io = io.BytesIO(encoded_jpg)image = PIL.Image.open(encoded_jpg_io)if image.format != 'JPEG':raise ValueError('Image format not JPEG')key = hashlib.sha256(encoded_jpg).hexdigest()width = int(data['size']['width'])height = int(data['size']['height'])xmin = []ymin = []xmax = []ymax = []classes = []classes_text = []truncated = []poses = []difficult_obj = []for obj in data['object']:difficult = bool(int(obj['difficult']))if ignore_difficult_instances and difficult:continuedifficult_obj.append(int(difficult))xmin.append(float(obj['bndbox']['xmin']) / width)ymin.append(float(obj['bndbox']['ymin']) / height)xmax.append(float(obj['bndbox']['xmax']) / width)ymax.append(float(obj['bndbox']['ymax']) / height)classes_text.append(obj['name'].encode('utf8'))classes.append(label_map_dict[obj['name']])truncated.append(int(obj['truncated']))poses.append(obj['pose'].encode('utf8'))example = tf.train.Example(features=tf.train.Features(feature={'image/height': dataset_util.int64_feature(height),'image/width': dataset_util.int64_feature(width),'image/filename': dataset_util.bytes_feature(data['filename'].encode('utf8')),'image/source_id': dataset_util.bytes_feature(data['filename'].encode('utf8')),'image/key/sha256': dataset_util.bytes_feature(key.encode('utf8')),'image/encoded': dataset_util.bytes_feature(encoded_jpg),'image/format': dataset_util.bytes_feature('jpeg'.encode('utf8')),'image/object/bbox/xmin': dataset_util.float_list_feature(xmin),'image/object/bbox/xmax': dataset_util.float_list_feature(xmax),'image/object/bbox/ymin': dataset_util.float_list_feature(ymin),'image/object/bbox/ymax': dataset_util.float_list_feature(ymax),'image/object/class/text': dataset_util.bytes_list_feature(classes_text),'image/object/class/label': dataset_util.int64_list_feature(classes),'image/object/difficult': dataset_util.int64_list_feature(difficult_obj),'image/object/truncated': dataset_util.int64_list_feature(truncated),'image/object/view': dataset_util.bytes_list_feature(poses),}))return exampledef main(_):data_dir = FLAGS.data_dirwriter = tf.python_io.TFRecordWriter(FLAGS.output_path)label_map_dict = label_map_util.get_label_map_dict(FLAGS.label_map_path)logging.info('Reading from dataset.')images_dir = os.path.join(data_dir, FLAGS.images_dir)images_path = os.listdir(images_dir)annotations_dir = os.path.join(data_dir, FLAGS.annotations_dir)examples_list = [os.path.splitext(x)[0] for x in images_path]for idx, example in enumerate(examples_list):if idx % 10 == 0:logging.info('On image %d of %d', idx, len(examples_list))path = os.path.join(annotations_dir, example + '.xml')with tf.gfile.GFile(path, 'r') as fid:xml_str = fid.read()xml = etree.fromstring(xml_str)data = dataset_util.recursive_parse_xml_to_dict(xml)['annotation']tf_example = dict_to_tf_example(data, FLAGS.data_dir, FLAGS.images_dir, label_map_dict,FLAGS.ignore_difficult_instances)writer.write(tf_example.SerializeToString())writer.close()if __name__ == '__main__':tf.app.run()
通过tf.app来传入外部参数
通过tf.train.example来把数据导成tf_example,然后序列化写入tfrecords文件
运行主要是5个参数
# From tensorflow/models/research/
python object_detection/dataset_tools/create_disk_tf_record.py \
> --data_dir=/home/icepoint/Downloads/datas/datas/ \
> --images_dir=img/ \
> --annotations_dir=xml/ \
> --output_path=/home/icepoint/Downloads/datas/train.tfrecords \ > --label_map_path=/home/icepoint/Downloads/datas/disk_label_map.pbtxt
train.py
运行文件(前面加以下指定的设备,以防报错)
$ CUDA_VISIBLE_DEVICE=0 python object_detection/train.py \
--logtostderr \ --train_dir=/home/icepoint/Downloads/datas/ \ --pipeline_config_path=/home/icepoint/tensorflow/models/research/object_detection/samples/configs/faster_rcnn_resnet101_pets.config
指定训练目录,之后会把一系列训练好的文件存在那个目录上
指定配置文件
配置文件
faster_rcnn_resnet101_pets.config
# Faster R-CNN with Resnet-101 (v1) configured for the Oxford-IIIT Pet Dataset.
# Users should configure the fine_tune_checkpoint field in the train config as
# well as the label_map_path and input_path fields in the train_input_reader and
# eval_input_reader. Search for "PATH_TO_BE_CONFIGURED" to find the fields that
# should be configured.
model {faster_rcnn {num_classes: 37image_resizer {keep_aspect_ratio_resizer {min_dimension: 600max_dimension: 1024}}feature_extractor {type: 'faster_rcnn_resnet101'first_stage_features_stride: 16}first_stage_anchor_generator {grid_anchor_generator {scales: [0.25, 0.5, 1.0, 2.0]aspect_ratios: [0.5, 1.0, 2.0]height_stride: 16width_stride: 16}}first_stage_box_predictor_conv_hyperparams {op: CONVregularizer {l2_regularizer {weight: 0.0}}initializer {truncated_normal_initializer {stddev: 0.01}}}first_stage_nms_score_threshold: 0.0first_stage_nms_iou_threshold: 0.7first_stage_max_proposals: 300first_stage_localization_loss_weight: 2.0first_stage_objectness_loss_weight: 1.0initial_crop_size: 14maxpool_kernel_size: 2maxpool_stride: 2second_stage_box_predictor {mask_rcnn_box_predictor {use_dropout: falsedropout_keep_probability: 1.0fc_hyperparams {op: FCregularizer {l2_regularizer {weight: 0.0}}initializer {variance_scaling_initializer {factor: 1.0uniform: truemode: FAN_AVG}}}}}second_stage_post_processing {batch_non_max_suppression {score_threshold: 0.0iou_threshold: 0.6max_detections_per_class: 100max_total_detections: 300}score_converter: SOFTMAX}second_stage_localization_loss_weight: 2.0second_stage_classification_loss_weight: 1.0}
}train_config: {batch_size: 1optimizer {momentum_optimizer: {learning_rate: {manual_step_learning_rate {initial_learning_rate: 0.0003schedule {step: 0learning_rate: .0003}schedule {step: 900000learning_rate: .00003}schedule {step: 1200000learning_rate: .000003}}}momentum_optimizer_value: 0.9}use_moving_average: false}gradient_clipping_by_norm: 10.0fine_tune_checkpoint: "/home/icepoint/Downloads/faster_rcnn_resnet101_coco_2017_11_08/model.ckpt"from_detection_checkpoint: true# Note: The below line limits the training process to 200K steps, which we# empirically found to be sufficient enough to train the pets dataset. This# effectively bypasses the learning rate schedule (the learning rate will# never decay). Remove the below line to train indefinitely.num_steps: 200000data_augmentation_options {random_horizontal_flip {}}
}train_input_reader: {tf_record_input_reader {input_path: "/home/icepoint/Downloads/datas/train.tfrecords"}label_map_path: "/home/icepoint/Downloads/datas/disk_label_map.pbtxt"
}eval_config: {num_examples: 2000# Note: The below line limits the evaluation process to 10 evaluations.# Remove the below line to evaluate indefinitely.max_evals: 10
}eval_input_reader: {tf_record_input_reader {input_path: "/home/icepoint/Downloads/datas/train.tfrecords"}label_map_path: "/home/icepoint/Downloads/datas/disk_label_map.pbtxt"shuffle: falsenum_readers: 1
}
需要修改一下train_config: fine_tune_checkpoint为下载的coco数据集中model.ckpt文件,num_steps迭代次数
需要修改train_input_reader:input_path表示输入train.tfrecords的文件路径,label_map_path表示类别文件路径
需要修改eval_input_reader:input_path与label_map_path
训练过程中可能比较耗时,或者耗费资源
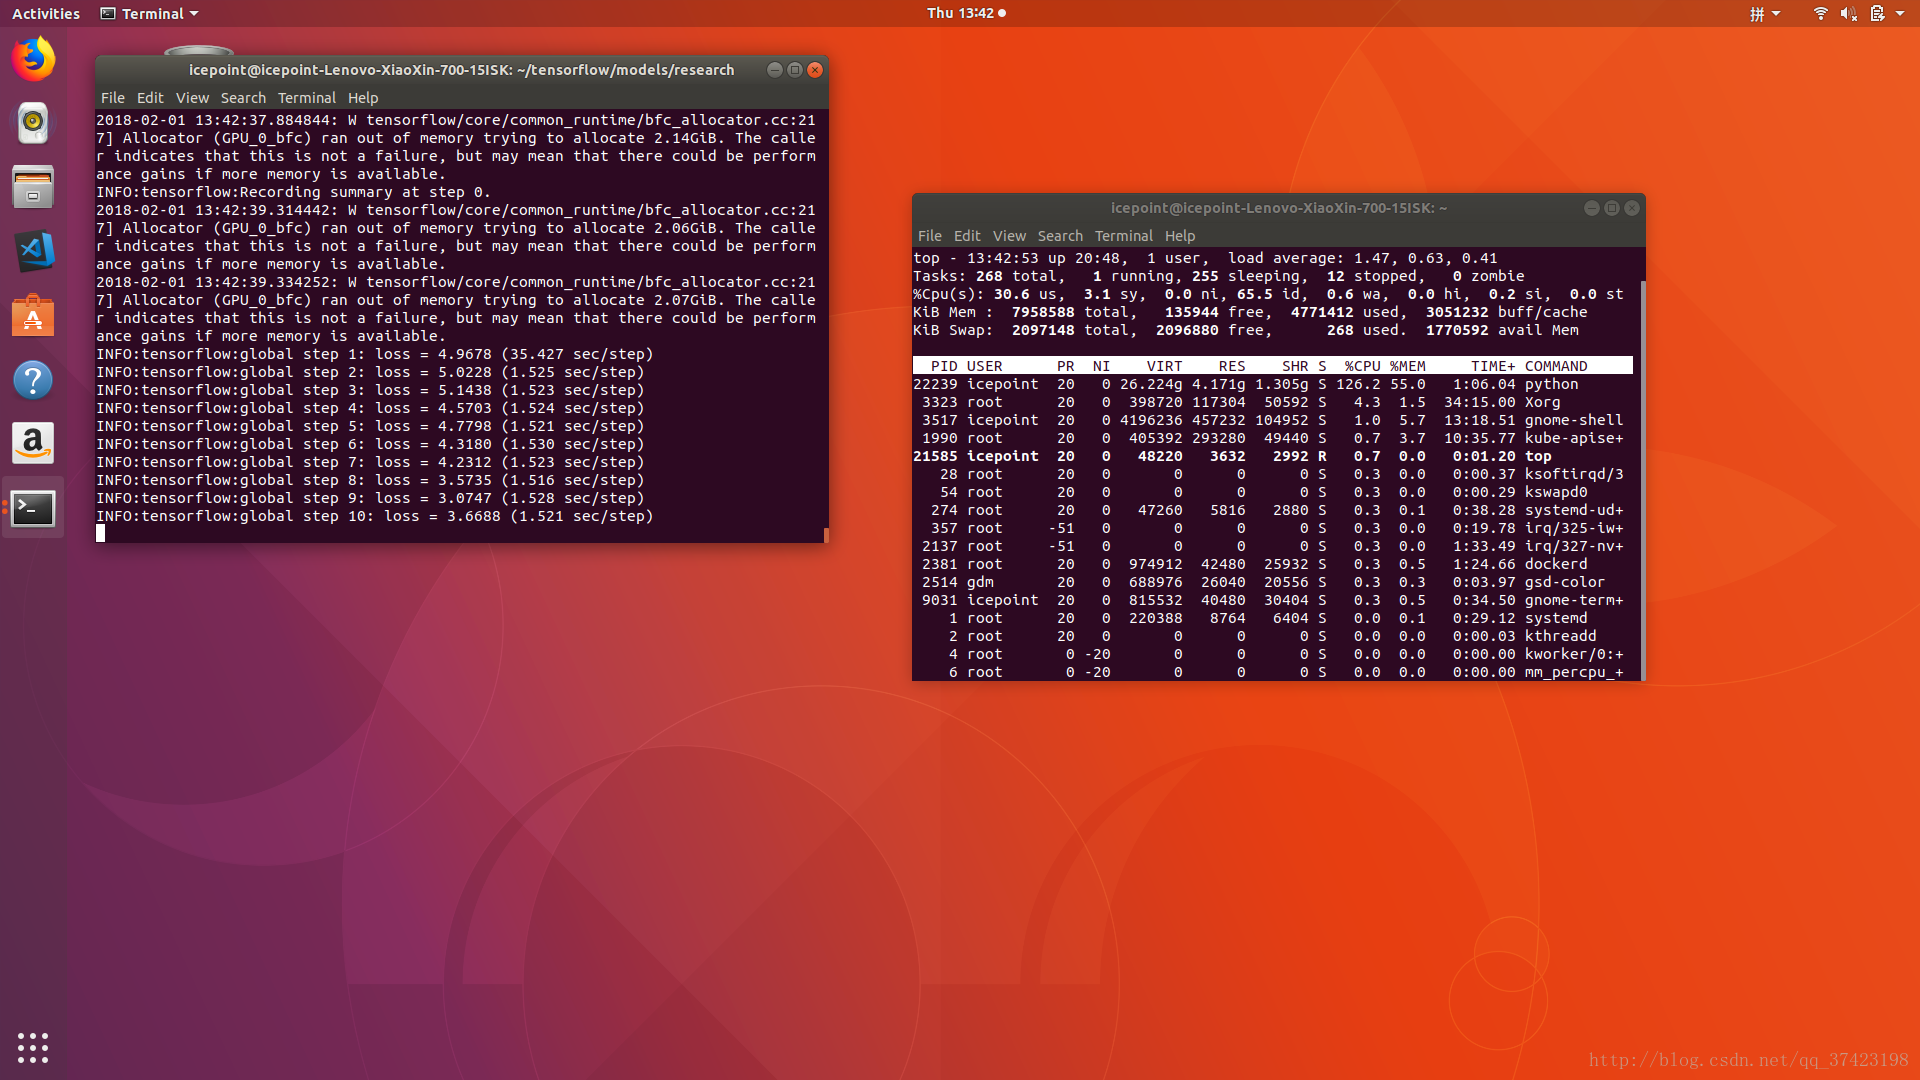
当自动保存model.ckpt文件时就可以终止训练
训练时训练目录下会有
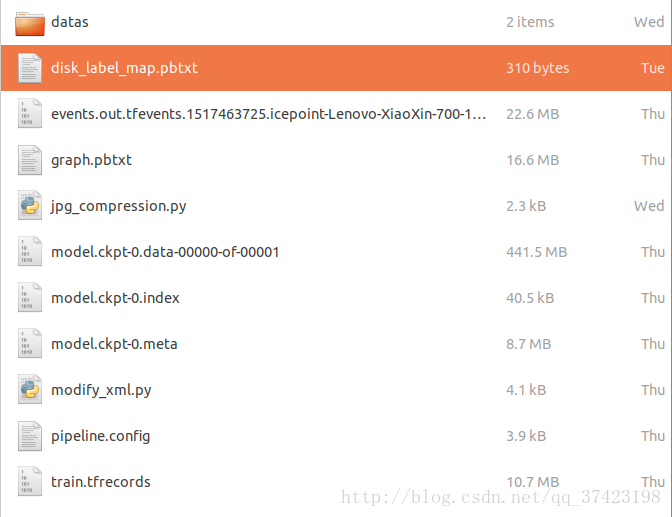
export_inference_graph.py
转换model.ckpt为pb文件
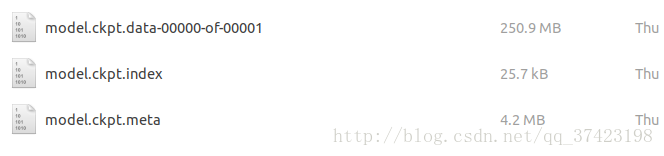
首先需要把train_dir下的model.ckpt-xxx.*三个文件+checkpoint文件,复制到train_checkpoint_prefix目录下
重命名把model.ckpt-xxx的xxx去掉
修改checkpoint里的路径内容
/Downloads/datas/ckpt/
运行
python export_inference_graph \--input_type image_tensor \ --pipeline_config_path /home/user/tensorflow/models/research/object_detection/samples/configs/faster_rcnn_resnet101_pets.config \ --trained_checkpoint_prefix /home/user/Downloads/datas/ckpt/model.ckpt \ --output_directory /home/user/Downloads/datas/ckpt/Note:The expected output would be in the directory
path/to/exported_model_directory (which is created if it does not exist)
with contents:
- graph.pbtxt
- model.ckpt.data-00000-of-00001
- model.ckpt.info
- model.ckpt.meta
- frozen_inference_graph.pb
+ saved_model (a directory)
注意运行时可能会报错:
ValueError: Protocol message RewriterConfig has no "layout_optimizer" field.推测可能是tensorflow临时commit的bug
解决:打开object_detection/exporter.py,将layout_optimizer字样修改为optimize_tensor_layout字样(函数名)即可
导出后会生成frozen_inference_graph.pb用于数据检测
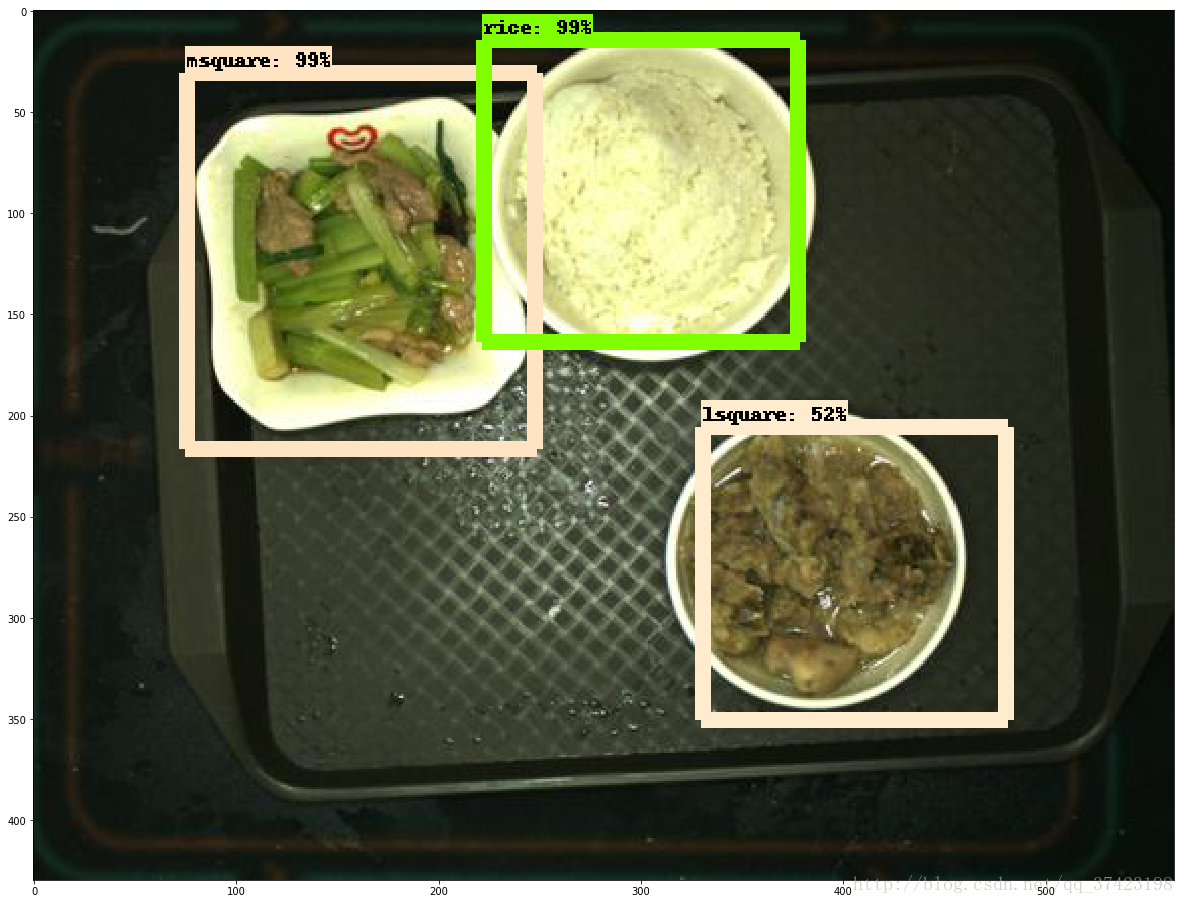
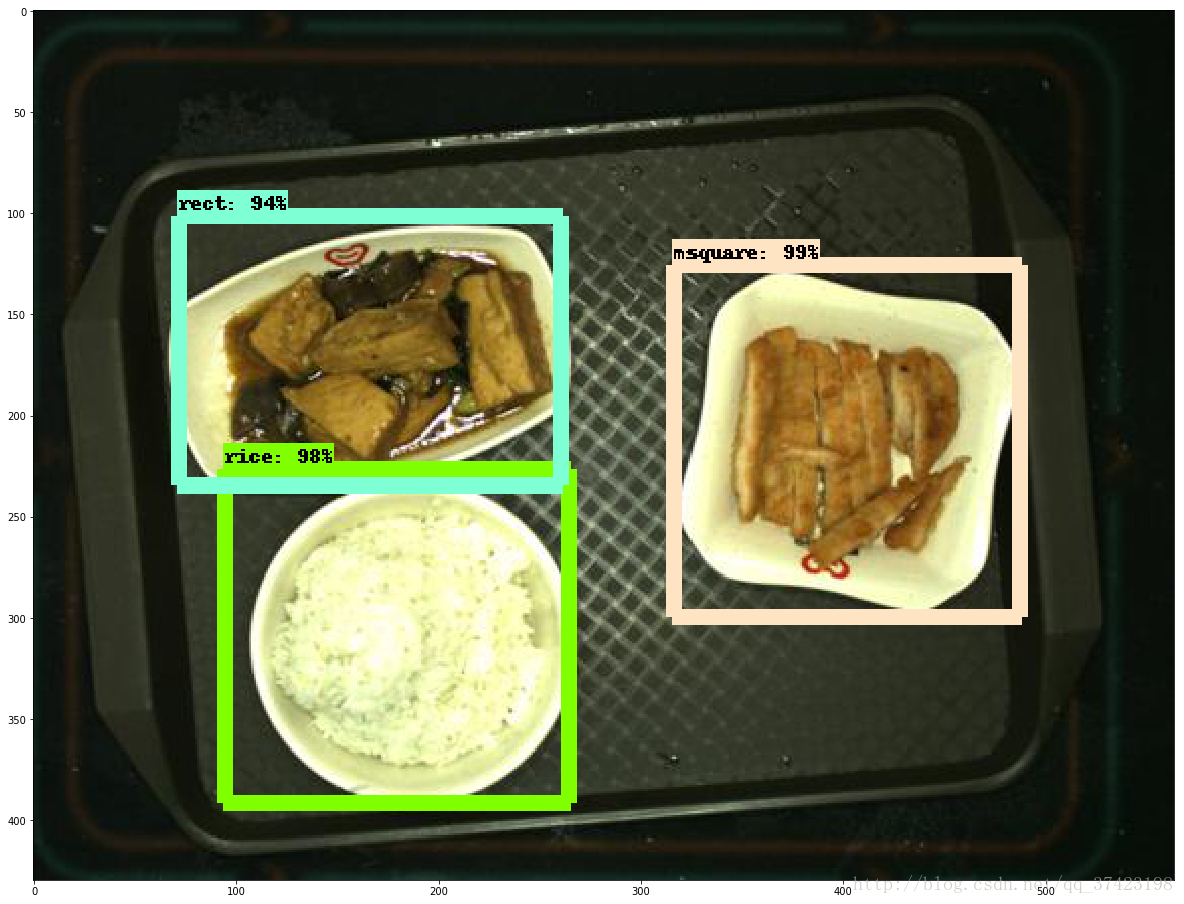
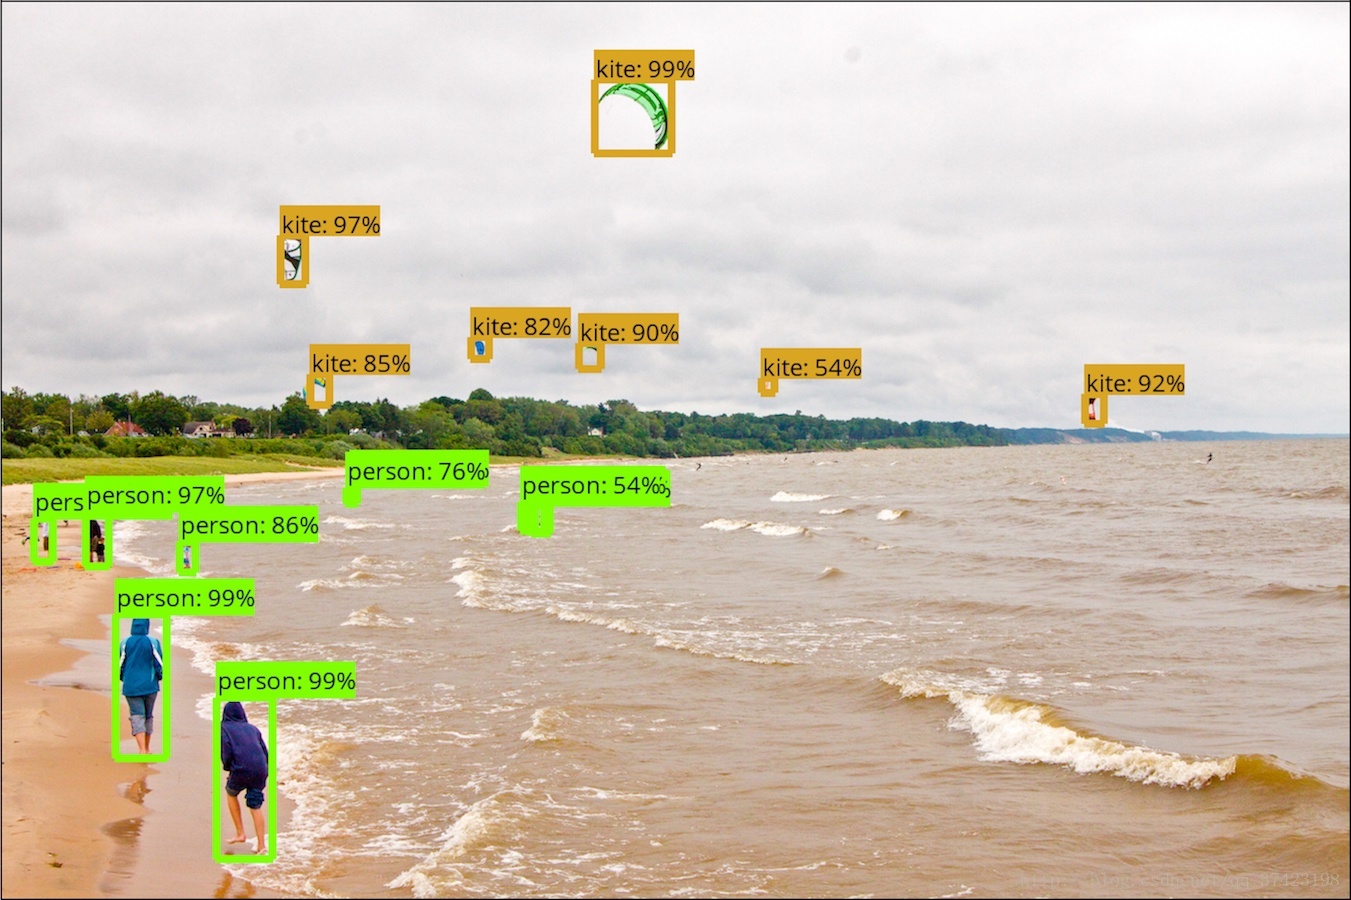
测试工作
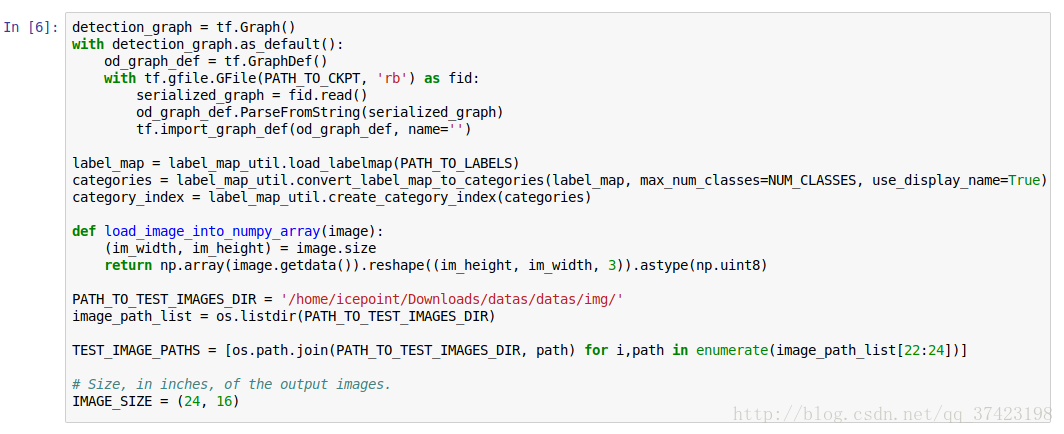
通过source, export PYTHONPATH打开jupyter notebook
打开object_detection_disk_dataset.ipynb
(具体参照object_detection/object_detection_tutorial.ipynb)

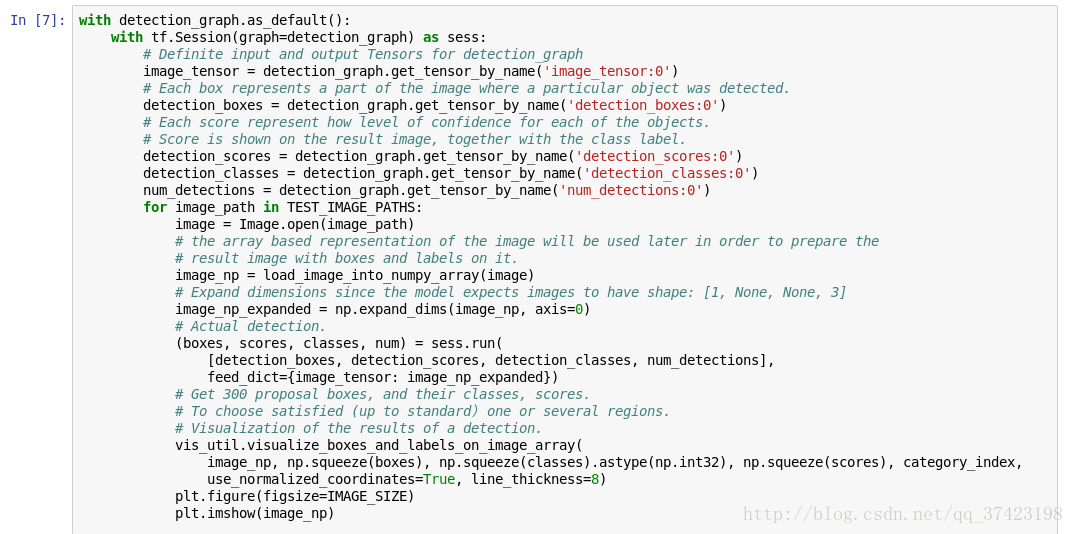
测试结果: