ESP8266+OLED显示天气
??在太极创客学习ESP8266三四天了,记录一下学习过程,还请各位大佬多加指点。
??基本思路:首先,ESP8266作客户端向心知天气API发送GET请求;然后,从心知天气响应报文体中的JSON数据解析出天气,气温等数据;最后用在OLED上把天气信息显示。
1 硬件及连接
- ESP8266-NodeMCU
- OLED屏幕
- 四根杜邦线
- 数据线一条
OLED的VCC连接ESP8266-NodeMCU的3V引脚,GND连接MCU的G引脚,SCL连接MCU的D1引脚,SDA连接MCU的D2引脚
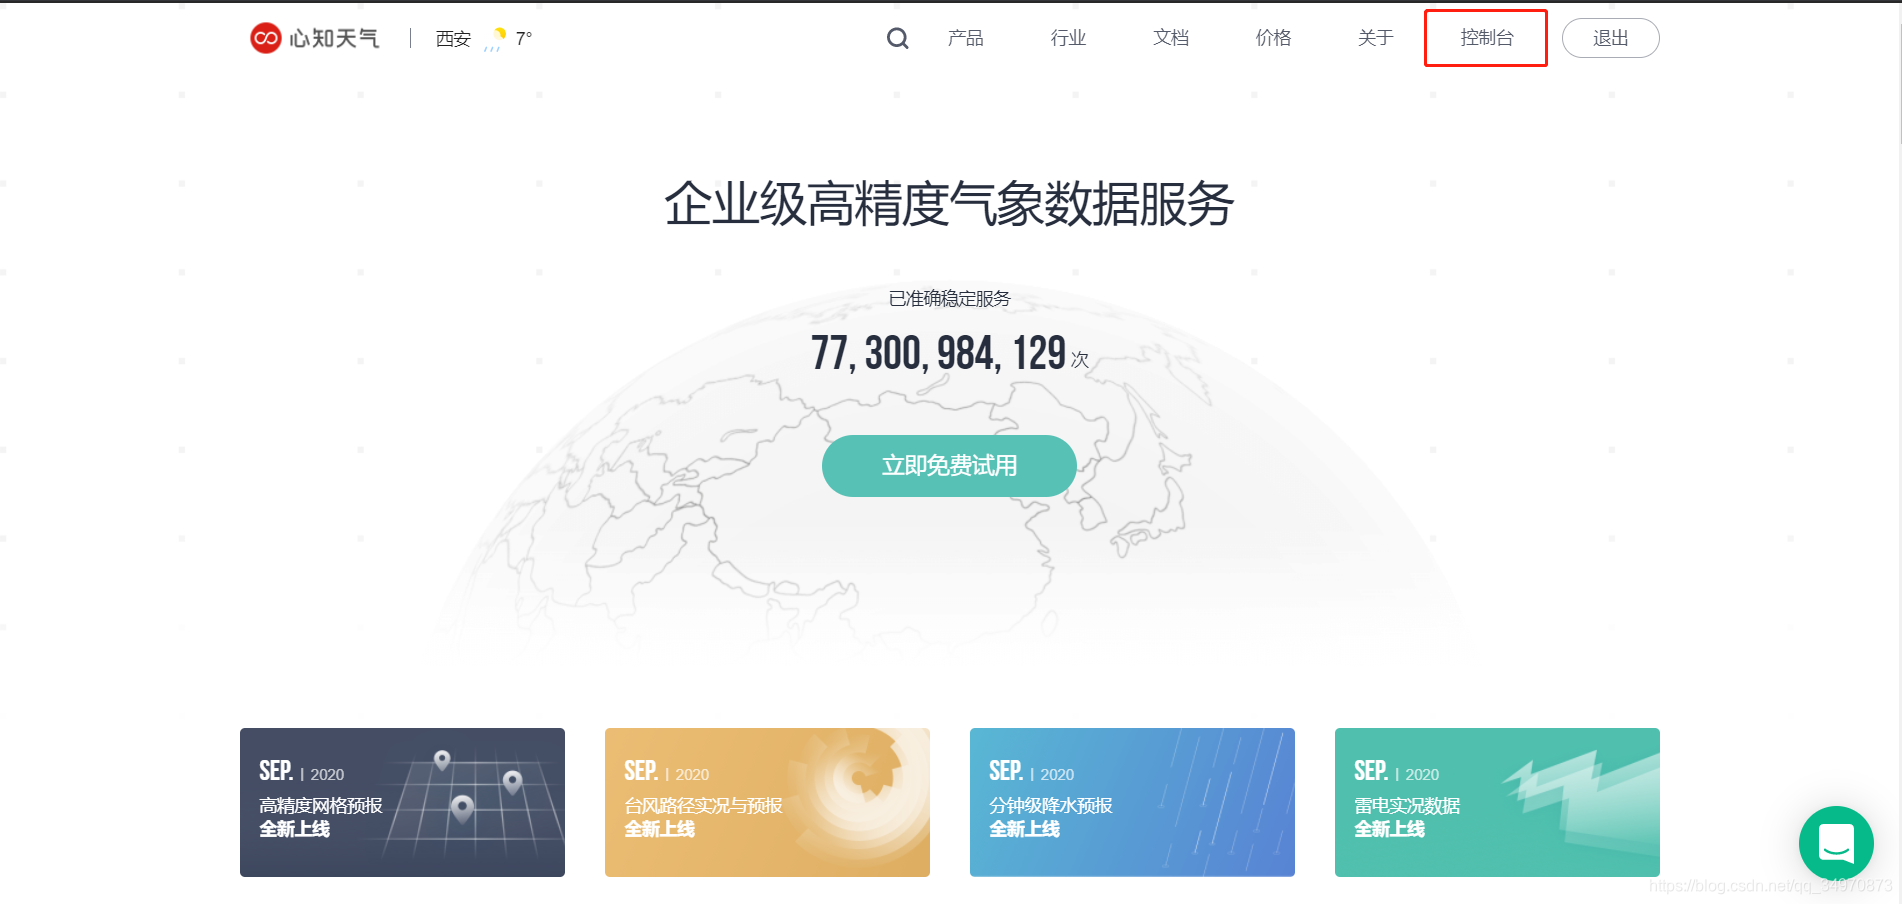
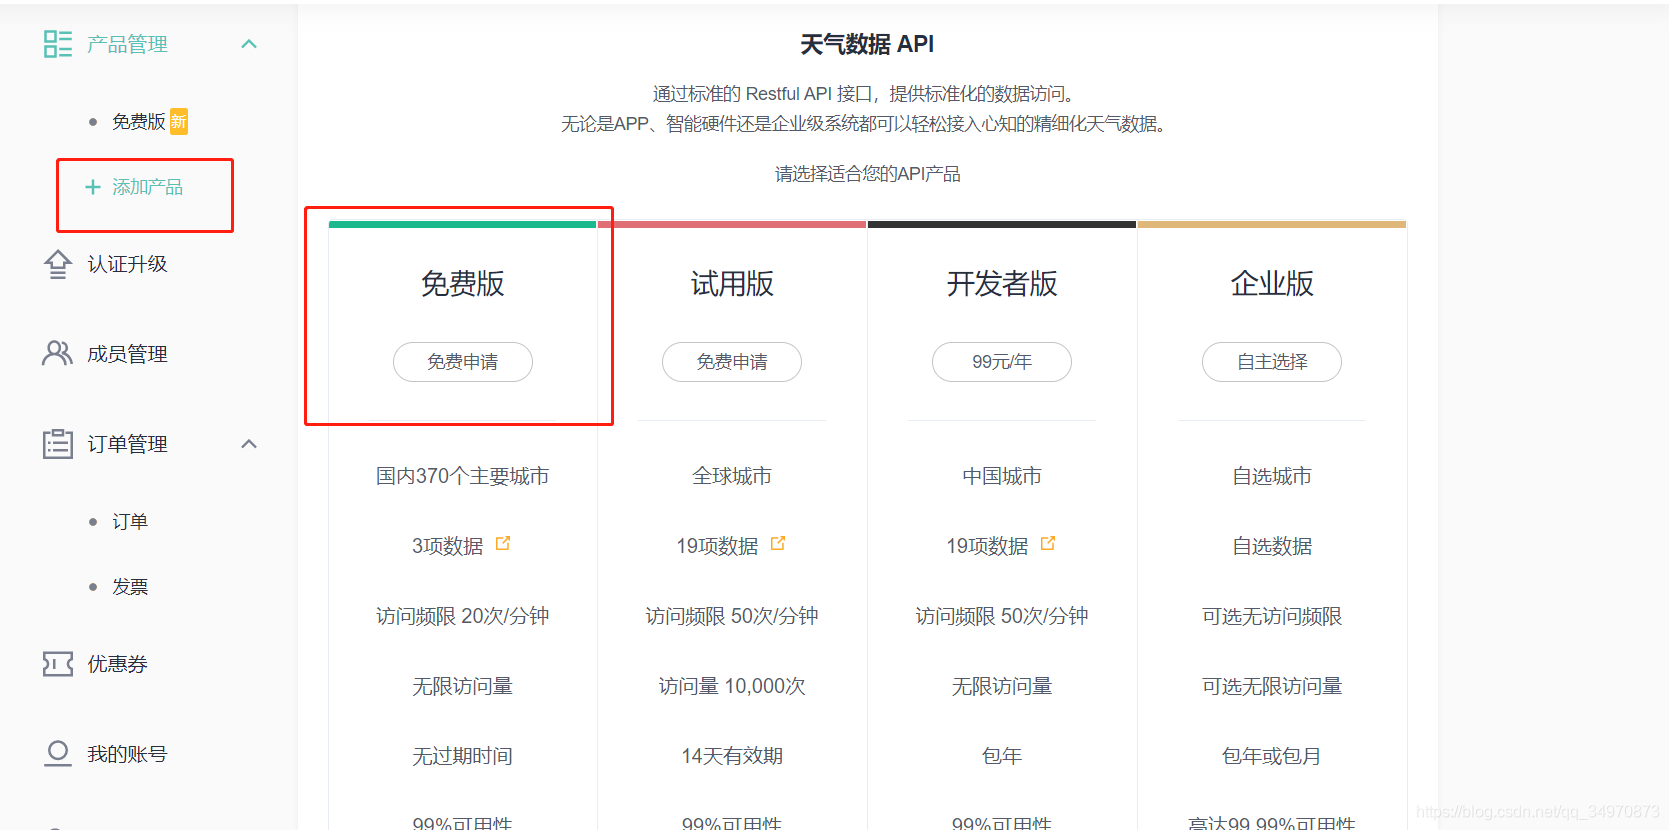
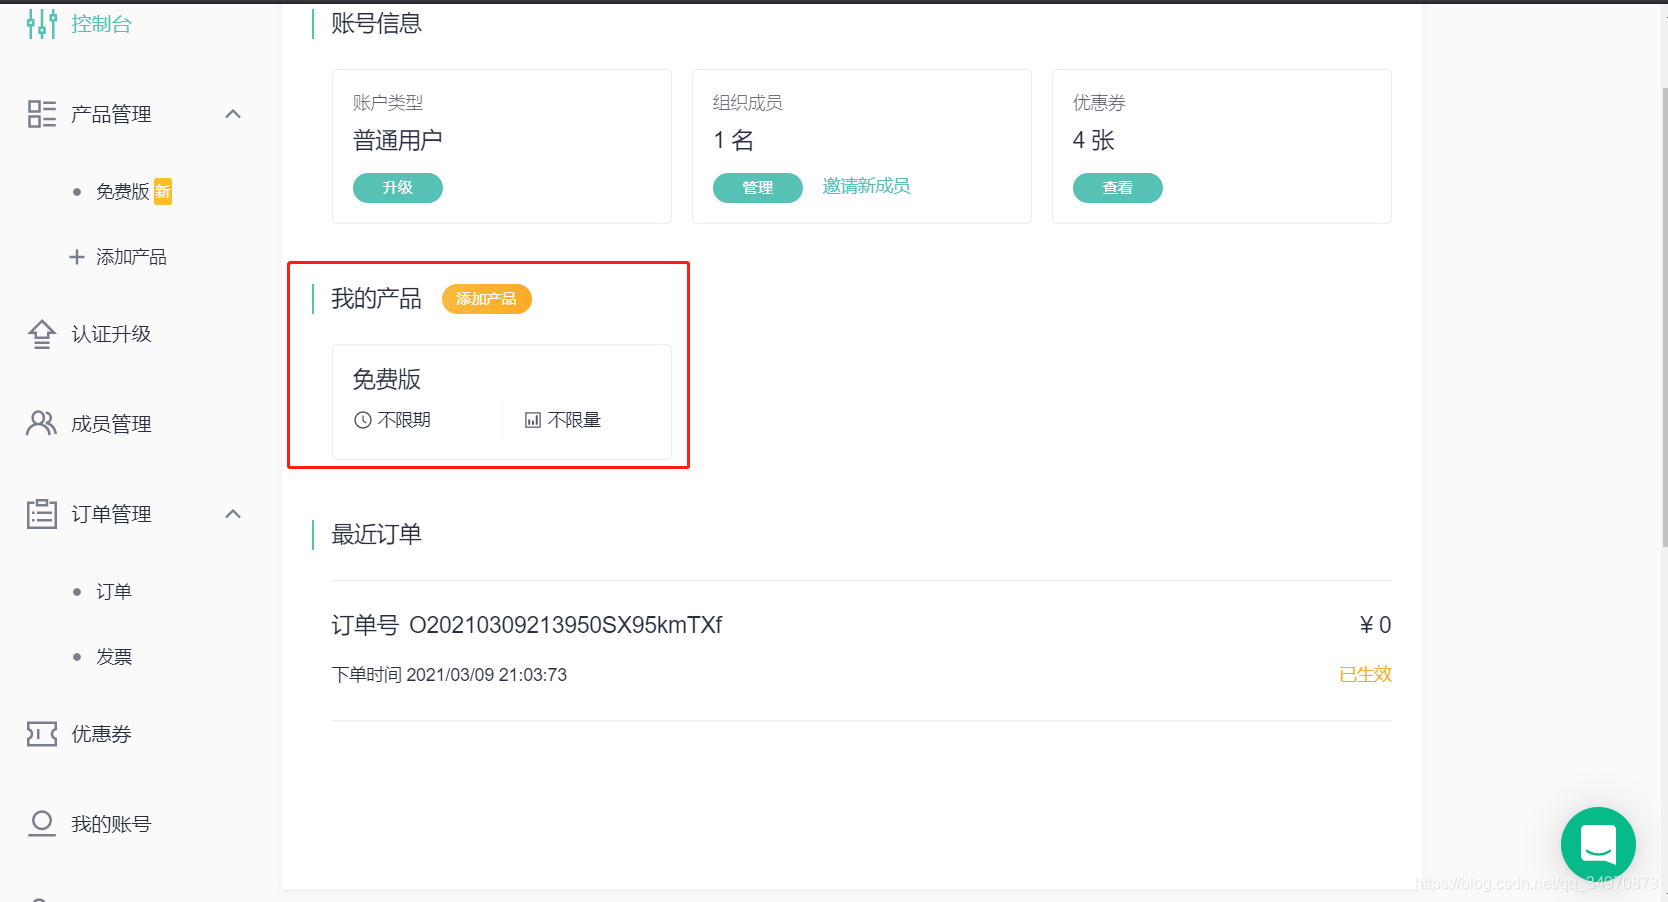
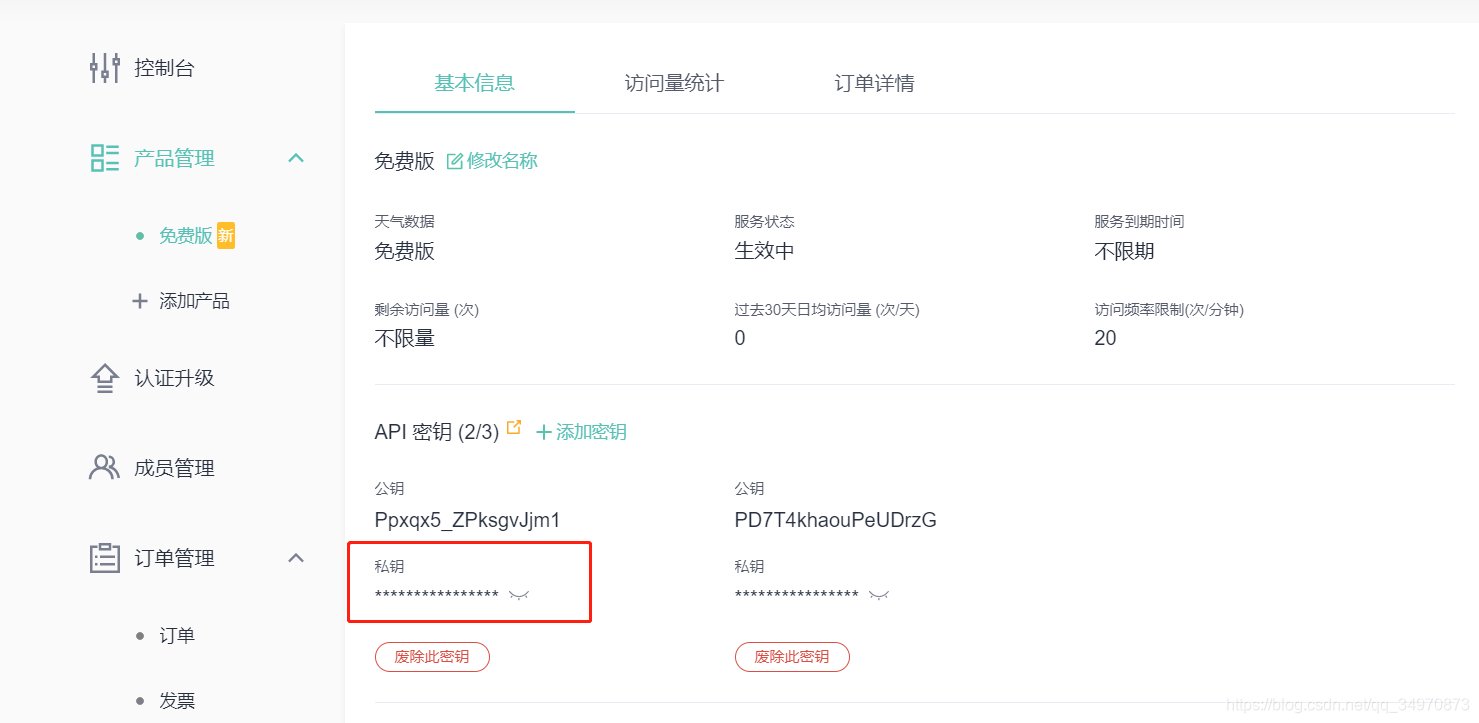
2 心知天气API
在知心天气申请API,并记住私钥
API的地址为api.seniverse.com/v3/weather/now.json?key=私钥(填写自己申请到的)&location=Xian(填写地点)&language=en&unit=c。服务器响应了一个JSON对象
{
"results":[{"location":{"id":"WQJ6YY8MHZP0","name":"Xian","country":"CN","path":"Xian,Xian,Shanxi,China","timezone":"Asia/Shanghai","timezone_offset":"+08:00"},"now":{"text":"Shower","code":"10","temperature":"7"},"last_update":"2021-03-10T17:25:00+08:00"
}
]
}
改JSON对象的元素是一个数组,数组的元素时三条JSON数据,数据名分别为Location,Now,以及last_update。
3 代码
#include <ESP8266WiFi.h>
#include <ArduinoJson.h>
#include <U8g2lib.h>
#include <Wire.h>//-------Wifi信息------//
const char* ssid = "xxxx";
const char* password = "xxxx";
//------------------- //
api.seniverse.com/v3/weather/now.json?key=SbCTo-Zgsj2X_44Er&location=Xian&language=en&unit=c
const int httpPort = 80; //端口号
const char* host = "api.seniverse.com"; //服务器地址String reqUserKey = "xxxxxxxxxx";//知心天气API私钥
String reqLocation = "Xian";//地址
String reqUnit = "c";//摄氏度//-------------------http请求-----------------------------//
String reqRes = "/v3/weather/now.json?key=" + reqUserKey ++ "&location=" + reqLocation +"&language=en&unit=" + reqUnit;
String httprequest = String("GET ") + reqRes + " HTTP/1.1\r\n" +"Host: " + host + "\r\n" +"Connection: close\r\n\r\n";
//--------------------------------------------------------//U8G2_SSD1306_128X64_NONAME_F_HW_I2C u8g2(U8G2_R0,/* reset=*/ U8X8_PIN_NONE);void OLEDDispaly(String cityName, String weather, String temperature);
void wifi_connect();
void httpRequest();
void parseJson(WiFiClient client);void setup() {
    // put your setup code here, to run once:Serial.begin(9600);u8g2.begin();wifi_connect();}void loop() {
    // put your main code here, to run repeatedly:httpRequest();delay(3000);
}void wifi_connect() {
    //提示信息Serial.print("Wifi connecting");u8g2.clearBuffer();u8g2.setFont(u8g2_font_unifont_t_chinese2);u8g2.setCursor(0, 16);u8g2.print("Wifi connecting ...");u8g2.sendBuffer();//连接WifiWiFi.begin(ssid, password);while (WiFi.status() != WL_CONNECTED) {
    Serial.print(".");delay(500);}Serial.println("\nWifi Connected!");u8g2.clearBuffer();u8g2.setCursor(0, 16);u8g2.print("Wifi connected!!!");u8g2.sendBuffer();}void httpRequest() {
    WiFiClient client;//1 连接服务器if (client.connect(host, httpPort)) {
    Serial.println("连接成功,接下来发送请求");client.print(httprequest);//访问API接口String response_status = client.readStringUntil('\n');Serial.println(response_status);if (client.find("\r\n\r\n")) {
    Serial.println("响应报文体找到,开始解析");}parseJson(client);}else {
    Serial.println("连接服务器失败");}client.stop();
}void OLEDDispaly(String cityName, String weather, String temperature) {
    u8g2.clearBuffer();u8g2.setCursor(0, 16);u8g2.print("City: ");u8g2.print(cityName);u8g2.setCursor(0, 36);u8g2.print("Weather: ");u8g2.print(weather);u8g2.setCursor(0, 52);u8g2.print("temperature: ");u8g2.print(temperature);u8g2.sendBuffer();
}void parseJson(WiFiClient client) {
    const size_t capacity = JSON_ARRAY_SIZE(1) + JSON_OBJECT_SIZE(1) + 2 * JSON_OBJECT_SIZE(3) + JSON_OBJECT_SIZE(6) + 230;DynamicJsonDocument doc(capacity);deserializeJson(doc, client);JsonObject obj1 = doc["results"][0];String cityName = obj1["location"]["name"].as<String>();String weather = obj1["now"]["text"].as<String>();String temperature = obj1["now"]["temperature"].as<String>();OLEDDispaly(cityName, weather, temperature);Serial.println(cityName);Serial.println(weather);Serial.println(temperature);
}