最近公司的项目使用了typescript 用的不是特别熟练 特此准备重头开始 搭建一个纯前端 管理系统页面 后续会将jsx 也集成进来
1 、使用vue-cli 搭建
vue init webpack vue-admin-master
npm run dev
npm i element-ui -S
在 main.js 中写入以下内容:
import Vue from 'vue';
import ElementUI from 'element-ui';
import 'element-ui/lib/theme-chalk/index.css';
import App from './App.vue';Vue.use(ElementUI);new Vue({
    el: '#app',render: h => h(App)
});

一个简单vue项目搭建成功
2、引入typescript
ts-loader typescript 必须安装
npm install ts-loader typescript tslint tslint-loader tslint-config-standard --save-dev
安装vue的官方插件
npm install vue-class-component vue-property-decorator --save
- vue-class-component:使用 TypeScript/装饰器 增强 Vue 组件
- vue-property-decorator:在 vue-class-component 上增强更多的结合 Vue 特性的装饰器
- ts-loader:让webpack 可以识别.ts文件
- .tsx文件 tslint-loader跟tslint:eslint 跟 tslint 作用基本一样
- tslint-config-standard:tslint 配置 standard风格的约束
3、配置 webpack
./build/webpack.base.conf.js 对ts 进行配置
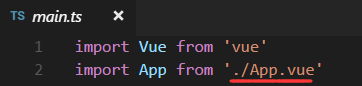
将main.js 改成main.ts
babel-polyfill 是对ie浏览器做的兼容
entry: {
    // app: './src/main.js'app: ["babel-polyfill", "./src/main.ts"]},
resolve: {
    extensions: ['.js', '.vue', '.json', '.ts', '.tsx'],alias: {
    'vue$': 'vue/dist/vue.esm.js','@': resolve('src'),}},
将 src 目录下的所有 js 文件后缀改为 .ts

改造之后的 ts 文件不会识别 .vue 文件,所以在引入 .vue 文件的时候,需要手动添加 .vue 后缀

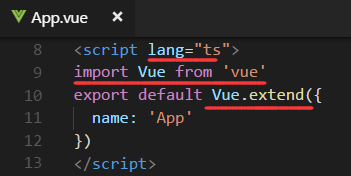
在所有 .vue 文件中,都需要在 <script> 中添加 lang=“ts” 标识
要让 TypeScript 正确推断 vue 组件选项中的类型,还需要引入 vue,并使用 Vue.extend 定义组件
找到module.rules 添加webpack对.ts的解析
//为module添加.ts/.tsx解析规则{
    test: /\.ts$/,exclude: /node_modules/,enforce: 'pre',loader: 'tslint-loader'},{
    test: /\.tsx?$/,loader: 'ts-loader',exclude: /node_modules/,options: {
    appendTsSuffixTo: [/\.vue$/],}},
4、添加tsconfig.json
在项目下 添加 tsconfig.json
ts-loader 会检索当前目录下的 tsconfig.json 文件,根据里面定义的规则来解析.ts文件
{
    "include": ["src/**/*"],"exclude": ["node_modules"],"compilerOptions": {
    "baseUrl": ".","paths": {
    "@/*": ["*", "src/*"]},"jsx": "preserve","jsxFactory": "h",// 启用 vue-class-component 及 vuex-class 需要开启此选项"experimentalDecorators": true,// 启用 vuex-class 需要开启此选项"strictFunctionTypes": false"allowSyntheticDefaultImports": true,"allowJs": true,"module": "esnext","target": "es5","moduleResolution": "node","isolatedModules": true,"lib": ["dom","es5","es6","es7","es2015.promise"],"sourceMap": true,"pretty": true}
}
5、添加 tslint.json
在项目下 添加 tslint.json
tslint-loader 作用等同于 eslint-loader
{
    "extends": ["tslint-eslint-rules"],"rulesDirectory": [],"rules": {
    "adjacent-overload-signatures": false,"ban-comma-operator": true,"ban-type": [true, ["object","User {} instead."],["string"]],"no-any": false,"no-empty-interface":true,"no-internal-module": true,"no-magic-numbers": false,"no-namespace": [ true,"allpw-declarations"],"no-non-null-assertion": true ,"no-parameter-reassignment": true,"no-reference": true,"no-unnecessary-type-assertion": false,"no-var-requires": false,"prefer-for-of":true,"promise-function-async": false,"typedef": [true,{
    "call-signature": "nospace","index-signature": "nospace","parameter": "nospace","property-declaration": "nospace","variable-declaration": "nospace"}],"typedef-whitespace": true,"unified-signatures": true,"await-promise": false,"ban": [true,"eval",{
    "name": "$", "message": "please don't"},["describe", "only"],{
    "name": ["it", "only"], "message": "don't focus tests"},{
    "name": ["chai", "assert", "equal"],"message": "Use 'strictEqual' instead."},{
    "name": ["*", "forEach"], "message": "Use a regular for loop instead."}],"curly": true,"forin":true,"import-blacklist":true,"label-postion": true,"no-arg":true,"no-bitwise":true,"no-conditional-assignmen": true,"no-console": false,"no-construct": true,"no-debugger": true,"no-duplicate-super": true,"no-empty":true,"no-eval": true,"no-floating-promises": false,"no-for-in-array": false,"no-implicit-dependencies": false,"no-inferred-empty-object-type": false,"no-invalid-template-strings":  true,"no-invalid-this": true,"no-misused-new": true,"no-null-keyword": false,"no-object-literal-type-assertion": false,"arrow-parens":  false},"ecmaFeatures": {
    "objectLiteralShorthandProperties": true}
}
6、.vue文件改造
ts 对 .vue 文件 并不能支持 需要在src 下边引用 vue-shim.d.ts 这样才能做到相应的语法检查和智能提示,我们自己编写的.d.ts文件直接放在项目的目录下,ts自己会去识别
import Vue from 'vue'
//识别.vue文件
declare module "*.vue" {
    export default Vue;
}
//element ui 组件
declare module 'vue/types/vue' {
    interface Vue {
    $Message: any,$Modal: any,}
}
7、vue-class-component
初始数据可以直接声明为实例的属性,而不需放入data() {return{}}中
<template><div class="container">Component</div>
</template>
<script lang="ts">import Vue from 'vue'import Component from 'vue-class-component'//@Component 必须加 不加会报错@Componentexport default class App extends Vue {
     }
</script>
8、vue-property-decorator
vue-property-decorator 是在 vue-class-component 上增强了更多的结合 Vue 特性的装饰器,新增了这 7 个装饰器:
@Emit
@Inject
@Model
@Prop
@Provide
@Watch
@Component (从 vue-class-component 继承)
import {
     Component, Emit, Inject, Model, Prop, Provide, Vue, Watch } from 'vue-property-decorator'@Component
export class App extends Vue {
    @Prop()a: number = 1@Prop({
     default: 'default value' })b: string@Prop([String, Boolean])c: string | boolean@Prop({
     type: null })d: any@Watch('watch')onWatch(val: string, oldVal: string) {
     }
}
等价于
export default {
    props: {
    checked: Boolean,a: Number,b: {
    type: String,default: 'default value'},c: [String, Boolean],d: {
     type: null }}methods: {
    onWatch(val, oldVal) {
     }},watch: {
    'watch': {
    handler: 'onWatch',immediate: false,deep: false}}
}
9、实例代码
改造 .vue 文件的 <script> 部分,以 HelloWorld.vue 为例:
// HelloWorld.vue<script lang="ts">
import Vue from 'vue'
import Component from 'vue-class-component'// @Component 修饰符注明了此类为一个 Vue 组件
@Component({
    })
export default class Hello extends Vue {
    msg: String = 'Welcome to Your Vue.js App'
}
</script>
组件内部不再采用 Vue 的格式,一开始也许不易接受,可以参考官方的迁移示例
// Vue 文件格式示范<template><div><input v-model="msg"><p>prop: {
    {
    propMessage}}</p><p>msg: {
    {
    msg}}</p><p>helloMsg: {
    {
    helloMsg}}</p><p>computed msg: {
    {
    computedMsg}}</p><button @click="greet">Greet</button></div>
</template><script>
import Vue from 'vue'
import Component from 'vue-class-component'@Component({
    props: {
    propMessage: String}
})
export default class App extends Vue {
    // initial datamsg = 123// use prop values for initial datahelloMsg = 'Hello, ' + this.propMessage// lifecycle hookmounted () {
    this.greet()}// computedget computedMsg () {
    return 'computed ' + this.msg}// methodgreet () {
    alert('greeting: ' + this.msg)}
}
</script>