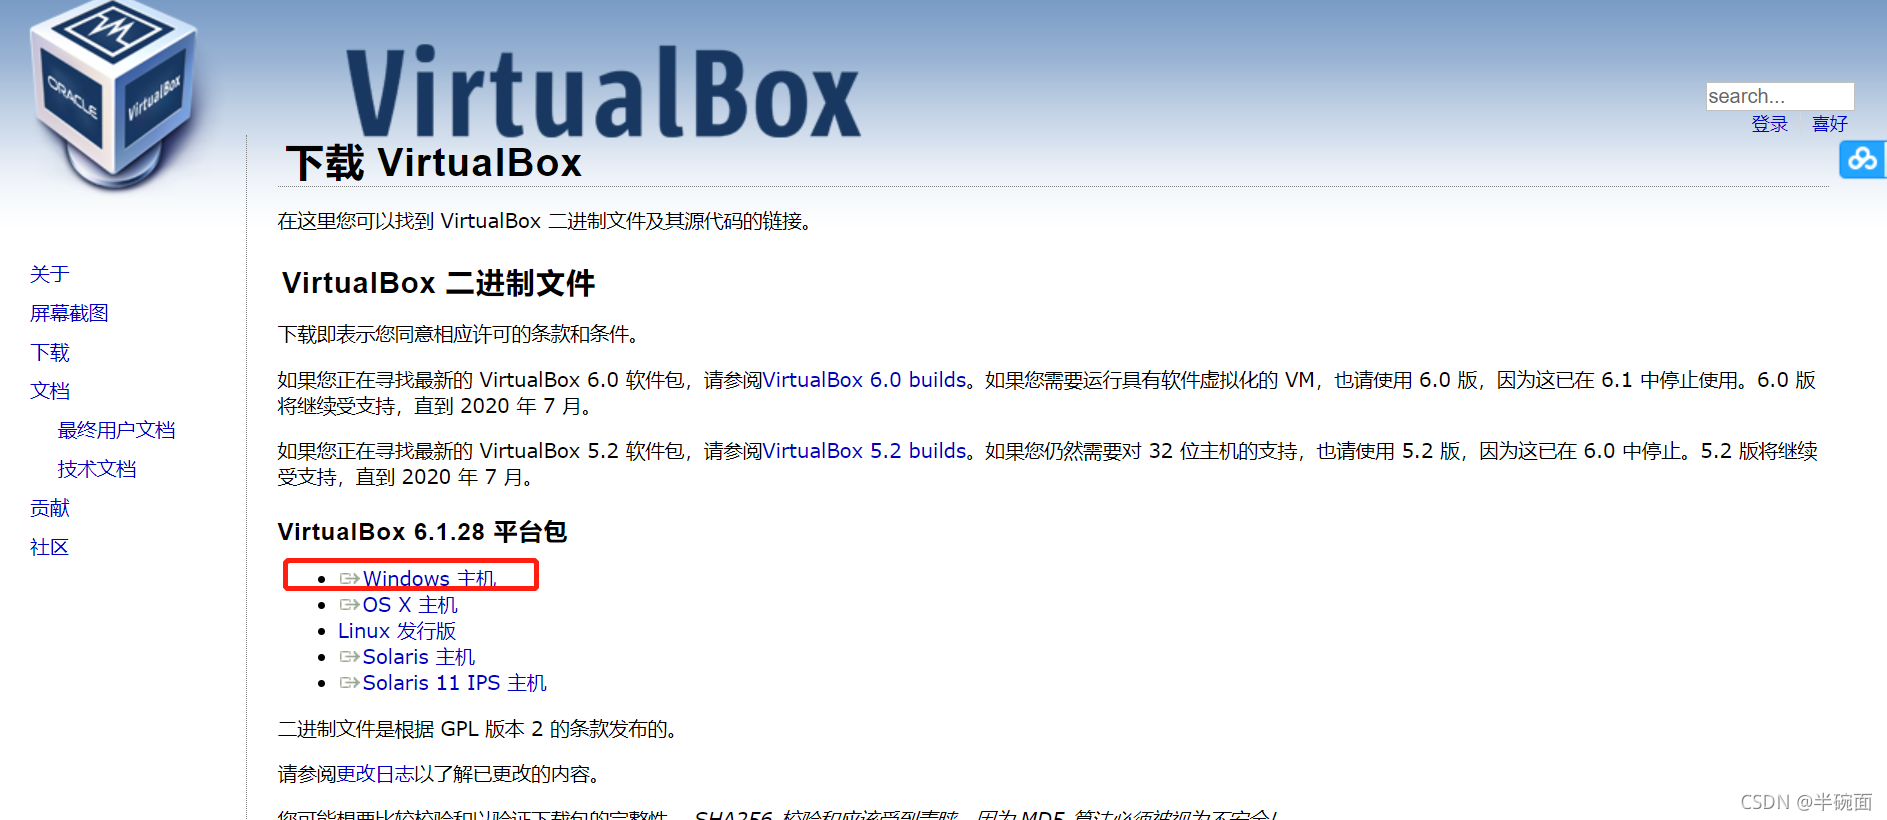
下载安装 VirtualBox:Downloads – Oracle VM VirtualBox
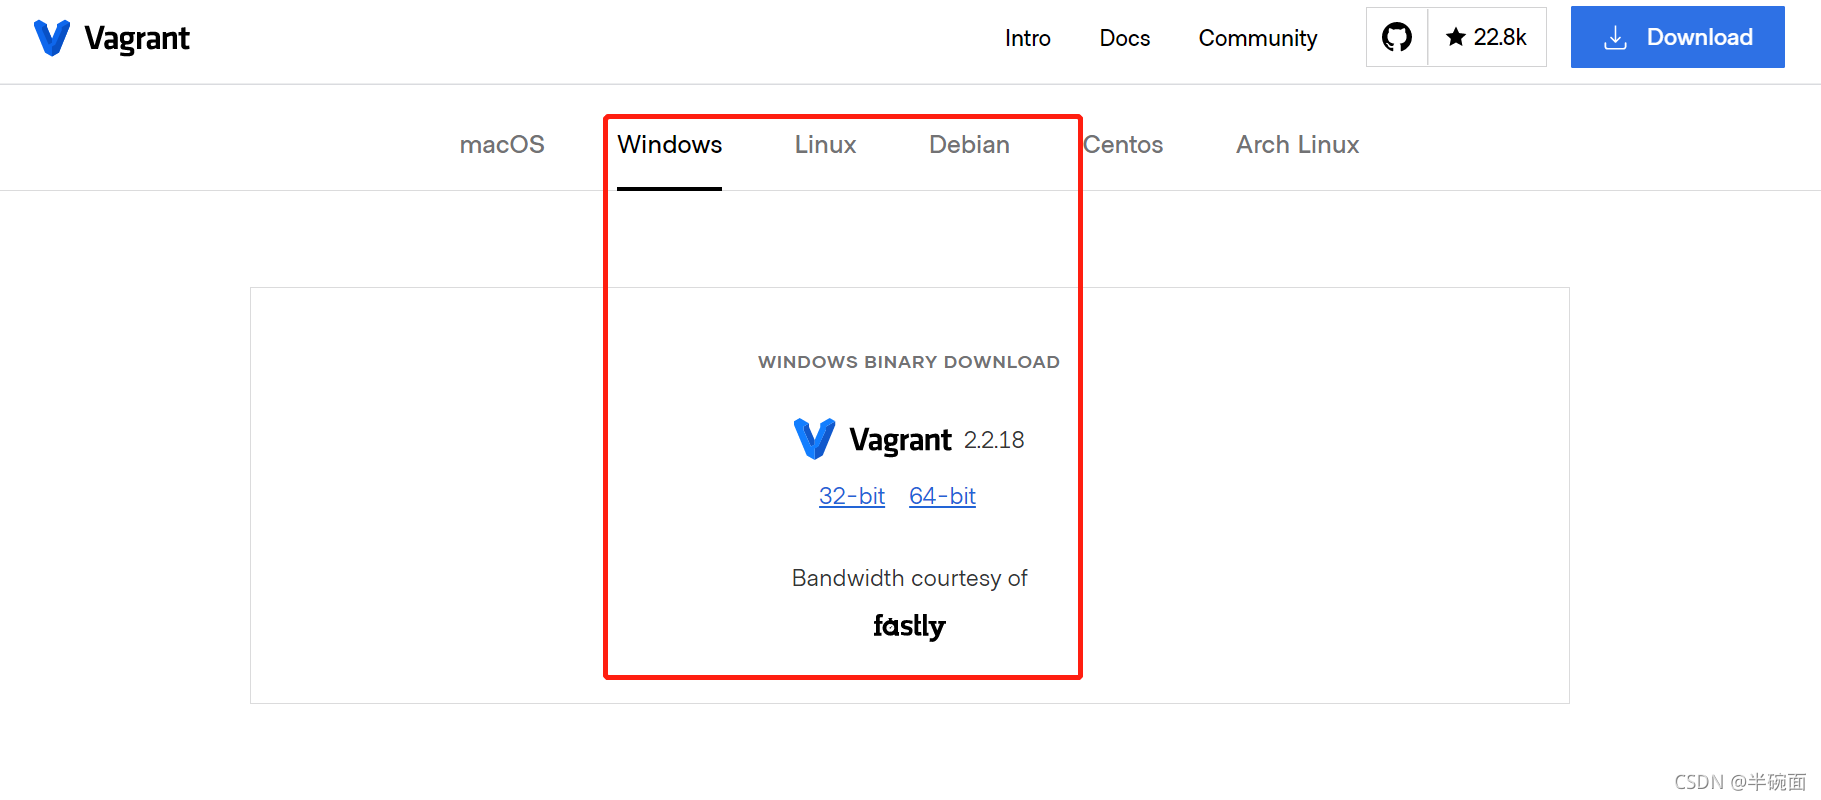
下载安装 Vagrant :Downloads | Vagrant by HashiCorp
下载需要使用的 box :比如:xxx.box 后缀是.box
注意:有时下载版本不同会有冲突的,最好的是安装 VirtualBox 和 Vagrant 最新版本,这样防止的出现冲突的情况
 注意:安装 Vagrant
Vagrant 是没有图形界面的,所以安装完成后也没有桌面快捷方式。具体使用方法,接下来会详细说明。
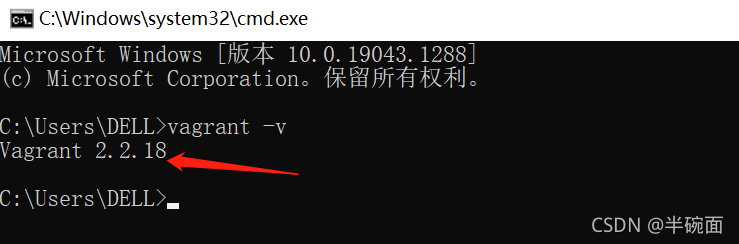
Vagrant 的安装程序会自动把安装路径加入到 PATH 环境变量,所以,这时候可以通过命令行执行 vagrant version 或者vagrant -v 检查是否安装成功:
看到图下,证明安装成功了
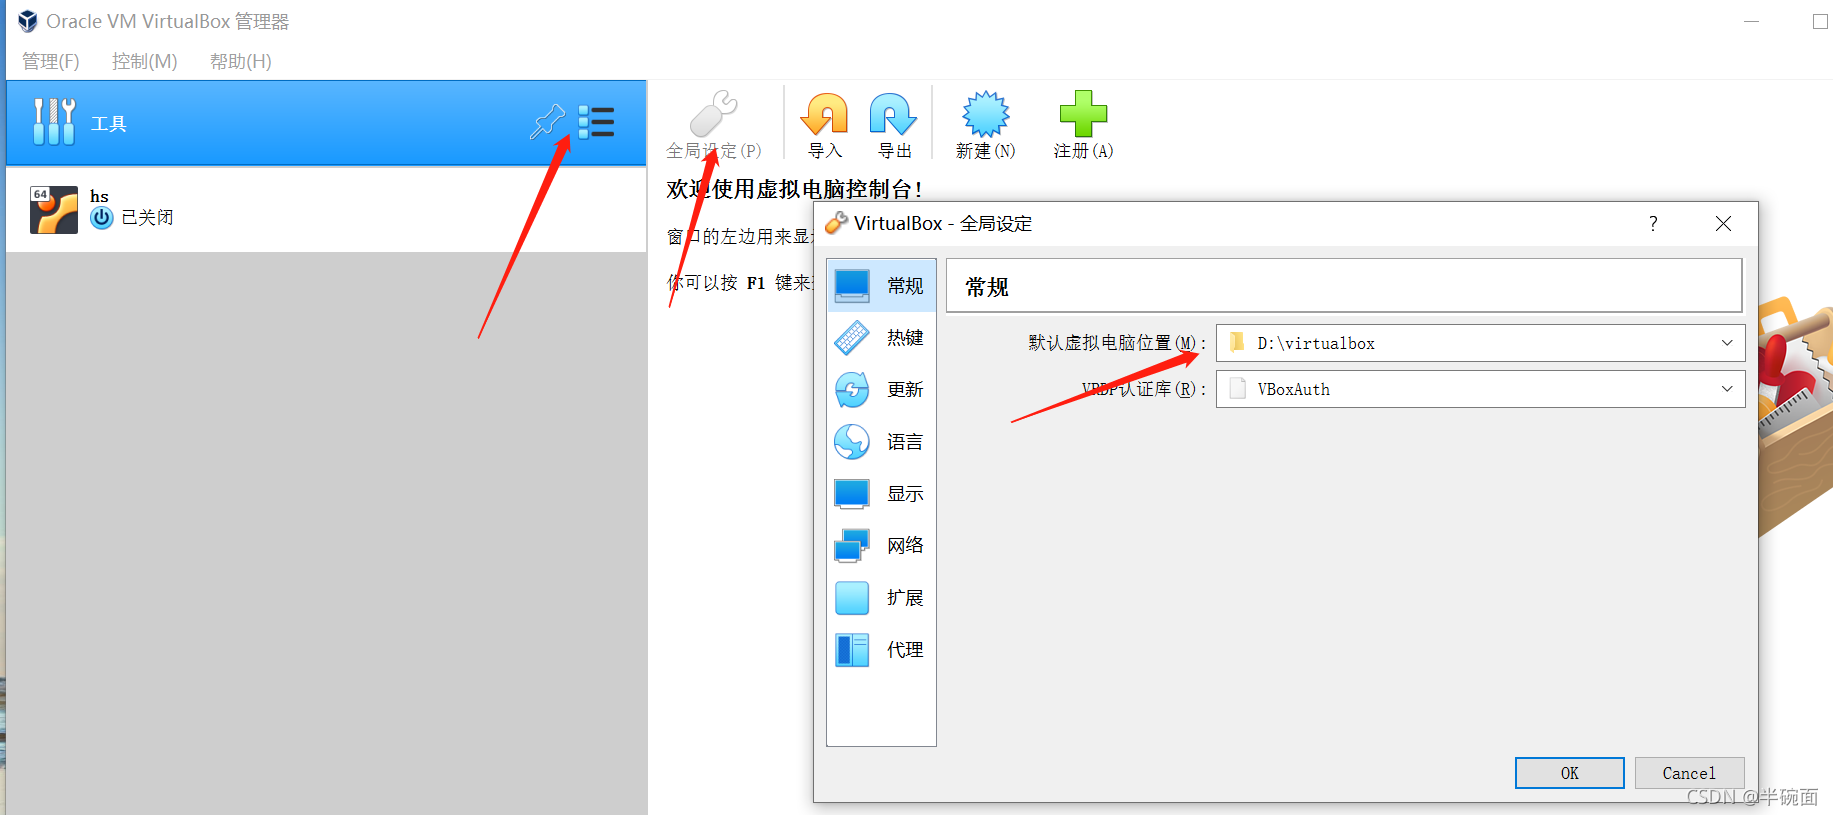
配置虚机存放位置
创建虚拟机会占用较多的磁盘空间,在 Windows 系统下默认的虚机创建位置是在 C 盘,所以最好配置到其它地方。
配置 VirtualBox
启动 VirtualBox 后,通过菜单 管理 -> 全局设定,或者按下快捷键 Ctrl + g,在全局设定对话框中,修改 默认虚拟电脑位置,指定一个容量较大的磁盘。
配置 Vagrant
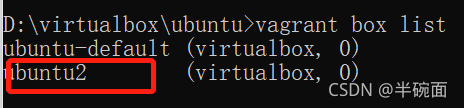
先查看本地是否有镜像存在
命令:vagrant box list
$ vagrant box list
There are no installed boxes! Use `vagrant box add` to add some.
如下添加一个ubuntu的box;注意ubuntu 名字可以由自己起,只是个名字而已
开始安装镜像
命令:vagrant box add 镜像文件路径(绝对路径) --name ubuntu2
#案例命令vagrant box add E:\U盘\学习资料\box\bionic-server-cloudimg-amd64-vagrant.box --name ubuntu2再次查询,可以看到有了一个 box:
命令:vagrant box list
Vagrant 基本操作
新建虚机
创建一个目录,然后执行 vagrant init
命令:如下
mkdir demo
cd demo
vagrant init ubuntu2
结果:
A `Vagrantfile` has been placed in this directory. You are now
ready to `vagrant up` your first virtual environment! Please read
the comments in the Vagrantfile as well as documentation on
`vagrantup.com` for more information on using Vagrant.
其中的 ubuntu2 就是我们要使用的 box 名字。
这个命令只是为我们生成一个 Vagrantfile,(该文件在刚才你建立的文件demo下),所以,这里的名字没指定或者写错了都没关系,后面会介绍如何编辑这个 Vagrantfile 来修改。
启动虚机
我们等会再来细看这个文件,现在直接按照提示执行 vagrant up
命令:vagrant up
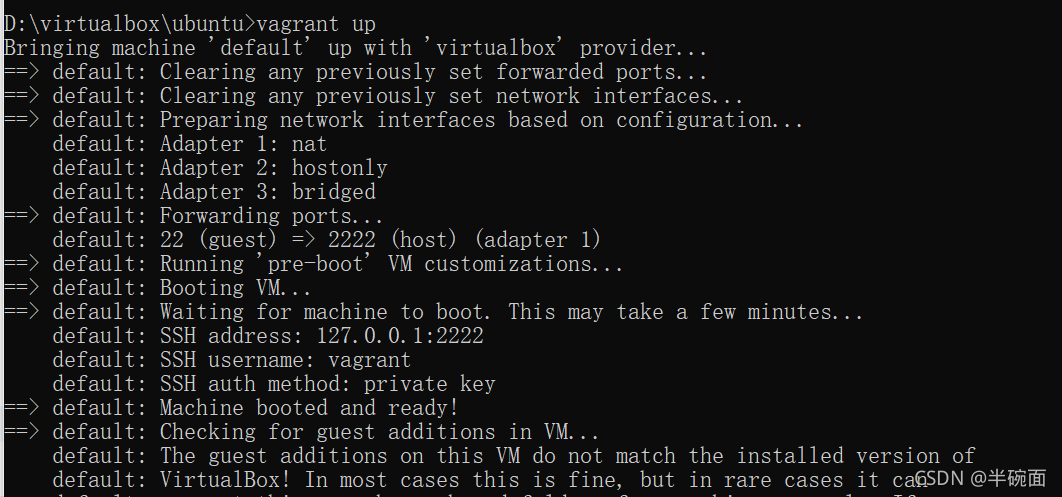
正常的情况下,不到一分钟应该就能启动成功了
这里我遇到点问题,2222 端口转发出现未知错误,造成 vagrant 的启动超时。检查了这个端口并没被占用,同时更改大一点的端口可以转发成功,所以应该是系统哪里有点问题。在后面我介绍了如何处理,如果你也遇到和我一样的情况,可先跳到下面查看。
注意到这里包含的信息:
- 虚机名称:
demo_default_1588406874156_65036(想改?最后有提) - 网卡:
Adapter 1: nat,第一块网卡,NAT 模式,这是固定的 - 端口转发:
22 (guest) => 2222 (host) (adapter 1),把虚机的 22 端口,映射到宿主机的 2222 端口上,这样就可以通过127.0.0.1:2222访问虚拟机了 - SSH 用户名:
vagrant,这里使用private key登录
密码也是
vagrant,但是密码方式仅供直接登录,是不能通过 SSH 登录的。
查看虚机状态
执行下面的命令可以查看虚机的状态:
vagrant status 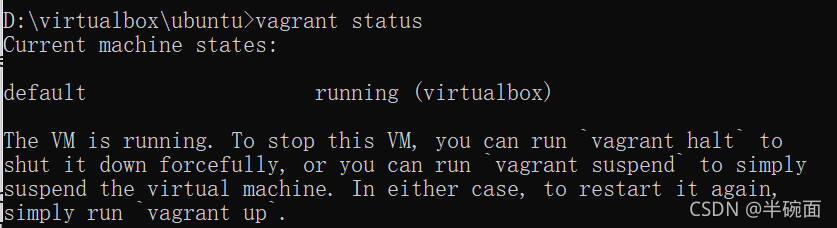
连接虚机
如果启动没问题,接下来执行 vagrant ssh 就能以 vagrant 用户直接登入虚机中。
root 用户没有默认密码,也不能直接登录。需要 root 权限的命令可以通过在命令前添加 sudo 来执行,也可以执行 sudo -i 直接切换到 root 用户。
这时候打开 VirtualBox 程序,可以看到自动创建的虚机:

我们也可以在 VirtualBox 的终端上登录系统,默认的登录用户名和密码都是 vagrant。
当然还可以使用其它的 SSH 连接工具例如 XShell,SecureCRT 连接,但是这里默认网卡使用的是 NAT 模式,没有指定 IP,实际应用并不方便,我们在后面介绍网络配置时再详细介绍如何连接虚机。
停止虚机
执行下面的命令可以关闭虚机:
vagrant halt
直接在 VirtualBox 上关闭虚机,或者直接在虚机内部执行 poweroff 命令也都是可以的。
初识 Vagrantfile
先来认识一下默认的 Vagrantfile 文件,使用带语法高亮的文本编辑器(例如 VSCode) 打开:
# -*- mode: ruby -*-
# vi: set ft=ruby :# All Vagrant configuration is done below. The "2" in Vagrant.configure
# configures the configuration version (we support older styles for
# backwards compatibility). Please don't change it unless you know what
# you're doing.
Vagrant.configure("2") do |config|# The most common configuration options are documented and commented below.# For a complete reference, please see the online documentation at# https://docs.vagrantup.com.# Every Vagrant development environment requires a box. You can search for# boxes at https://vagrantcloud.com/search.config.vm.box = "ubuntu2"# Disable automatic box update checking. If you disable this, then# boxes will only be checked for updates when the user runs# `vagrant box outdated`. This is not recommended.# config.vm.box_check_update = false# Create a forwarded port mapping which allows access to a specific port# within the machine from a port on the host machine. In the example below,# accessing "localhost:8080" will access port 80 on the guest machine.# NOTE: This will enable public access to the opened port# config.vm.network "forwarded_port", guest: 80, host: 8080# Create a forwarded port mapping which allows access to a specific port# within the machine from a port on the host machine and only allow access# via 127.0.0.1 to disable public access# config.vm.network "forwarded_port", guest: 80, host: 8080, host_ip: "127.0.0.1"# Create a private network, which allows host-only access to the machine# using a specific IP.# config.vm.network "private_network", ip: "192.168.33.10"# Create a public network, which generally matched to bridged network.# Bridged networks make the machine appear as another physical device on# your network.# config.vm.network "public_network"# Share an additional folder to the guest VM. The first argument is# the path on the host to the actual folder. The second argument is# the path on the guest to mount the folder. And the optional third# argument is a set of non-required options.# config.vm.synced_folder "../data", "/vagrant_data"# Provider-specific configuration so you can fine-tune various# backing providers for Vagrant. These expose provider-specific options.# Example for VirtualBox:## config.vm.provider "virtualbox" do |vb|#   # Display the VirtualBox GUI when booting the machine#   vb.gui = true##   # Customize the amount of memory on the VM:#   vb.memory = "1024"# end## View the documentation for the provider you are using for more# information on available options.# Enable provisioning with a shell script. Additional provisioners such as# Ansible, Chef, Docker, Puppet and Salt are also available. Please see the# documentation for more information about their specific syntax and use.# config.vm.provision "shell", inline: <<-SHELL#   apt-get update#   apt-get install -y apache2# SHELL
end
以上代码只是原次配置文件的东西,只看看看就行了
刨除注释,这个文件的实际生效内容实际只有 3 行:
Vagrant.configure("2") do |config|config.vm.box = "centos-7"
end
自定义配置 Vagrantfile
下面我将针对这份默认的 Vagrantfile 内容,逐个讲解其中的配置含义和如何根据实际情况修改。
配置端口转发
端口转发(Port forward)又叫端口映射,就是把虚机的某个端口,映射到宿主机的端口上。这样就能在宿主机上访问到虚拟机中的服务。
例如启动虚机时,默认的 22 (guest) => 2222 (host) (adapter 1) 就是把虚机的 SSH 服务端口(22)映射到宿主机的 2222 端口,这样直接在宿主机通过 ssh 客户端访问 127.0.0.1:2222 端口就等价于访问虚拟机的 22 端口。
配置私有网络
方便我们直接通过ip 可以访问虚拟机上面的代码程序
找到应该的位置 搜索 private_network

取消注释下面一行,就可以为虚机设置指定的私有网络地址:192.168.33.10 这个可以改成你要的ip ,但是需要遵守ip协议有效的 ip
config.vm.network "private_network", ip: "192.168.33.10"
配置公共网络
下面这条配置用来配置公共网络:
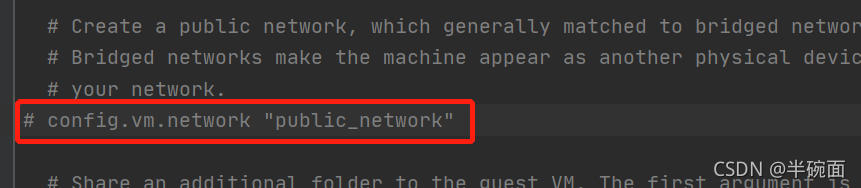
把上面代码去掉 注释,就能支持同一个局域网下能访问虚拟机的网站
配置同步文件夹
把虚拟机的上面的项目文件 与 宿主电脑项目文件互通,代码可以在宿主电脑上面改了,不需要上传到虚拟机上面,就能同步代码
下面的配置项用来配置同步文件夹:
![]()
../data 是你本地电脑的路径,最好写绝对路径
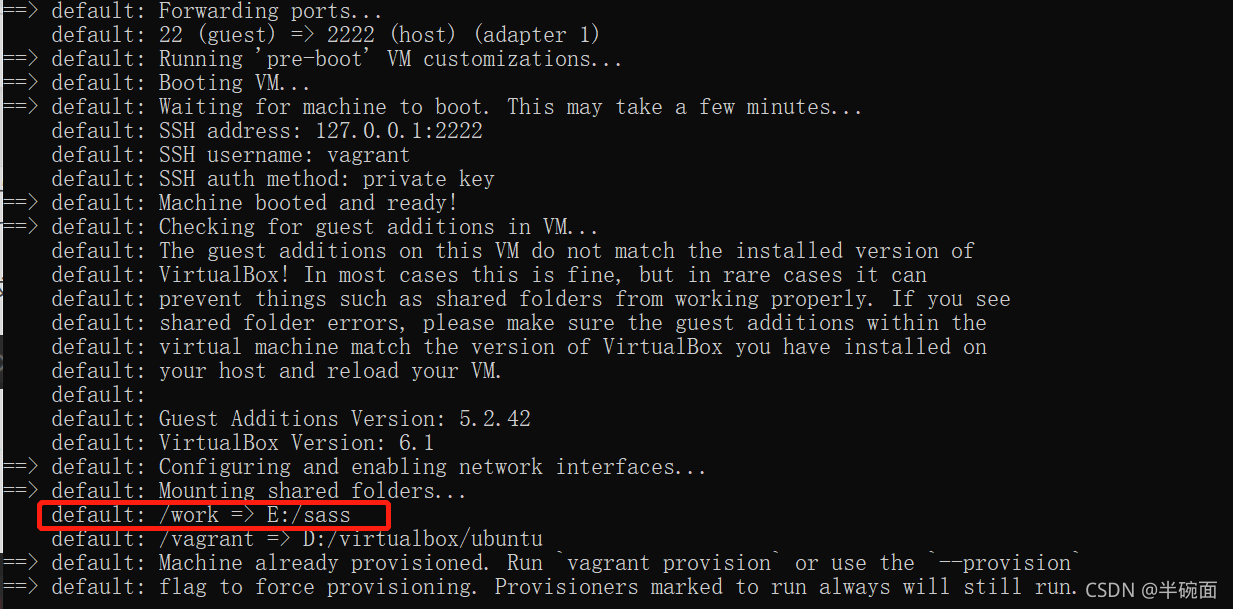
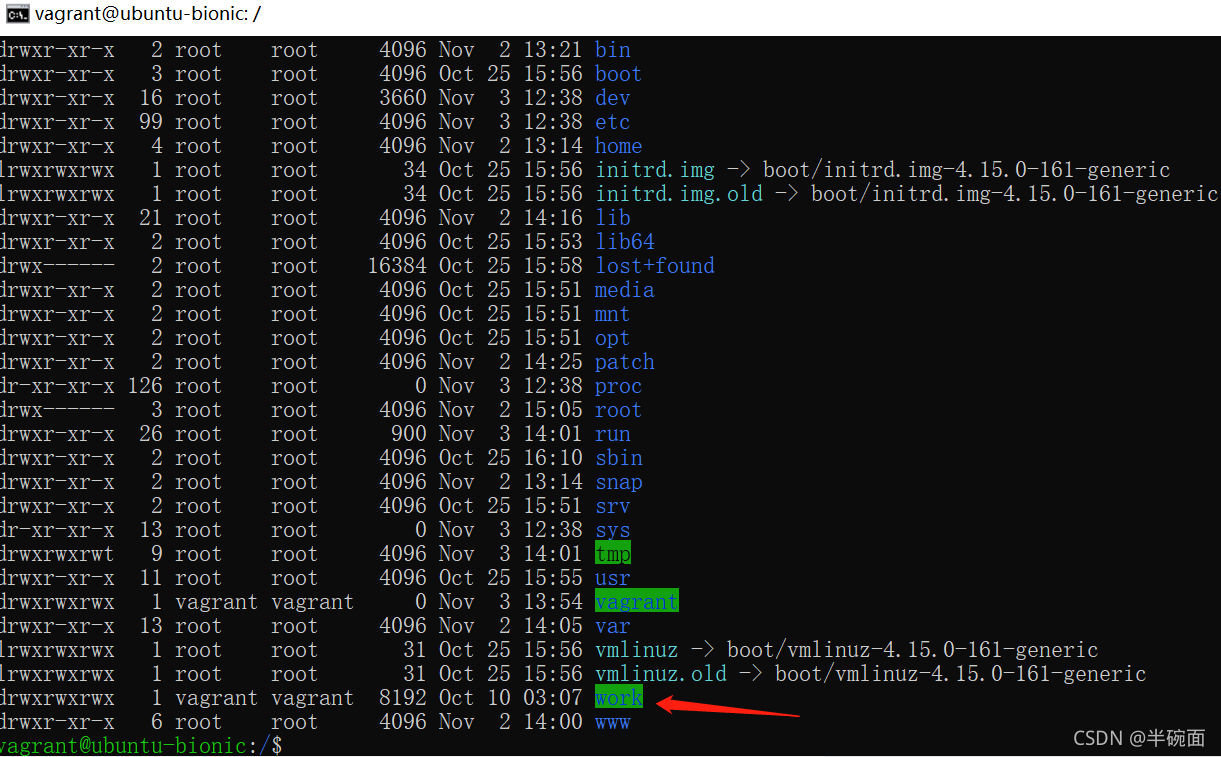
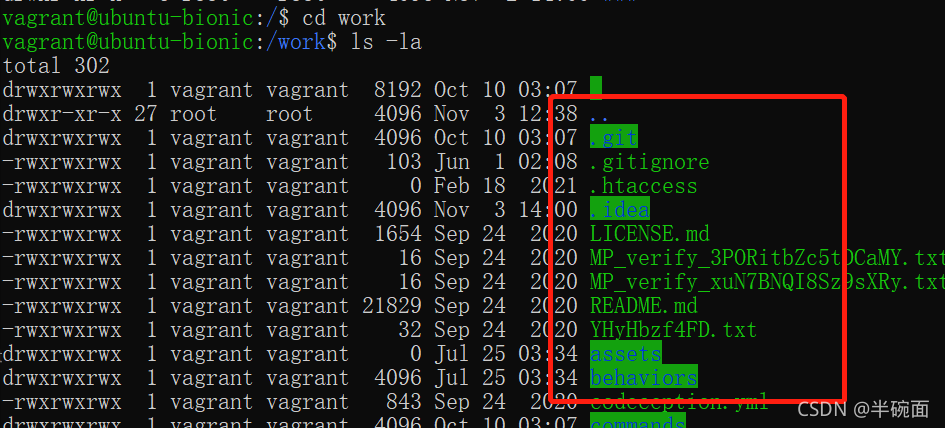
以下是我的本地修改的路径 /work 是虚拟机上面的路径

修改配置了,需要重启虚拟机 vagrant reload 或者先 关闭vagrant halt 再启动 vagrant up
、
看到三处地方,就知道是否成功了
更改虚机规格
VirtualBox 等虚拟机软件在 Vagrant 中被称为 Provider,虚机的规格等配置是和 Provider 相关的。因为 VirtualBox 用的最多,所以默认的配置提示是以 VirtualBox 举例。
使用 VSCode 时,选中它们,然后按下快捷键 Ctrl + / 即可:
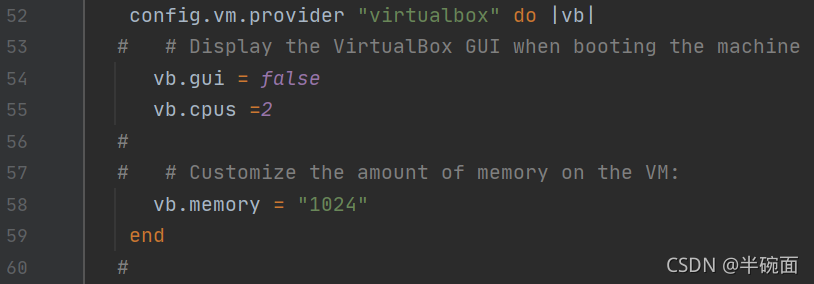
config.vm.provider "virtualbox" do |vb|# Display the VirtualBox GUI when booting the machinevb.gui = true# Customize the amount of memory on the VM:vb.memory = "1024"end
vb.gui = true 是在虚机启动时自动打开 VirtualBox 的图形界面,这对服务器来说没什么用,直接删掉。
添加 CPU 的配置,同时修改内存大小:
config.vm.provider "virtualbox" do |vb|vb.cpus = 2vb.memory = 2048end我本地的结果图
配置可以根据你本地的电脑改
这样就配合一个 虚拟机的服务器
下面根据你项目是什么代码,就搭建什么环境,php运行环境----比较快的方式,推荐安装宝塔

这是php运行的界面