根据使用场景,配置并集成一个Cortex-M0的内核,暂时不涉及的实现的部分
目录
阅读手册
Chapter1 Introduction
1.1 About the processor
1.2 About integration and implementation
Chapter2 Configuration Guidelines
2.1 About configuration guidelines
2.2 Configuration options
2.2.1 CORTEXM0 configuration options
2.2.2 CORTEXM0INTEGRATION configuration options
2.2.3 CoreSight ROM table base address
Chapter 3 Key Integration Points
3.1 About key integration points
3.2 Key integration tasks
Chapter 4 Functional Integration Guidelines
4.2 时钟
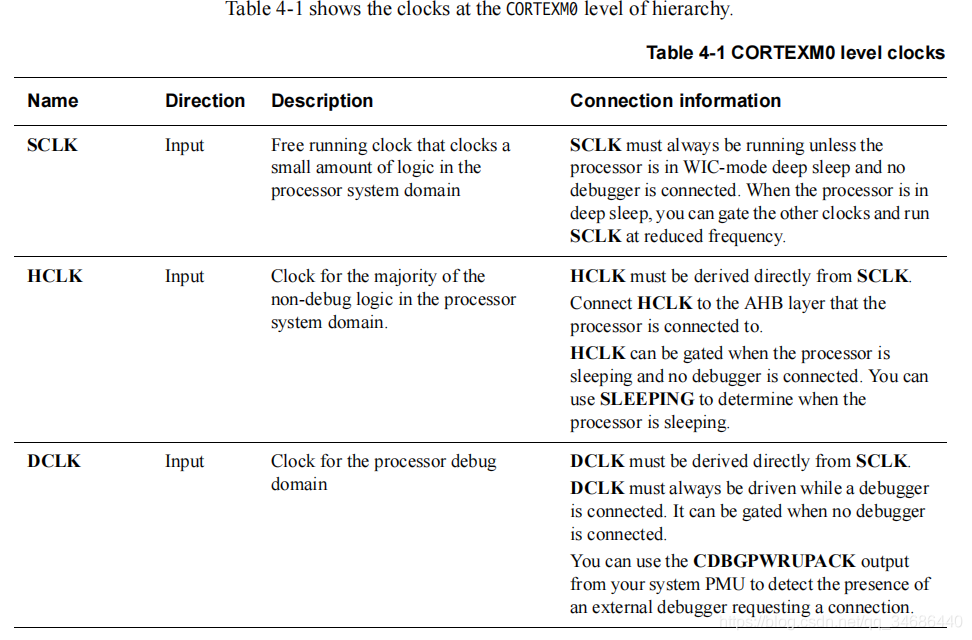
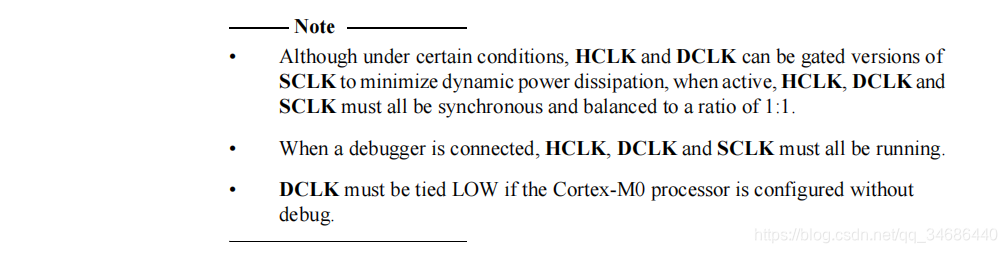
4.2.1 CORTEXM0 level clocks
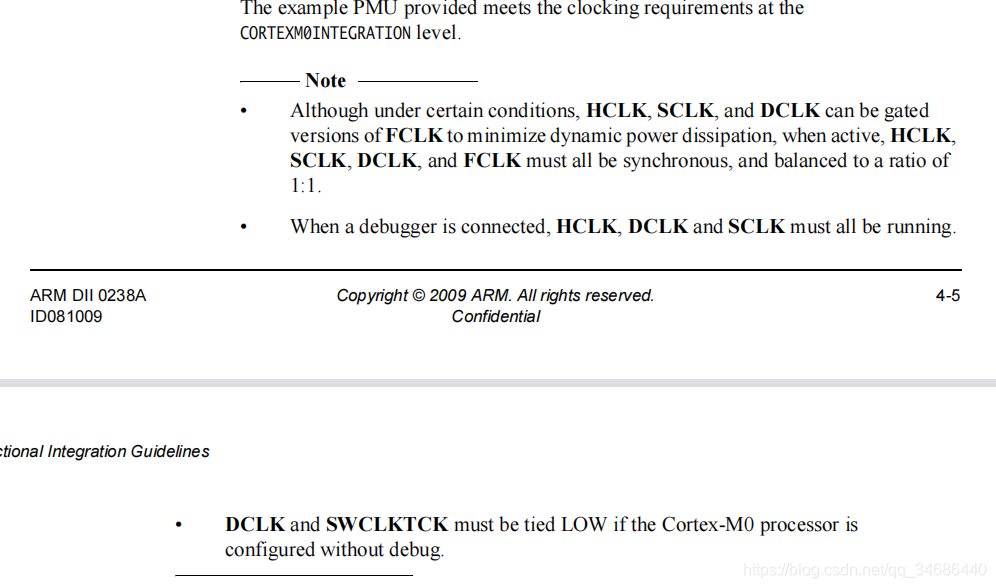
4.2.2 CORTEXM0INTEGRATION level clocks
4.3 复位
4.3.1 CORTEXM0 level resets
4.3.2 CORTEXM0INTEGRATION level resets
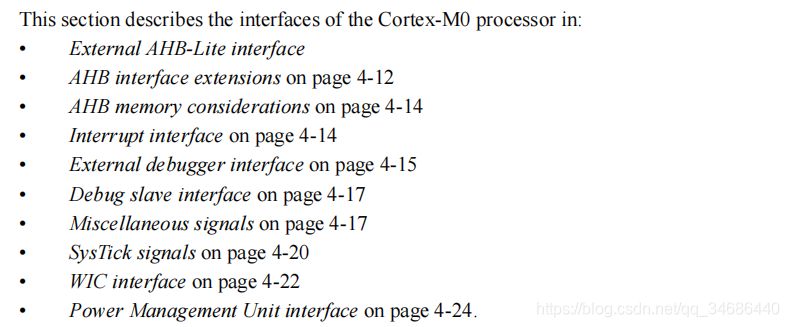
4.4 Interfaces
阅读手册
参考文献:Cortex? -M0 Revision: r0p0 Integration and Implementation Manual
Chapter1 Introduction
1.1 About the processor
Cortex-M0处理器是具有极低门数的节能处理器
它旨在用于需要小面积处理器的微控制器和深度嵌入式应用
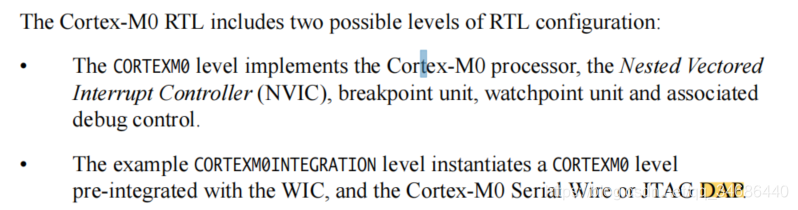
支持两种层次的集成:
- 纯粹的处理器级别
- 集成了WIC和DAP的处理器级别

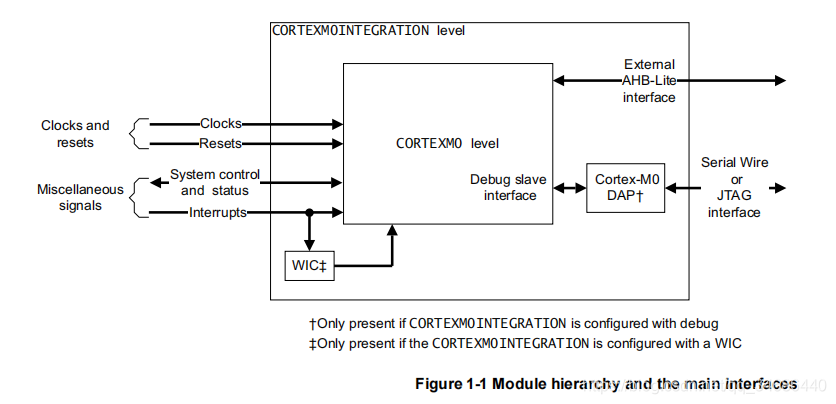

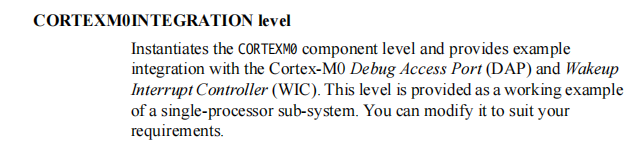
可以看到,集成层次的Cortex-M0多了WIC和DAP
Cortex-M0是高度可配置的处理器,可以配置:大端小端,中断数,是否能debug,SysTick timer 等等
提供了两个配置好的层级样例
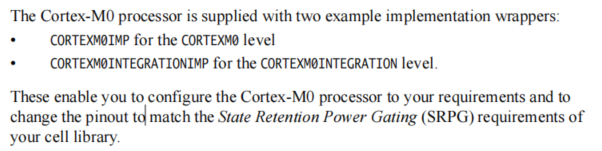
可以根据自己的需求配置Cortex-M0处理器,并且并更改管脚以匹配单元库的状态保持功率门控(SRPG)要求。
1.2 About integration and implementation
集成的操作根据你所使用的tools可能会有所不同

将处理器集成到SoC上,是第一步
- 将时钟和复位连接到处理器
- 将处理器连接到外设和总线
- 执行对处理器的测试
- 验证SoC
在此过程中,你必须要考虑的事情:
- 接口,尤其是未使用的接口
- 验证
撒旦法
Chapter2 Configuration Guidelines
介绍如何对处理器进行配置
2.1 About configuration guidelines
想要成功的配置处理器,你需要对所有的选项都进行配置
上面提到过,有两种集成的策略
不同的级别有不同的配置选项(通过参数parameter配置)
可以通过添加一个wraper对模块进行实例化,以完成对参数的配置;
也可以使用这些wraper在处理器上指定其他输入和输出,以进行电源门控或测试;
例如,提供的实例
- CORTEXM0IMP.v
- CORTEXM0INTEGATIONIMP.v
2.2 Configuration options
2.2.1 CORTEXM0 configuration options
- ACG:指定是否包含时钟门,以最大程度的降低动态功耗;如果使用architectural clock gating,你必须在实现它的时候使用目标工艺库的cell替换
parameter ACG = 1; // Architectural clock gating:
// 0 = absent
// 1 = present
- AHBSLV:指定实现SLV端口的总线协议;如果集成了Cortex-M0 level,需要使用到其他的debug infrastructure,ARM推荐设置这个参数为1
parameter AHBSLV = 1; // SLV port AHB-Lite compliance:
// 0 = non-compliant
// 1 = more-compliant
- BE:指定处理器数据传输的endianness端,大端或者小端
parameter BE = 0; // Data transfer endianess:
// 0 = little-endian
// 1 = byte-invariant big-endian
- BKPT:断点比较器的数量
parameter BKPT = 4; // Number of breakpoint comparators:
// 0 = none
// 1 = one
// 2 = two
// 3 = three
// 4 = four
- DBG:是否包含调试特性,和BKPT,WPT一块使用
parameter DBG = 1; // Debug configuration:
// 0 = no debug support
// 1 = implement debug support
- NUMIRQ:指定外部中断的数量
parameter NUMIRQ = 32; // Functional IRQ lines:
// 1 = IRQ[0]
// 2 = IRQ[1:0]
// . . ...
// 32 = IRQ[31:0]
- RAR:指定是否重置所有的寄存器还是仅仅架构寄存器
parameter RAR = 0; // Reset-all-register option
// 0 = standard, architectural reset
// 1 = extended, all register reset
- SMUL:乘法器的配置
parameter SMUL = 0; // Multiplier configuration:
// 0 = MULS is single cycle (fast)
// 1 = MULS takes 32-cycles (small)
- SYST:是否使用系统滴答计时器,一般实现操作系统的时候会用到
parameter SYST = 1; // SysTick timer option:
// 0 = SysTick not present
// 1 = SysTick present
-
WIC:是否支持唤醒中断控制器
parameter WIC = 1; // Wake-up interrupt controller support:// 0 = no support
// 1 = WIC deep-sleep supported
-
WICLINES:WIC支持的行;如果没有使用WIC的行,这个参数没有影响
-
parameter WICLINES = 34; // Supported WIC lines:
// 2 = NMI and RXEV
// 3 = NMI, RXEV and IRQ[0]
// 4 = NMI, RXEV and IRQ[1:0]
// . . ...
// 34 = NMI, RXEV and IRQ[31:0]
-
WPT:设置数据观察点的个数
-
parameter WPT = 2; // Number of DWT comparators:
// 0 = none
// 1 = one
// 2 = two
2.2.2 CORTEXM0INTEGRATION configuration options
- JTAGnSW
parameter JTAGnSW = 0; // Debug port interface
// 0 = SerialWire interface
// 1 = JTAG interface
2.2.3 CoreSight ROM table base address
Cortex-M0处理器包括一个符合CoreSight的ROM表,该表提供了指向内存映射的NVIC和调试资源的指针。
该ROM表固定在处理器内存映射中的地址0xE00FF000处。
必须确保将此ROM表设置为系统中的单个主ROM表,或被系统中的另一个有效CoreSight ROM表引用
如果是CORTEXM0INTEGRATION level:
单master的ROM table已经被配置好,并且在地址0xE00FF000处
如果是Cortex-M0级别:
参考技术手册:the CoreSight Components Technical Reference Manual
Chapter 3 Key Integration Points
3.1 About key integration points
本章列举了将Cortex-M0处理器集成到SoC设计中时要考虑的要点;可以使用这章检查是否完成相关集成步骤
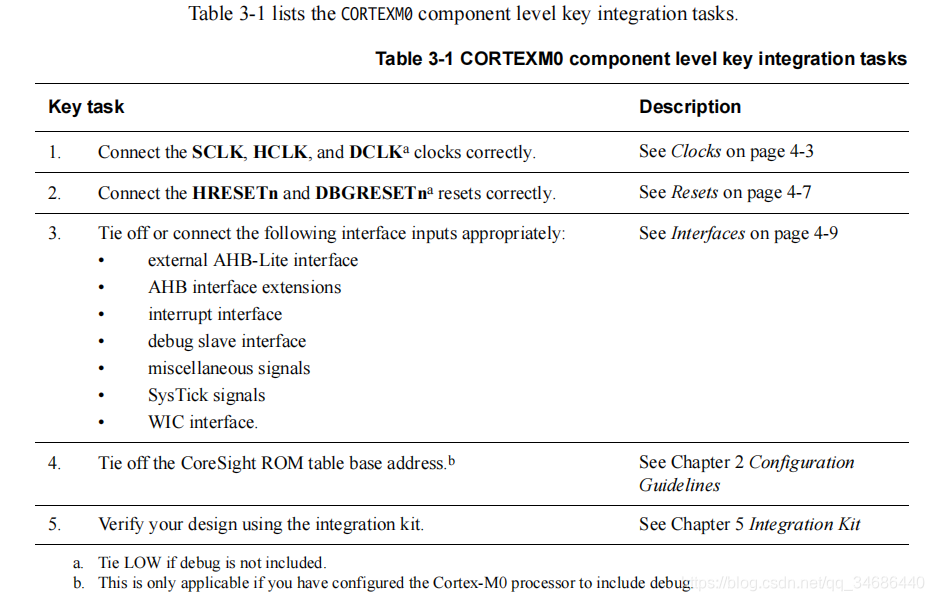
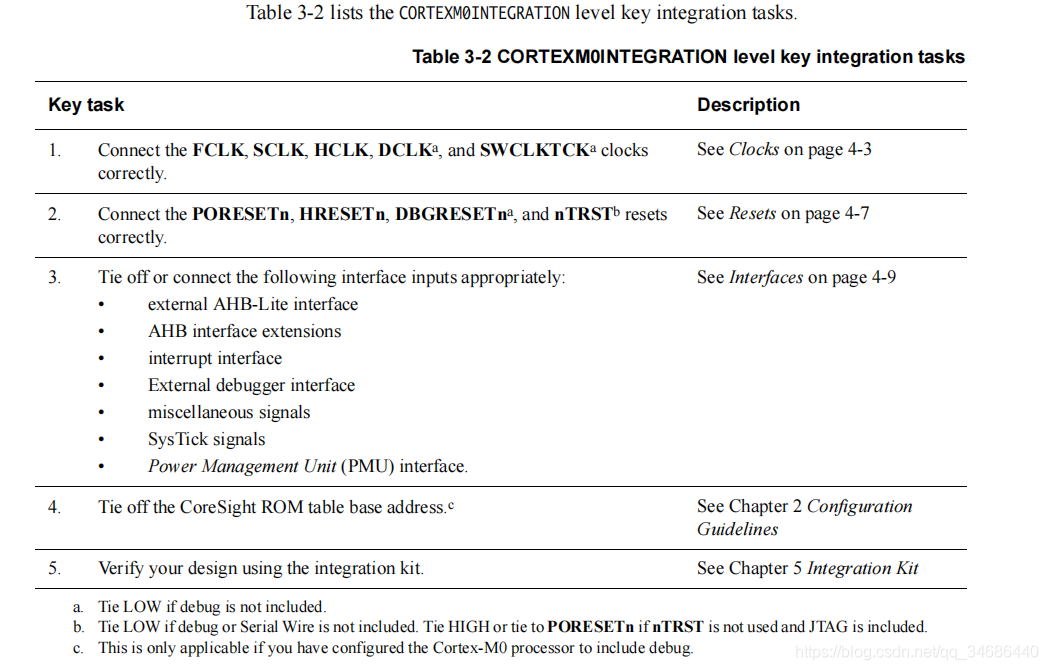
3.2 Key integration tasks
Chapter 4 Functional Integration Guidelines
处理器集成到SoC的功能集成指南。
4.2 时钟
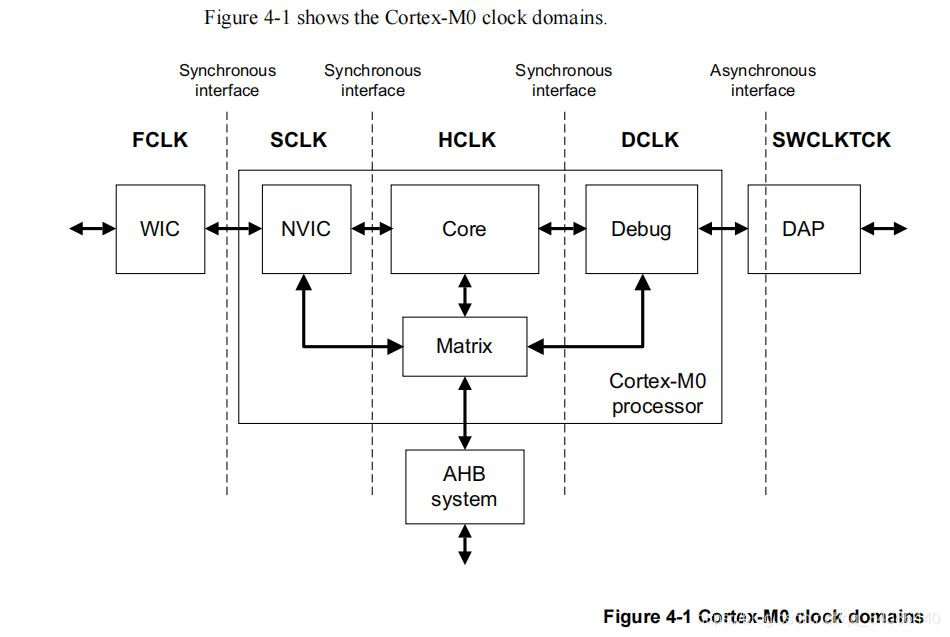
4.2.1 CORTEXM0 level clocks
4.2.2 CORTEXM0INTEGRATION level clocks
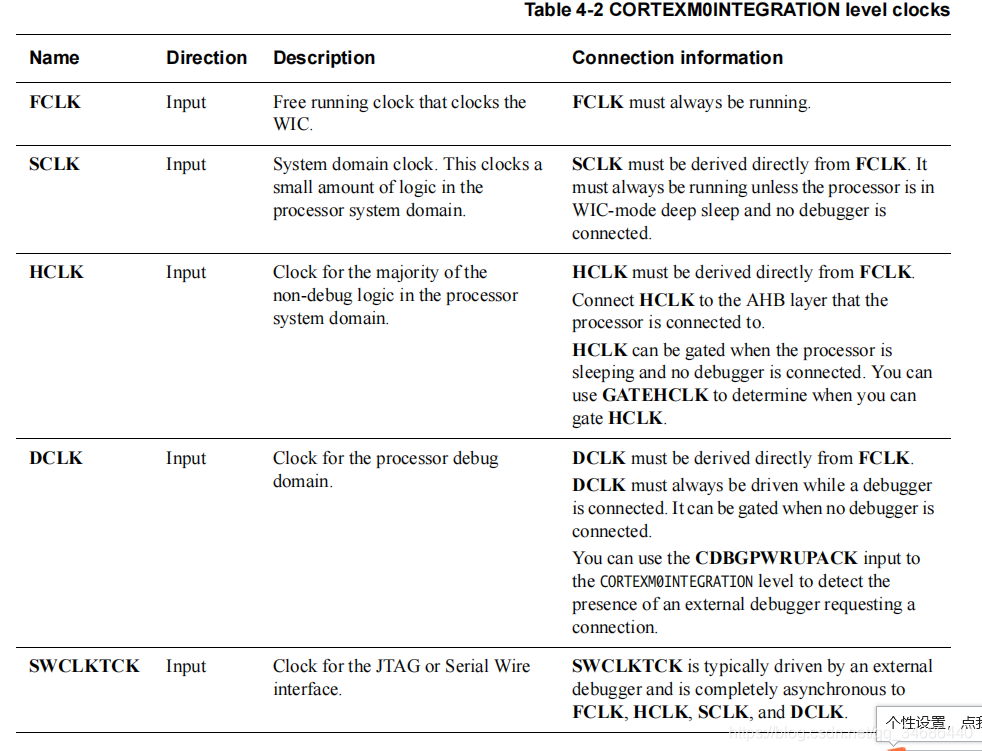
可以知道:FCLK,SCLK,HCLK,DCLK需要给一个同步时钟,SWCLKTCK给一个异步的调试时钟
4.3 复位
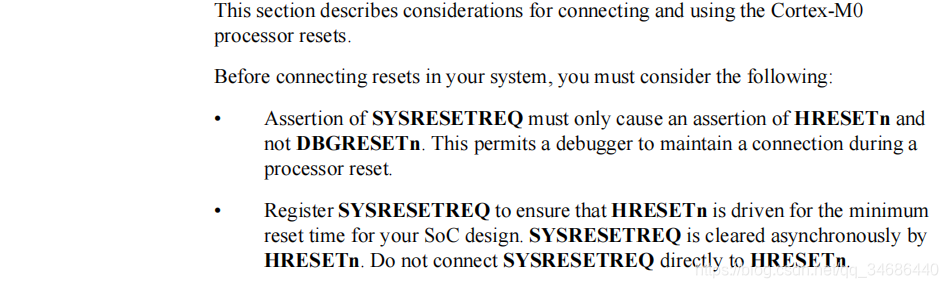
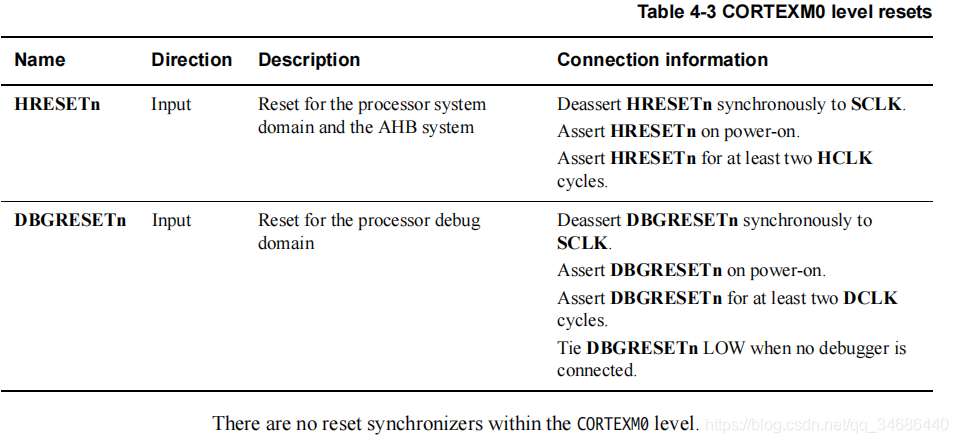
4.3.1 CORTEXM0 level resets
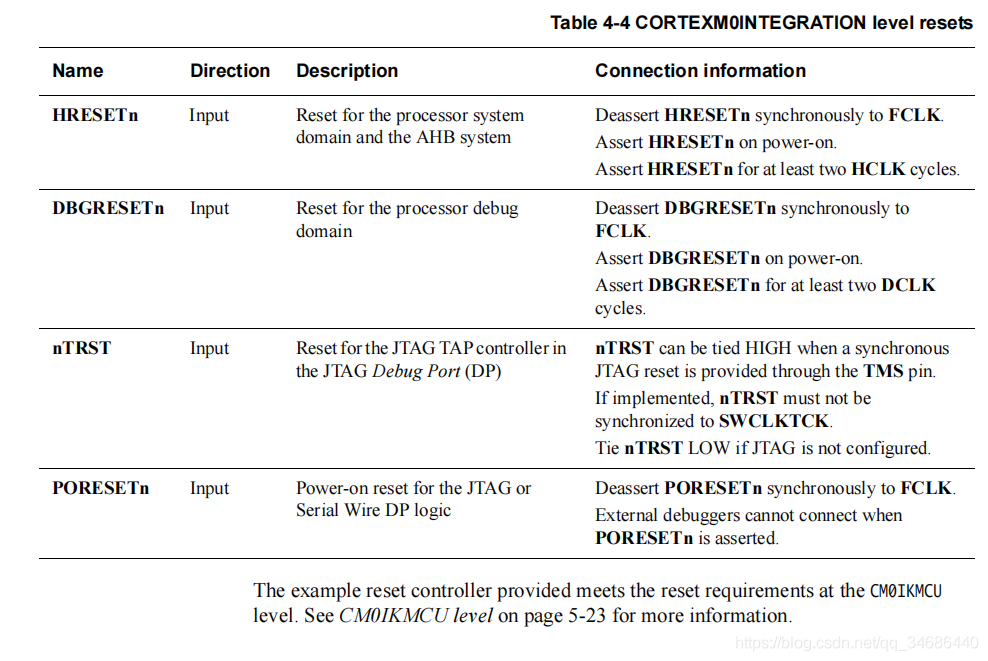
4.3.2 CORTEXM0INTEGRATION level resets
4.4 Interfaces