说明
练习作品,两个效果合在一起,仅供参考。
正文
Shader "Custom/TwoSidesDeathShader" {Properties {_ForeColor ("Color", Color) = (1,1,1,1)//正面颜色调节_ForeTex ("Foreground Texture", 2D) = "white" {}//正面贴图_BackColor ("Color", Color) = (1,1,1,1)//反面颜色调节_BackTex ("Background Texture", 2D) = "white" {}//反面贴图_MaskTex ("Mask Texture",2D) = "white" {}//碎化遮罩贴图_Threshold ("Threshold",Range(0,1)) = 0//碎化调节阈值}SubShader {Pass{Tags { "RenderType"="Opaque" }Cull off//关闭背面裁剪CGPROGRAM#pragma vertex vert#pragma fragment frag#include "UnityCG.cginc"fixed4 _ForeColor;fixed4 _BackColor;sampler2D _ForeTex;sampler2D _BackTex;sampler2D _MaskTex;float _Threshold;struct appdata{float4 pos : POSITION;float2 uv : TEXCOORD0;};struct v2f{float4 pos : SV_POSITION;float2 uv : TEXCOORD0;};v2f vert(appdata v){v2f f;f.pos = UnityObjectToClipPos(v.pos);f.uv = v.uv;return f;}fixed4 frag(v2f i,fixed Facing : VFACE):SV_TARGET{fixed4 mask = tex2D(_MaskTex,i.uv);float checker = mask.r > _Threshold?-1:0;clip(checker);//对遮罩贴图采样,并用r通道的值与阈值比较以进行选择性裁剪fixed4 o1 = tex2D(_ForeTex,i.uv) * _ForeColor;fixed4 o2 = tex2D(_BackTex,i.uv) * _BackColor;return Facing > 0 ? o1 : o2;//Facing为正,返回正面贴图,反之,返回背面贴图}ENDCG}}FallBack "Diffuse"
}
注:
1.Facing的使用可参考官方示例
2.调节Threshold的值即可调节碎化程度
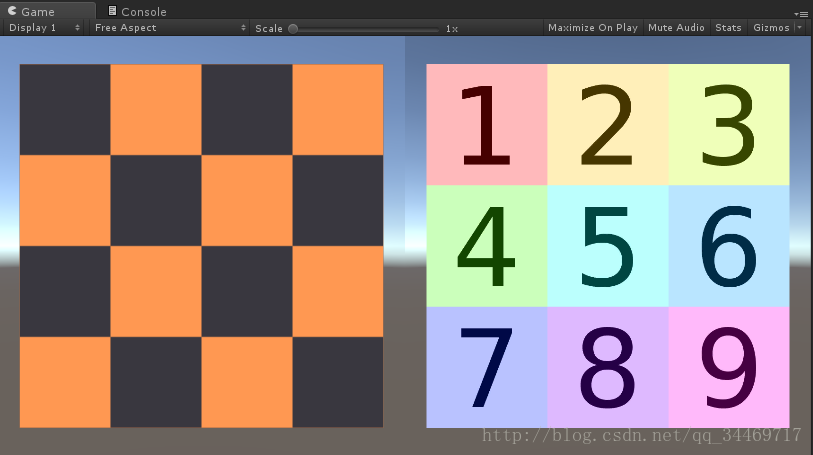
结果