QT绘图 橡皮擦效果的实现
前言
为了处理一些简单图片的后期处理,制作了一个简单的橡皮擦功能脚本。用来处理机器视觉中的图像处理。
开发工具
python版本:
3.6.5
相关模块:
PyQt5
CV2
numpy
PIL
环境搭建
python添加到变量,pip安装相关模块
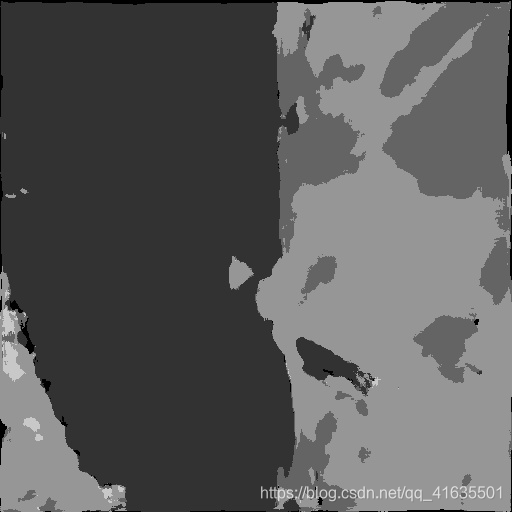
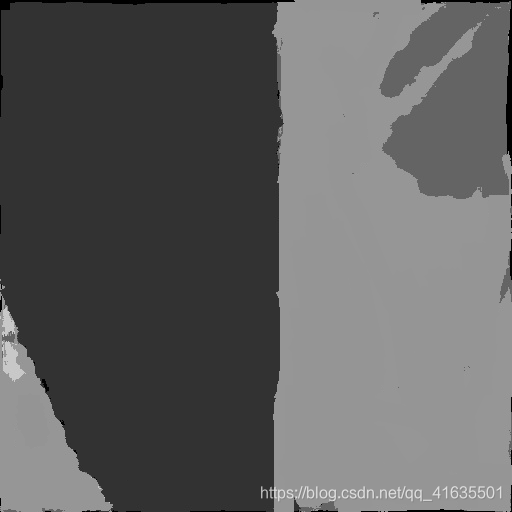
效果
原理介绍
主要通过pyqt5 实现UI界面,设置鼠标响应。通过鼠标左键点击获取图像当前坐标点的位置和RGBA值,然后返回RGBA值给画笔,设置画笔对应的RGBA值。通过鼠标的移动覆盖不同颜色的区域,这样就实现了橡皮擦的效果。
实现内容:
# -*- coding: utf-8 -*-from PIL import Image
import cv2
import numpy as np
import sys
from PyQt5.QtWidgets import QApplication, QWidget
from PyQt5.QtGui import QPainter, QPixmap, QPen ,QColor
from PyQt5.QtCore import Qt, QPointimg_path = "C:\\Users\\DELL\\Desktop\\11.18\\1-1.png"class Winform(QWidget):def __init__(self, parent=None):super(Winform, self).__init__(parent)self.setWindowTitle("橡皮擦")self.pix = QPixmap()  # 实例化一个 QPixmap 对象self.lastPoint = QPoint()  # 起始点self.endPoint = QPoint()  # 终点self.initUi()self.r = 0self.g = 0self.b = 0self.a = 255def initUi(self):try:# 窗口大小设置为600*500self.resize(512, 512)# 画布大小为400*400,背景为白色self.pix = QPixmap(500, 500)self.pix.load(img_path)# self.pix.fill(Qt.white)except:print("1")# 重绘的复写函数 主要在这里绘制# 鼠标按压事件def mousePressEvent(self, event):# 鼠标左键按下try:if event.button() == Qt.LeftButton:# print("按下")# print("按压坐标",event.pos(),event.x())# 获取图片的RGB数值和坐标im = Image.open(img_path)pix = im.load()print("pix",pix)img_RGBA = pix[event.x(), event.y()]if len(img_RGBA) == 4:self.r, self.g, self.b ,self.a = img_RGBAelif len(img_RGBA) == 3:self.r, self.g, self.b = img_RGBAelse:self.r, self.g, self.b = img_RGBA# print("img3",self.r, self.g, self.b, self.d)print("RGB:",pix[event.x(), event.y()],"坐标:", (event.x(), event.y()))self.lastPoint = event.pos()self.endPoint = self.lastPointexcept:print("2")# 鼠标移动事件def mouseMoveEvent(self, event):# 鼠标左键按下的同时移动鼠标try:if event.buttons() and Qt.LeftButton:# print("移动坐标", event.pos())self.endPoint = event.pos()# 进行重新绘制self.update()except:print("3")# 鼠标释放事件def mouseReleaseEvent(self, event):# 鼠标左键释放try:if event.button() == Qt.LeftButton:self.endPoint = event.pos()# print("释放坐标", event.pos())# 进行重新绘制self.update()except:print("4")def paintEvent(self, event):try:# print("绘画")pp = QPainter(self.pix)pen = QPen(QColor(self.r, self.g, self.b, self.a))  # 定义笔格式对象pen.setWidth(20)  # 设置笔的宽度pp.setPen(pen)  # 将笔格式赋值给 画笔# 根据鼠标指针前后两个位置绘制直线pp.drawLine(self.lastPoint, self.endPoint)# 让前一个坐标值等于后一个坐标值,# 这样就能实现画出连续的线self.lastPoint = self.endPointpainter = QPainter(self)painter.drawPixmap(0, 0, self.pix)  # 在画布上画出self.pix.save(save_path)except:print("5")if __name__ == "__main__":app = QApplication(sys.argv)form = Winform()form.show()sys.exit(app.exec_())