接前面二,下面我们实现右键菜单、http通信、路由。
本系列教程是用Vue.js + Nuxt.js + Element + Vuex + 开源js绘图库,打造一个属于自己的在线绘图软件,最终效果:http://topology.le5le.com 。如果你觉得好,欢迎给文章和开源库点赞,让我们更有动力去做好!
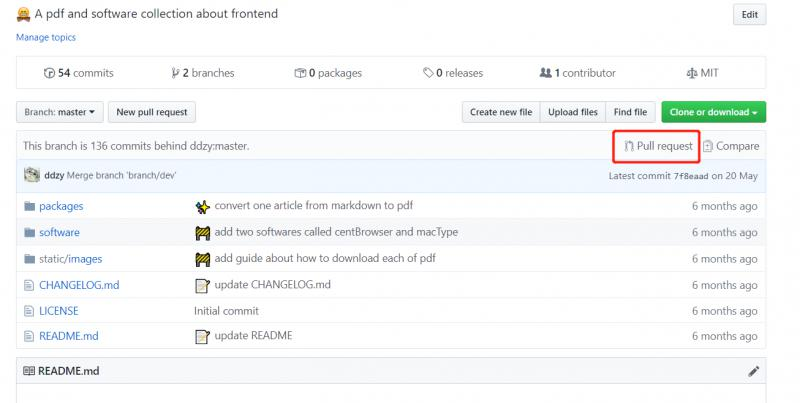
本系列教程源码地址:Github
目录
- 搭建项目框架,教程一
- dva(redux),教程二
- 右键菜单,教程三
- http通信,教程三
- 路由,教程三
右键菜单
右键菜单原理很简单:自定义html的oncontextmenu事件:
<div id="topology-canvas" className={styles.full} onContextMenu={this.hanleContextMenu} />复制代码
屏蔽默认右键菜单事件,计算右键鼠标位置,弹出一个我们自己的div自定义菜单即可
hanleContextMenu = (event: any) => {event.preventDefault()event.stopPropagation()if (event.clientY + 360 < document.body.clientHeight) {this.setState({contextmenu: {position: 'fixed',zIndex: '10',display: 'block',left: event.clientX + 'px',top: event.clientY + 'px',bottom: ''}});} else {this.setState({contextmenu: {position: 'fixed',zIndex: '10',display: 'block',left: event.clientX + 'px',top: '',bottom: document.body.clientHeight - event.clientY + 'px'}});}}复制代码
<div style={this.state.contextmenu} ><CanvasContextMenu data={this.state.selected} canvas={this.canvas} />
</div>复制代码
在本项目中,封装了一个右键菜单组件“CanvasContextMenu”,通过父组件,传递canvas实例和选中的属性数据
export interface CanvasContextMenuProps {data: {node?: Node,line?: Line,multi?: boolean,nodes?: Node[],locked?: boolean};canvas: Topology;
}复制代码
其中,属性data含义为:
data: {node: null,       // 选中节点line: null,         // 选中连线nodes: null,    // 选中多个节点multi: false,   // 选中多个节点/连线locked: false // 选中对象是否被锁定
}复制代码
然后,我们根据菜单事件和属性来调用canvas的相应接口函数,参考开发文档
http通信
这里,我们不去从零写个后端服务,直接采用topology.le5le.com线上接口服务。当然Umi.js支持Mock数据
代理配置
首先,我们需要给.umirc.ts添加http代理配置,这样开发环境下的http请求,自动代理转发给topology.le5le.com,获取到真实数据。
proxy: {'/api/': {target: 'http://topology.le5le.com',changeOrigin: true},'/image/': {target: 'http://topology.le5le.com',changeOrigin: true}}复制代码
其中,proxy的含义是指:所有/api/、/image/开头的请求,自动转发给http://topology.le5le.com/ ,其他的不转发。通常,我们通过前缀/api/表示这是后端接口请求,而不是静态资源请求;/image/表示静态资源图片请求。
http请求和拦截器
我们直接使用umi-request,和axios差不多,没有谁好谁坏。
yarn add umi-request --save
yarn add le5le-store --save  // cookie复制代码
新建一个utils/request.tsx拦截器文件。http拦截器的作用是,每次请求和数据返回时,自动帮我们处理一些全局公用操作。比如身份认证token的添加。
import _request, { extend } from 'umi-request';
import { notification } from 'antd';
import router from 'umi/router';import { Cookie } from 'le5le-store';const codeMessage: any = {200: '服务器成功返回请求的数据。',201: '新建或修改数据成功。',202: '一个请求已经进入后台排队(异步任务)。',204: '删除数据成功。',400: '发出的请求有错误,服务器没有进行新建或修改数据的操作。',401: '用户没有权限(令牌、用户名、密码错误)。',403: '用户得到授权,但是访问是被禁止的。',404: '发出的请求针对的是不存在的记录,服务器没有进行操作。',406: '请求的格式不可得。',410: '请求的资源被永久删除,且不会再得到的。',422: '当创建一个对象时,发生一个验证错误。',500: '服务器发生错误,请检查服务器。',502: '网关错误。',503: '服务不可用,服务器暂时过载或维护。',504: '网关超时。',
};// response拦截器, 处理response
_request.interceptors.response.use((response: any, options) => {if (response.body.error) {notification.error({message: `服务错误`,description: response.body.error,});}return response;
});/*** 异常处理程序*/
const errorHandler = (error: any) => {const { response = {} } = error;const { status } = response;const errortext = codeMessage[response.status] || response.statusText;if (status === 401) {notification.error({message: '请先登录。',});return;}// environment should not be usedif (status === 403) {router.push('/');return;}if (status <= 504 && status >= 500) {notification.error({message: `服务错误`,description: errortext,});return;}if (status >= 404 && status < 422) {router.push('/');}
};/*** 配置request请求时的默认参数*/
const request = extend({errorHandler, // 默认错误处理headers: {'Authorization': Cookie.get('token') // 自动添加header},credentials: 'omit'
});export default request;
复制代码
然后直接使用上面我们扩展的request请求即可:
import request from '@/utils/request';export async function get() {return request('/api/user/profile');
}复制代码
用户登录
1. 给redux新增user
在models文件夹下新增一个user.tsx。这里,我们用到了异步请求,因此新增了effects,专门用于异步数据提交;得到异步数据后,再通过reducers操作(这里为set),真正提交数据到store。
import { Reducer } from 'redux';
import { Effect } from 'dva';
import { get } from '@/services/user';export interface IUser {current: any
}export interface UserModelType {namespace: 'user';state: IUser;effects: {fetch: Effect;};reducers: {set: Reducer<IUser>;};
}const UserModel: UserModelType = {namespace: 'user',state: {current: null},effects: {*fetch(_, { call, put }) {const response = yield call(get);yield put({type: 'set',payload: response,});},},reducers: {set(state, action) {return {...state,current: action.payload,};},},
};export default UserModel;复制代码
其中,http请求用户数据被封装在独立的service里:@/services/user
import request from '@/utils/request';export async function get() {return request('/api/user/profile');
}复制代码
2. 右上角添加用户头像和昵称
{current ? (<SubMenu title={<span><Avatar style={{ backgroundColor: '#f56a00', verticalAlign: 'middle' }} size="small">{current.username[0]}</Avatar><span className="ml5">{current.username}</span></span>} className={styles.right}><Menu.Item className={styles.subTtem}><a href={accountUrl} target="_blank">退出</a></Menu.Item></SubMenu>) : (<Menu.Item className={styles.right}><a href={accountUrl} target="_blank">登录/注册</a></Menu.Item>)}复制代码
3. http请求用户登录状态
这里,我们直接省略登录页面,直接跳转到线上登录页面account.le5le.com,共享登录状态。
凡是le5le.com的子域名,通过共享cookie中的token来共享le5le.com的登录状态。首先,我们修改本地电脑的host文件,新增一条local.le5le.com子域名,映射到本地电脑:
127.0.0.1 local.le5le.com复制代码
如何修改host文件,请google。
然后,我们把 http://localhost:8000/ 换成 http://local.le5le.com:8000/ 去在浏览器中打开我们的开发页面,这时,我们就可以点击右上角“登录/注册”,去登录。
4. 第一次打开网页,读取用户是否登录
在le5le.com上,是使用jwt的方式去用户认证的。jwt的token值存储在cookie中,方便子域名共享登录。然后每个http请求headers里面加上Authorization: token值,后端服务就可以认证用户身份。
在第一次打开网页初始化时,只需在请求后端服务/api/user/profile获取用户即可。当接口/api/user/profile返回用户数据,表示用户已登录;当返回401表示未登录。这里,我们先判断了是否存在cookie下的token在请求用户接口。参考headers.tsx:
componentDidMount() {const { dispatch } = this.props as any;if (Cookie.get('token')) {dispatch({type: 'user/fetch',});}}复制代码
这里,发送一个redux请求数据指令'user/fetch',models/user.tsx的effects/fetch就会请求用户数据。
然后,通过 connect,把 models/users 赋值到 header.tsx的props
export default connect((state: any) => ({ canvas: state.canvas, user: state.user }))(Headers);复制代码
路由,添加一个首页列表页面
注释掉.umirc.ts里面的路由配置,我们采用“约定优于配置”的方式
// routes: [// {// path: '/',// component: '../layouts/index',// routes: [{ path: '/', component: '../pages/index' }],// },// ],复制代码
把原有的画布页面index.tsx及组件移动到 workspace下。新增一个index.tsx首页
import React from 'react';
import { connect } from 'dva';
import router from 'umi/router';import { Avatar, Pagination } from 'antd';import { list } from '@/services/topology';
import styles from './index.less';class Index extends React.Component<{}> {state = {data: {list: [],count: 0},search: {pageIndex: 1,pageCount: 8}};componentDidMount() {this.getList();}async getList(page?: number) {const data = await list(page || this.state.search.pageIndex, this.state.search.pageCount);this.setState({data});}handlePage = (page: number) => {this.setState({search: {pageIndex: page,pageCount: 8}});this.getList(page);}open(data: any) {router.push({pathname: '/workspace',query: {id: data.id,},});}render() {return (<div className={styles.page}><div className={styles.nav}><label>热门图文</label></div><div className="flex wrap">{this.state.data.list.map((item: any, index) => {return (<div className={styles.topo} key={index} onClick={() => { this.open(item) }}><div className={styles.image}><img src={item.image} /></div><div className="ph15 pv10"><div className={styles.title} title={item.name}>{item.name}</div><div className={styles.desc} title={item.desc}>{item.desc}</div><div className="flex mt5"><div className="full flex middle"><Avatar style={{ backgroundColor: '#f56a00', verticalAlign: 'middle' }} size="small">{item.username[0]}</Avatar><span className="ml5">{item.username}</span></div><div><span className="hover pointer mr15" title="赞"><i className={item.stared ? 'iconfont icon-appreciatefill' : 'iconfont icon-appreciate'} /><span className="ml5">{item.star || 0}</span></span><span className="hover pointer" title="收藏"><i className={item.favorited ? 'iconfont icon-likefill' : 'iconfont icon-like'} /><span className="ml5">{item.hot || 0}</span></span></div></div></div></div>)})}</div><div><Pagination defaultPageSize={8} current={this.state.search.pageIndex} total={this.state.data.count} onChange={this.handlePage} /></div></div>);}
}export default connect((state: any) => ({ event: state.event }))(Index);复制代码
在componentDidMount里面去请求数据列表,然后通过open去跳转到workspace路由。
最后
自此,一个麻雀虽小五脏俱全的小项目就完成了,包含:框架搭建、插件、vuex、身份认证、http通信、路由等功能。
整个项目功能细节还不完善,欢迎大家提pr:
完整细节可参考:http://topology.le5le.com/ ,开发文档 。可加入贡献者名单哦!也欢迎加群交流讨论:

如何贡献
通过GitHub的pr方式:
- 阅读开发文档,了解相关属性。
- fork仓库到自己名下
- 本地修改并提交到自己的git仓库
- 在自己的fork仓库找到 “Pull request” 按钮,提交
开源项目不易,欢迎大家一起参与,给【文章、GitHub开源库】点星点赞,或资助服务器: