����Ŀ¼
- һ����������
- ����������
-
- 1����Ҫ������
- 2��ubuntu core�汾
- �������� ubuntu
-
- 1��������
- 2����װ qemu ģ����
- 3��iMX6Q Ubuntu14.04ϵͳ ���� ����
- 4��iMX6Q Ubuntu14.04ϵͳ ���� ������������Դ
- 5��ģ���½ iMX6Q Ubuntu14.04 ϵͳ
-
- �١�����ģ���½�ű�
- �ڡ�ģ���½ iMX6Q Ubuntu14.04 ϵͳ
- 6��iMX6Q Ubuntu14.04 ϵͳ ��װ����
-
- �١�����Դ
- �ڡ���������
- 7��iMX6Q Ubuntu14.04 ϵͳ �û�����
-
- �١�����root����
- �ڡ�������������
- �ۡ����ñ���IP
- 8��iMX6Q Ubuntu14.04 ϵͳ ���� ���Դ���
- 9��iMX6Q Ubuntu14.04 ϵͳ ���� ����dhcp
- 10��iMX6Q Ubuntu14.04 ϵͳ �������
- �ġ����� iMX6Q Ubuntu14.04 �ļ�ϵͳ
-
- 1������rootfsĿ¼
- 2�������ļ�ϵͳ
һ����������
����������Ubuntu14.04
����ƽ̨��iMX6Q
�ں˰汾��4.14.98
����������
1����Ҫ������
ubuntu core �ٷ����ش�����
Ubuntuһ��������Ӧ��Ϊ���Ŀ�ԴGNU/Linux����ϵͳ��ubuntu core����СUbuntu����
Ubuntu�ٷ��ṩ�˲�ͬ�汾��ubuntu core�����Ը�����Ҫ���ء���ֲ��
ѡ��汾���ص�ʱ�����غ��� core-armhf
ѡ��汾���ص�ʱ�����غ��� core-armhf
ѡ��汾���ص�ʱ�����غ��� core-armhf
2��ubuntu core�汾
��������ѡ����Ubuntu14.04.6
ubuntu-base-14.04.6-base-armhf.tar.gz
�������� ubuntu
1��������
�½��ļ��д�� ubuntu core
mkdir ~/rootfs
���� ubuntu core
cp /media/sf_share/6q/ubuntu/ubuntu-base-14.04.6-base-armhf.tar.gz ~/
��ѹ ubuntu core �� rootfs
sudo tar xvf ubuntu-base-14.04.6-base-armhf.tar.gz -C rootfs/
����rootfs�鿴�ļ�

2����װ qemu ģ����
qemu ģ������
����չ�����Զ����µ�ָ�
��Դ������ֲ�������ٶȿ�
��֧��Ӳ�����⻯��x86�����Ͽ���ʹ��KVM��������ں�ksm��ҳ�汸���ڴ棬�ٶ��ȶ�Զ����VMware ESX
������ģ���ٶȣ�ijЩ������������ʵʱ����
����������ƽ̨������Linux�ij���
���Դ��漰��ԭ����״̬(�������еij���)
�����������翨
qemuģ������Ҫ�����ǣ���������Ubuntu�� ģ���½ Ҫ��ֲ�� Ubuntu��
��ģ�����ϣ����е�ubuntuϵͳ������ʹ�ø��� Ubuntu��������װ��Ҫ��������
sudo apt-get install qemu-user-static

���� qemu-arm-static �� ubuntu core �� usr/bin/
sudo cp /usr/bin/qemu-arm-static ~/rootfs/usr/bin/
3��iMX6Q Ubuntu14.04ϵͳ ���� ����
Ϊ�������ɹ��ĸ��ļ�ϵͳ�ܹ�����������ֱ�ӿ���������dns�����ļ������ļ�ϵͳ����Ӧλ��
���������� resolv.conf �� ubuntu core�� etc Ŀ¼
sudo cp /etc/resolv.conf ~/rootfs/etc/
��һ�������Ļ����ϲ�����������
��һ�������Ļ����ϲ�����������
��һ�������Ļ����ϲ�����������
4��iMX6Q Ubuntu14.04ϵͳ ���� ������������Դ
�������������� iMX6Q Ubuntu14.04ϵͳ ������������Դ��
����������Ϊ�廪��������Դ��Ҳ����ֱ��ʹ��Ĭ�ϵġ�
sudo vim ~/rootfs/etc/apt/sources.list
����ԭ����Ĭ������
# See http://help.ubuntu.com/community/UpgradeNotes for how to upgrade to
# newer versions of the distribution.
deb http://ports.ubuntu.com/ubuntu-ports/ trusty main restricted
# deb-src http://ports.ubuntu.com/ubuntu-ports/ trusty main restricted## Major bug fix updates produced after the final release of the
## distribution.
deb http://ports.ubuntu.com/ubuntu-ports/ trusty-updates main restricted
# deb-src http://ports.ubuntu.com/ubuntu-ports/ trusty-updates main restricted## N.B. software from this repository is ENTIRELY UNSUPPORTED by the Ubuntu
## team. Also, please note that software in universe WILL NOT receive any
## review or updates from the Ubuntu security team.
deb http://ports.ubuntu.com/ubuntu-ports/ trusty universe
# deb-src http://ports.ubuntu.com/ubuntu-ports/ trusty universe
deb http://ports.ubuntu.com/ubuntu-ports/ trusty-updates universe
# deb-src http://ports.ubuntu.com/ubuntu-ports/ trusty-updates universe## N.B. software from this repository is ENTIRELY UNSUPPORTED by the Ubuntu
## team, and may not be under a free licence. Please satisfy yourself as to
## your rights to use the software. Also, please note that software in
## multiverse WILL NOT receive any review or updates from the Ubuntu
## security team.
deb http://ports.ubuntu.com/ubuntu-ports/ trusty multiverse
# deb-src http://ports.ubuntu.com/ubuntu-ports/ trusty multiverse
deb http://ports.ubuntu.com/ubuntu-ports/ trusty-updates multiverse
# deb-src http://ports.ubuntu.com/ubuntu-ports/ trusty-updates multiverse## N.B. software from this repository may not have been tested as
## extensively as that contained in the main release, although it includes
## newer versions of some applications which may provide useful features.
## Also, please note that software in backports WILL NOT receive any review
## or updates from the Ubuntu security team.
deb http://ports.ubuntu.com/ubuntu-ports/ trusty-backports main restricted universe multiverse
# deb-src http://ports.ubuntu.com/ubuntu-ports/ trusty-backports main restricted universe multiverse## Uncomment the following two lines to add software from Canonical's
## 'partner' repository.
## This software is not part of Ubuntu, but is offered by Canonical and the
## respective vendors as a service to Ubuntu users.
# deb http://archive.canonical.com/ubuntu trusty partner
# deb-src http://archive.canonical.com/ubuntu trusty partnerdeb http://ports.ubuntu.com/ubuntu-ports/ trusty-security main restricted
# deb-src http://ports.ubuntu.com/ubuntu-ports/ trusty-security main restricted
deb http://ports.ubuntu.com/ubuntu-ports/ trusty-security universe
# deb-src http://ports.ubuntu.com/ubuntu-ports/ trusty-security universe
deb http://ports.ubuntu.com/ubuntu-ports/ trusty-security multiverse
# deb-src http://ports.ubuntu.com/ubuntu-ports/ trusty-security multiverse
ֻҪ��ubuntu�ij�ubuntu-ports���ɡ�������������Դ���пƴ���������Դ���Լ�������������Դ�����������ġ�
ѡ������һ���Ϳ����ˣ���������ѡ���пƴ���������Դ
1��Ubuntu14.04ϵͳ ARM �пƴ���������Դ
# icedustpan
deb http://mirrors.ustc.edu.cn/ubuntu-ports/ trusty main multiverse restricted universe
deb http://mirrors.ustc.edu.cn/ubuntu-ports/ trusty-backports main multiverse restricted universe
deb http://mirrors.ustc.edu.cn/ubuntu-ports/ trusty-proposed main multiverse restricted universe
deb http://mirrors.ustc.edu.cn/ubuntu-ports trusty-security main multiverse restricted universe
deb http://mirrors.ustc.edu.cn/ubuntu-ports/ trusty-updates main multiverse restricted universe
deb-src http://mirrors.ustc.edu.cn/ubuntu-ports/ trusty main multiverse restricted universe
deb-src http://mirrors.ustc.edu.cn/ubuntu-ports/ trusty-backports main multiverse restricted universe
deb-src http://mirrors.ustc.edu.cn/ubuntu-ports/ trusty-proposed main multiverse restricted universe
deb-src http://mirrors.ustc.edu.cn/ubuntu-ports/ trusty-security main multiverse restricted universe
deb-src http://mirrors.ustc.edu.cn/ubuntu-ports/ trusty-updates main multiverse restricted universe
2��Ubuntu14.04ϵͳ ARM �廪��������Դ
# icedustpan
deb http://mirrors.mit.edu/ubuntu-ports/ trusty main restricted universe multiverse
deb http://mirrors.mit.edu/ubuntu-ports/ trusty-updates main restricted universe multiverse
deb http://mirrors.mit.edu/ubuntu-ports/ trusty-security main restricted universe multiverse
deb http://mirrors.mit.edu/ubuntu-ports/ trusty-backports main restricted universe multiverse
deb http://mirror.csclub.uwaterloo.ca/ubuntu-ports/ trusty main restricted universe multiverse
deb http://mirror.csclub.uwaterloo.ca/ubuntu-ports/ trusty-updates main restricted universe multiverse
deb http://mirror.csclub.uwaterloo.ca/ubuntu-ports/ trusty-security main restricted universe multiverse
deb http://mirror.csclub.uwaterloo.ca/ubuntu-ports/ trusty-backports main restricted universe multiverse
5��ģ���½ iMX6Q Ubuntu14.04 ϵͳ
������ʹ��ģ������¼ iMX6Q Ubuntu14.04 ϵͳ
�١�����ģ���½�ű�
�� rootfs ��һ��Ŀ¼ ����ģ���½�ű�
�ҵ� iMX6Q Ubuntu14.04 ϵͳ�ļ� �Ƿ��� ~/rootfs/
�����ҵ� rootfs ��һ��Ŀ¼ ������Ŀ¼ ~
vim ~/ch-mount.sh
�ű�����
#!/bin/bashfunction mnt() {
    echo "MOUNTING"sudo mount -t proc /proc ${
    2}procsudo mount -t sysfs /sys ${
    2}syssudo mount -o bind /dev ${
    2}devsudo chroot ${
    2}
}function umnt() {
    echo "UNMOUNTING"sudo umount ${
    2}procsudo umount ${
    2}syssudo umount ${
    2}dev}if [ "$1" == "-m" ] && [ -n "$2" ] ;
thenmnt $1 $2
elif [ "$1" == "-u" ] && [ -n "$2" ];
thenumnt $1 $2
elseecho ""echo "Either 1'st, 2'nd or both parameters were missing"echo ""echo "1'st parameter can be one of these: -m(mount) OR -u(umount)"echo "2'nd parameter is the full path of rootfs directory(with trailing '/')"echo ""echo "For example: ch-mount -m /media/sdcard/"echo ""echo 1st parameter : ${
    1}echo 2nd parameter : ${
    2}
fi
���ӿ�ִ��Ȩ��
chmod +x ch-mount.sh
�ڡ�ģ���½ iMX6Q Ubuntu14.04 ϵͳ
1��rootfs ������Ҵ�� iMX6Q Ubuntu14.04 ϵͳ�ļ� ��Ŀ¼
2��-m ����homeĿ¼ ���������Ҫ�ֶ�����Ŀ¼����Ȼ����ʱ�������No directory,Logging in with HOME=/ ��
3��rootfs �ij��Լ���� Ubuntuϵͳ�ļ���Ŀ¼
./ch-mount.sh -m rootfs/
�ɹ�ģ���½ iMX6Q Ubuntu14.04 ϵͳ

6��iMX6Q Ubuntu14.04 ϵͳ ��װ����
�١�����Դ
apt-get update
�ڡ���������
��������Լ�������ȥ���ؾͺ���
���������ص�������
apt-get install sudo sudo����
apt-get install vim vim�༭��
apt-get install net-tools ifconfig��netstat��route��arp��
apt-get install dhcpcd5 dhcp����
apt-get install iputils-ping ping��ping6
apt-get install wireless-tools iwconfig�ȣ���ʾ������������
apt-get install htop htop���ߣ�����ʽ���̲鿴��
apt-get install rsyslog ϵͳlog����
apt-get install network-manager Network Manager����Ϳ�ܣ����������
apt-get install ifupdown ifup��ifdown�ȹ���
apt-get install ethtool ethtool�����ʾ������̫������
һ����װȫ�����
apt-get install sudo vim net-tools dhcpcd5 iputils-ping wireless-tools htop rsyslog network-manager ifupdown ethtool
7��iMX6Q Ubuntu14.04 ϵͳ �û�����
�١�����root����
passwd root
�ڡ�������������
echo "i.MX6Q" > /etc/hostname
�ۡ����ñ���IP
echo "127.0.0.1 localhost" >> /etc/hosts
echo "127.0.1.1 i.MX6Q" >> /etc/hosts
8��iMX6Q Ubuntu14.04 ϵͳ ���� ���Դ���
���õ���iMX6Q��iMXƽ̨Ĭ�ϵ��Դ�����ttymxc0
��Ҫ�� etc/init ���洴��һ�� ttymxc0.conf �ļ�
sudo vim ~/rootfs/etc/init/ttymxc0.conf
ttymxc0.conf ������д���´���
# ttymxc0 - getty
# icedustpan
# This service maintains a getty on ttymxc0 from the point the system is
# started until it is shut down again.start on stopped rc RUNLEVEL=[2345] and (not-container orcontainer CONTAINER=lxc orcontainer CONTAINER=lxc-libvirt)stop on runlevel [!2345]respawn
exec /sbin/getty -8 115200 ttymxc0Ȼ����Ҫ��etc/rc.local
sudo vim ~/rootfs/etc/rc.local
����
start ttymxc0
#!/bin/sh -e
#
# rc.local
#
# This script is executed at the end of each multiuser runlevel.
# Make sure that the script will "exit 0" on success or any other
# value on error.
#
# In order to enable or disable this script just change the execution
# bits.
#
# By default this script does nothing.start ttymxc0
exit 0
9��iMX6Q Ubuntu14.04 ϵͳ ���� ����dhcp
����DHCP��������¼��������֮�������ã�������ʱ����һ�㡣
echo auto eth0 > /etc/network/interfaces.d/eth0
echo iface eth0 inet dhcp >> /etc/network/interfaces.d/eth0
ʹ������DHCP
/etc/init.d/networking restart

10��iMX6Q Ubuntu14.04 ϵͳ �������
���������˳�ģ���¼��iMX6Q Ubuntu14.04 ϵͳ
�˳��˳�chroot
exit
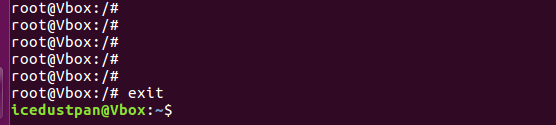
�ýű��������˳� ģ���¼ �ļ�ϵͳ
./ch-mount.sh -u rootfs/

�����Ѿ��˳�ģ���¼��iMX6Q Ubuntu14.04 ϵͳ
�ġ����� iMX6Q Ubuntu14.04 �ļ�ϵͳ
1������rootfsĿ¼
cd ~/rootfs/
2�������ļ�ϵͳ
��ΪiMXƽ̨���ļ�ϵͳ��Ĭ��.bz2��ʽ��
����ѹ������.bz2��ʽ���ļ�ϵͳ
sudo tar jcvf imx6q-ubuntu14.04.tar.bz2 *
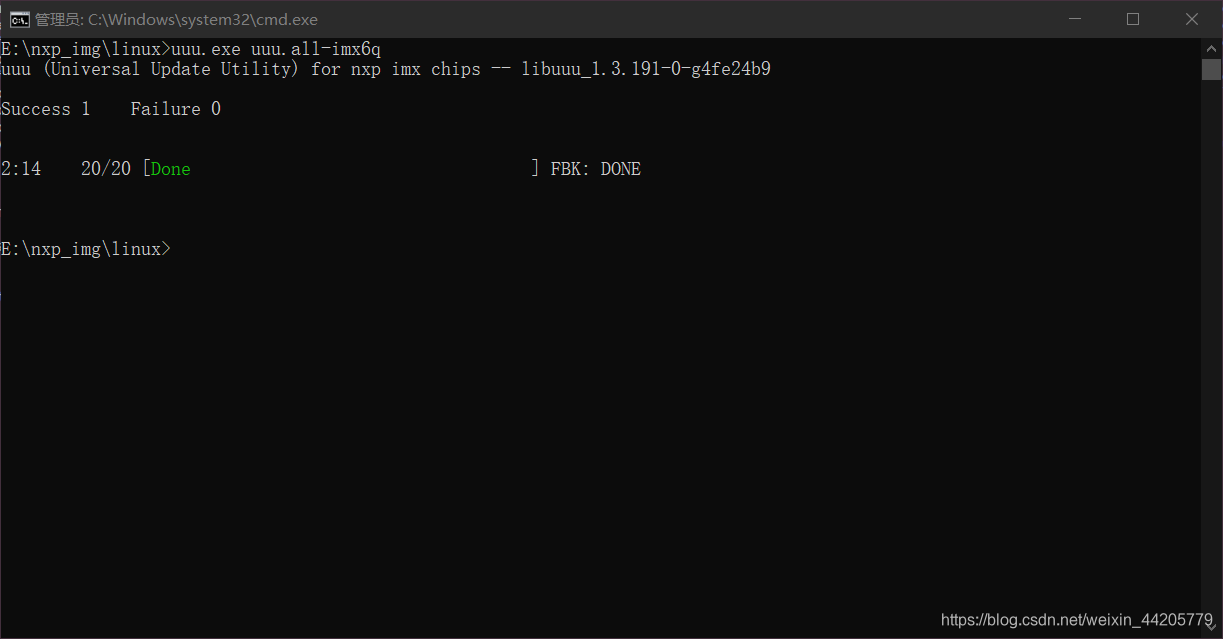
������������ļ�ϵͳ��¼��ȥ������
ʹ��uuu������¼ϵͳ