文章目录
- 背景
- 文档
- 版本
- 使用
- 安装步骤
- 配置信息
- 自定义上传文件
- 汉化
- 自动调整高度
- 多图上传(第三方插件,非官方插件使用方案)
- 配置信息
- 问题: 怎么使用第三方插件
- 解决方案
- 下载tinymce到本地
- 配置index.html
- 问题: upfiles.html 出现iframe跨域
- 解决方案
背景
笔者项目原先使用的是百度的ueditor编辑器,由于没有了维护,并且在原基础上改造的成本大,于是考虑更换新的编辑器
而对于新的编辑器选择,笔者考虑以下几点
- 是否持续更新,在网上有很多开源项目,有些属于个人,有些属于组织,在选择时,笔者都会去看最近一次更新的时间,以及github上issue的数量,从而来判断是否还在更新中
- 是否提供自定义图片上传功能,很多开源的富文本项目都不提供自定义的上传文件功能,当然,对于普通的上传,大部分项目都是支持的,只是笔者的文件都是放在了阿里云的oss中,在上传时并不想经过自己的服务器,再经由服务器上传到oss中(这不是浪费io嘛)
最终我选择了tinymce,理由如下: - 配置简单
- 支持框架(vue\angular\react)
- 已商业化(也就是说会一直更新,并且他也有提供免费功能,已经足够笔者使用)
文档
官方文档,可自行翻译
第三方翻译的中文说明文档
版本
| 名称 | 版本号 |
|---|---|
| angular | 8+ |
| tinymce | 5.1.5 |
使用
安装步骤
英文说明: https://www.tiny.cloud/docs/integrations/angular/
- 安装tinymce-angular包,并保存到你package.json用–save
npm install --save @tinymce/tinymce-angular
- 在app.module.ts加入EditorModule,以下为示例
import { BrowserModule } from '@angular/platform-browser';import { NgModule } from '@angular/core';import { EditorModule } from '@tinymce/tinymce-angular';import { AppComponent } from './app.component';@NgModule({declarations: [AppComponent],imports: [BrowserModule,EditorModule],providers: [],bootstrap: [AppComponent]})export class AppModule { }
- 使用示例
<editorinitialValue="<p>This is the initial content of the editor</p>"[init]="{height: 500,menubar: false,plugins: ['advlist autolink lists link image charmap print preview anchor','searchreplace visualblocks code fullscreen','insertdatetime media table paste code help wordcount'],toolbar:'undo redo | formatselect | bold italic backcolor | \alignleft aligncenter alignright alignjustify | \bullist numlist outdent indent | removeformat | help'}"></editor>
运行项目则可在对应路由看到编辑器
配置信息
自定义上传文件
{selector: '#oneweek-editor',// plugins是tinymce的各种插件plugins: 'link lists image code table colorpicker textcolor wordcount contextmenu codesample',images_upload_handler: (blobInfo, success, failure) => {// blobInfo.blob()为file, blobInfo.blob().name为文件名称,调用成功后需要回调success(文件名称),向页面传递图片信息,如果失败了需要回调failure(失败信息)console.log('上传图片啦');},// toolbar定义快捷栏的操作, | 用来分隔显示toolbar: 'image | codesample | bullist numlist | bold italic underline strikethrough | alignleft'+ ' aligncenter alignright alignjustify | undo redo',// 这里是代码块的一些语言选择,好像暂时还没支持typescriptcodesample_languages: [{text: 'Python', value: 'python'},{text: 'HTML/XML', value: 'markup'},{text: 'JavaScript', value: 'javascript'},{text: 'CSS', value: 'css'},{text: 'Java', value: 'java'}],// 高度height: 600}
汉化
{selector: '#oneweek-editor',// plugins是tinymce的各种插件plugins: 'link lists image code table colorpicker textcolor wordcount contextmenu codesample',// 语言包可以使用tinymce提供的网址,但是墙的原因,会连不上/网速慢,所以还是自行下载,下载地址:https://www.tiny.cloud/get-tiny/language-packages/language_url: 'zh_CN.js的地址:如http://xxx/zh_CN.js',language: 'zh_CN',images_upload_handler: (blobInfo, success, failure) => {// blobInfo.blob()为file, blobInfo.blob().name为文件名称,调用成功后需要回调success(文件名称),向页面传递图片信息,如果失败了需要回调failure(失败信息)console.log('上传图片啦');},// toolbar定义快捷栏的操作, | 用来分隔显示toolbar: 'image | codesample | bullist numlist | bold italic underline strikethrough | alignleft'+ ' aligncenter alignright alignjustify | undo redo',// 这里是代码块的一些语言选择,好像暂时还没支持typescriptcodesample_languages: [{text: 'Python', value: 'python'},{text: 'HTML/XML', value: 'markup'},{text: 'JavaScript', value: 'javascript'},{text: 'CSS', value: 'css'},{text: 'Java', value: 'java'}],// 高度height: 600,}
自动调整高度
{selector: '#oneweek-editor',// plugins是tinymce的各种插件plugins: 'link lists image code table colorpicker textcolor wordcount contextmenu codesample autosize',// 语言包可以使用tinymce提供的网址,但是墙的原因,会连不上/网速慢,所以还是自行下载,下载地址:https://www.tiny.cloud/get-tiny/language-packages/language_url: 'zh_CN.js的地址',language: 'zh_CN',images_upload_handler: (blobInfo, success, failure) => {// blobInfo.blob()为file, blobInfo.blob().name为文件名称,调用成功后需要回调success(文件名称),向页面传递图片信息,如果失败了需要回调failure(失败信息)console.log('上传图片啦');},// toolbar定义快捷栏的操作, | 用来分隔显示toolbar: 'image | codesample | bullist numlist | bold italic underline strikethrough | alignleft'+ ' aligncenter alignright alignjustify | undo redo',// 这里是代码块的一些语言选择,好像暂时还没支持typescriptcodesample_languages: [{text: 'Python', value: 'python'},{text: 'HTML/XML', value: 'markup'},{text: 'JavaScript', value: 'javascript'},{text: 'CSS', value: 'css'},{text: 'Java', value: 'java'}],autoresize_on_init: false,// 最小高度min_height: 350,// 最大高度max_height: 650}
多图上传(第三方插件,非官方插件使用方案)
由于tinymce官方并没有提供多图上传的功能,所以只能自己开发或者依赖于第三方开发者
在上文提供的文档中的中文文档地址中,无私的贡献者,为我们提供了更多插件 -> 图片批量上传, 此为使用说明地址
配置信息
{selector: '#oneweek-editor',// plugins是tinymce的各种插件plugins: 'link lists image code table colorpicker textcolor wordcount contextmenu codesample autosize axupimgs',// 语言包可以使用tinymce提供的网址,但是墙的原因,会连不上/网速慢,所以还是自行下载,下载地址:https://www.tiny.cloud/get-tiny/language-packages/language_url: 'zh_CN.js的地址',language: 'zh_CN',images_upload_handler: (blobInfo, success, failure) => {// blobInfo.blob()为file, blobInfo.blob().name为文件名称,调用成功后需要回调success(文件名称),向页面传递图片信息,如果失败了需要回调failure(失败信息)console.log('上传图片啦');},// toolbar定义快捷栏的操作, | 用来分隔显示toolbar: 'image axupimgs | codesample | bullist numlist | bold italic underline strikethrough | alignleft'+ ' aligncenter alignright alignjustify | undo redo',// 这里是代码块的一些语言选择,好像暂时还没支持typescriptcodesample_languages: [{text: 'Python', value: 'python'},{text: 'HTML/XML', value: 'markup'},{text: 'JavaScript', value: 'javascript'},{text: 'CSS', value: 'css'},{text: 'Java', value: 'java'}],autoresize_on_init: false,// 最小高度min_height: 350,// 最大高度max_height: 650}
问题: 怎么使用第三方插件
使用说明截图如下:
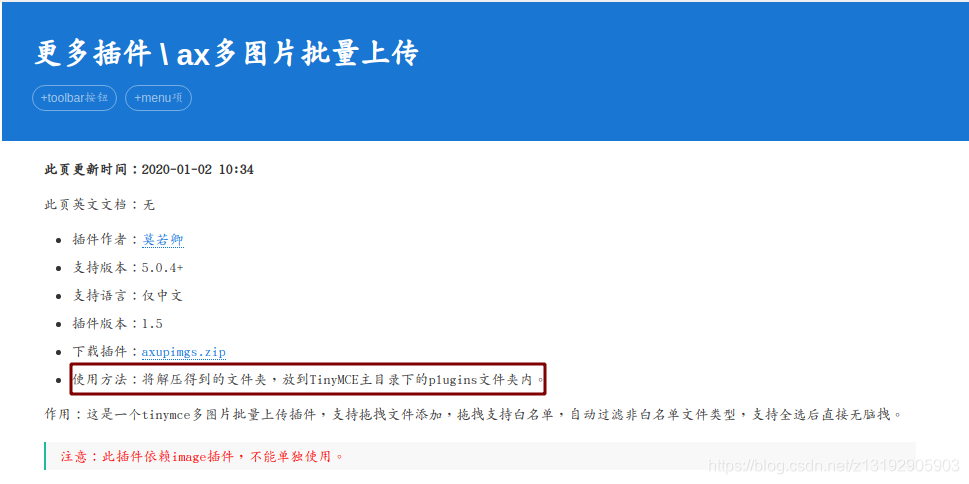
说明中指明,要将zip下载后放置到tinymce主目录下的plugins文件夹内,此时就出现一个问题:angular安装的tinymce使用地址默认是官方地址,也没有在配置中提供使用自己的地址的参数,怎么放第三方插件
解决方案
下载tinymce到本地
下载地址
在官网上下载tinymce包,下载完成后解压到自己项目中,也可以放到第三方空间(如阿里云的oss,第三方文件托管平台,只要能在项目中访问到即可),再将下载到的axupimgs.zip解压,将解压得到的axupimgs整个文件夹都挪到tinymce文件夹下的plugins文件夹下即可
即
- tinymce
- plugins
- axupimgs
- plugins
配置index.html
在index.html中加入对tinymce.min.js的引用
<script type="text/javascript" src="https://oss2.platform.weekweekup.cn/assets/tinymce_editor/5.1.5/tinymce.min.js"></script>
启动项目,可以看到
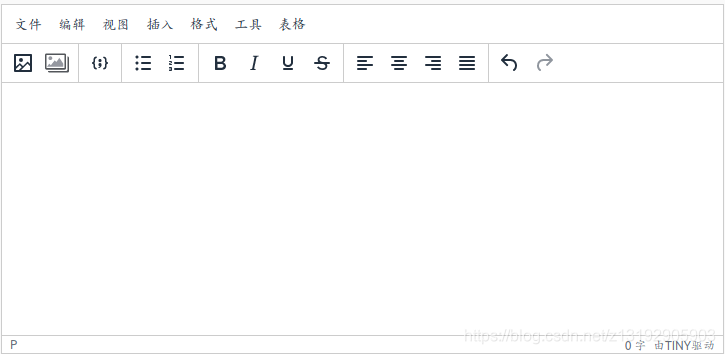
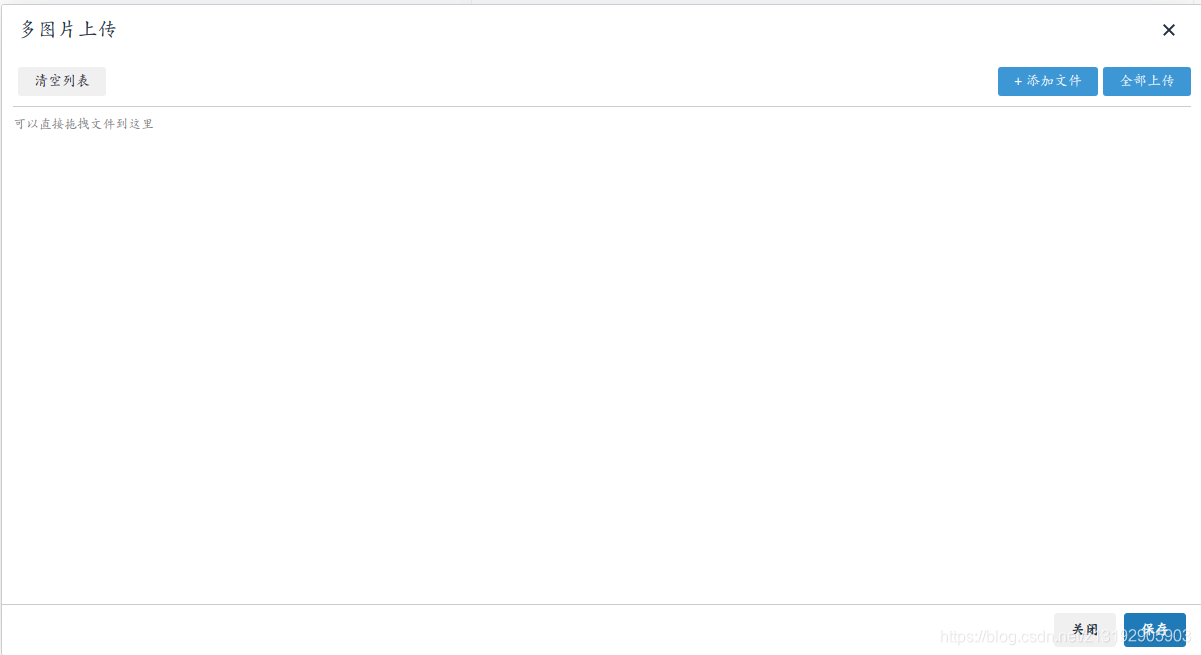
点击多图上传,会出现如下窗口,并且在console控制台中不会报错,功能都能正常使用
问题: upfiles.html 出现iframe跨域
如果你的tinymce文件夹不是放在项目中,而是托管到第三方平台,如阿里云的oss,在点击多图上传时,在console中会打印跨域问题,并且你也无法在多图上传的窗口中进行操作
这是因为第三方开发者在编写程序时,使用的iframe嵌套,而此刻我们的项目和tinymce地址不同,出现了跨域
解决方案
修改axupimgs中的plugin.min.js文件,将
var baseURL=tinymce.baseURL;
var iframe1 = baseURL+'/plugins/axupimgs/upfiles.html';
改为
var baseURL = document.location.protocol + '//' + document.location.host;
var iframe1 = baseURL + '/assets/plugins/axupimgs/upfiles.html';
并且将axupimgs文件夹下的loading.gif和upfiles.html都放到项目的assets文件夹下,结构如下:
src
- assets
- plugins
- axupimgs
- upfiles.html
- loading.gif
在angular.json文件中加入axupimgs文件夹:
"architect": {"build": {"builder": "@angular-devkit/build-angular:browser","options": {"outputPath": "dist/course","index": "src/index.html","main": "src/main.ts","polyfills": "src/polyfills.ts","tsConfig": "src/tsconfig.app.json","assets": ["src/assets/plugins/axupimgs"],
重新启动项目,即可正常使用多图上传