vue router传参的三种方式 - 简书先看看以下代码示例中的用到的路由表 我们实现路由的跳转有两种方法,声明式和编程式,一般情况下用到编程式的方法来实现的情况会比较多,直接用router 的实例方法push()就...https://www.jianshu.com/p/660d8fcb0a47
1.路由组件query传值
//该路由路径为/home/message/detail   所以该组件能从$route上的得到数据
//to的字符串写法
<router-link :to="`/home/message/detail?id=${m.id}&title=${m.title}`"></router-link>
//to的对象写法
<router-link :to='{path:'/home/message/detail',query:{id:m.id,title:m.title}
}' ></router-link>//得到数据的组件
<template><ul><li>消息编号:{
   {$route.query.id}}</li><li>消息标题:{
   {$route.query.title}}</li></ul>
</template><script>export default {name:'Detail',mounted() {console.log(this.$route)},}
</script>
2.命名路由name:在使用路由传参时,to里面的path属性,可以用name代替
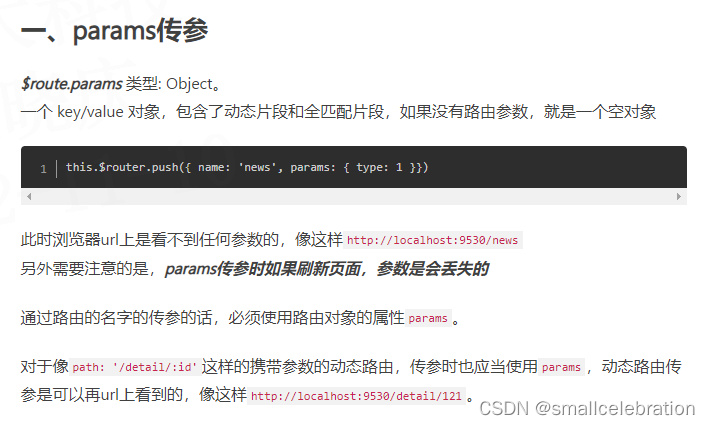
3.路由params传参(需要注意的是,params传参时如果刷新页面,参数是会丢失的)
<!-- 路由跳转并携带params参数 字符串写法 -->
<router-link :to="`/home/message/detail/${m.id}/${m.title}`" ></router-link>
<!-- to的对象写法 -->
<router-link :to="{name:'xiangqing',params:{id:m.id,title:m.title}
}"></router-link>//detail组件中接收值<li>消息编号:{
   {$route.params.id}}</li><li>消息标题:{
   {$route.params.title}}</li>对象形式:qarams的路径配置只能用name配置param路由配置声明占位:children:[{name:'xiangqing',path:'detail/:id/:title',component:Detail,}]
4.路由props传参:代替this.$route.params.id简写(即上方简写)
{path:'message',component:Message,children:[{name:'xiangqing',path:'detail',component:Detail,props的第一种写法,值为对象,该对象中的所有key-value都会以props的形式传给Detail组件。props:{id:'xxx',title:'hello'}props的第二种写法,值为布尔值,若布尔值为真,就会把该路由组件收到的所有params参数,以props的形式传给Detail组件。 父向子传值 所有params参数props:truedetail组件中接收数据 props:['id','title'],props的第三种写法,值为函数props($route){return {id:$route.query.id,title:$route.query.title,a:1,b:'hello'}}
5.路由router-link的replace属性:(默认是push模式)
-
设置
replace属性的话,当点击时,会调用router.replace(),而不是router.push(),所以导航后不会留下历史记录。<!-- 设置 replace 属性的话,当点击时,会调用 router.replace(),而不是 router.push(),所以导航后不会留下历史记录。 --><router-linkreplaceclass="list-group-item"active-class="active"to="/home/news">News</router-link>6.编程式路由导航:不使用链接router-link。
- this.$router.push() / this.$router.replace()
-
使用路由器上的this.$router.push({name:''或path:'/message, query:{}/params:{}) 导航要去的地址,及参数
//两种模式对比	<router-link :to="{name:'xiangqing',query:{id:m.id,title:m.title}}">{
   {m.title}}</router-link>编程式路由导航<button @click="pushShow(m)">push查看</button><button @click="replaceShow(m)">replace查看</button>//逻辑代码methods: {pushShow(m){this.$router.push({name:'xiangqing',query:{id:m.id,title:m.title}})},replaceShow(m){this.$router.replace({name:'xiangqing',query:{id:m.id,title:m.title}})}
7.keep-alive缓存路由组件:包含用include不包含用exclude
	缓存多个路由组件<keep-alive :include="['News','Message']"> <router-view></router-view></keep-alive>缓存一个路由组件<keep-alive include="News"><router-view></router-view></keep-alive>在News组件中,添加如下生命周期函数activated() {console.log("--激活--");//进入News组件触发}deactivated() {console.log("--失活--");//离开News组件触发}
}
8.keep-alive缓存组件激活与失活两个生命周期函数
被 keep-alive 缓存的组件激活时调用。该钩子在服务器端渲染期间不被调用。activated() {console.log('News组件被激活了')this.timer = setInterval(() => {console.log('@')this.opacity -= 0.01if(this.opacity <= 0) this.opacity = 1},16)},被 keep-alive 缓存的组件失活时调用。该钩子在服务器端渲染期间不被调用。deactivated() {console.log('News组件失活了')clearInterval(this.timer)},9.全局路由前置beforeEach/后置afterEach路由守卫(在router中)
后置路由守卫用处:切换时更改document.title=to.meta.title|| '某某系统' (更改页签的标题)
全局前置路由守卫――――初始化的时候被调用、每次路由切换之前被调用
router.beforeEach((to,from,next)=>{// to:要去的地址/ from:从哪个地址来 / next:放行令牌console.log('前置路由守卫',to,from)if(to.meta.isAuth){ //判断要去的地址是否需要鉴权if(localStorage.getItem('school')==='atguigu'){next()}else{alert('学校名不对,无权限查看!')}}else{next()}
})全局后置路由守卫――――初始化的时候被调用、每次路由切换之后被调用
router.afterEach((to,from)=>{console.log('后置路由守卫',to,from)document.title = to.meta.title || '硅谷系统'
})export default router
10.独享路由守卫 :beforeEnter:(to,from,next)=>{}
独享路由守卫只有前置守卫,后置是全局后置路由守卫
{name:'xinwen',path:'news',component:News,meta:{isAuth:true,title:'新闻'},beforeEnter: (to, from, next) => {console.log('独享路由守卫',to,from)if(to.meta.isAuth){ //判断是否需要鉴权if(localStorage.getItem('school')==='atguigu'){next()}else{alert('学校名不对,无权限查看!')}}else{next()}}11.组件内路由守卫:与mounted平级
beforeRouterEnter(){ //在通过路由规则进入该组件时被调用} beforeRouterLeave(to,from,next){ }
mounted() {// console.log('%%%',this.$route)},//通过路由规则,进入该组件时被调用beforeRouteEnter (to, from, next) {console.log('About--beforeRouteEnter',to,from)if(to.meta.isAuth){ //判断是否需要鉴权if(localStorage.getItem('school')==='atguigu'){next()}else{alert('学校名不对,无权限查看!')}}else{next()}},//通过路由规则,离开该组件时被调用beforeRouteLeave (to, from, next) {console.log('About--beforeRouteLeave',to,from)next()}}12.路由hash模式/history模式
通过mode更改模式
hash模式:localhost:5000/#/home/news (#及后面的都是hash值,不会发给服务器)
history模式需要后端来配置:localhost:5000/home/news 因为后端没有这个路径,所以刷新404
const router = new VueRouter({mode:'history',routes:[nodejs里面配置:connect-history-api-fallback(解决history 404问题)
const history=required('connect-history-api-fallback')
//必须在静态资源之前应用中间件
app.use(history())app.use(express.static(__dirname+'/static'))
13.动态更换路由列表

或者登录的时候根据条件判断,然后刷新路由列表
this.$router.go(0);