目录
官方资料
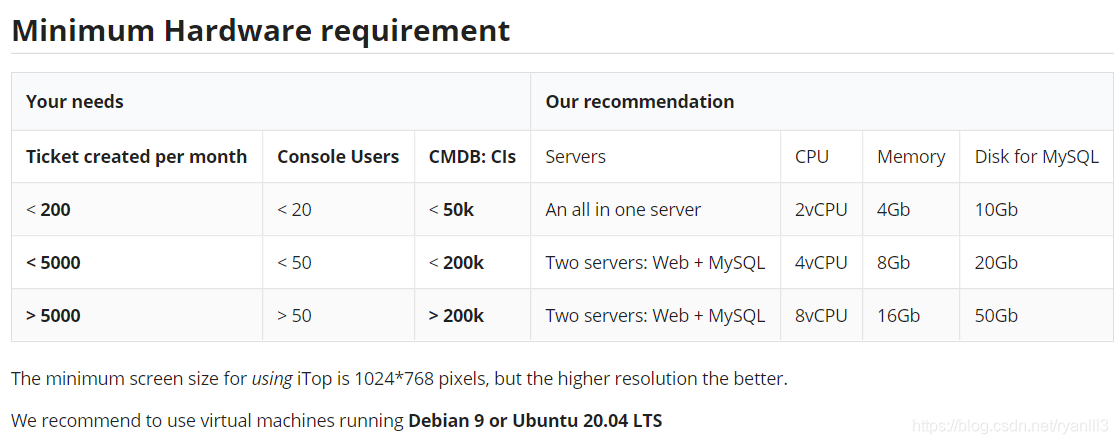
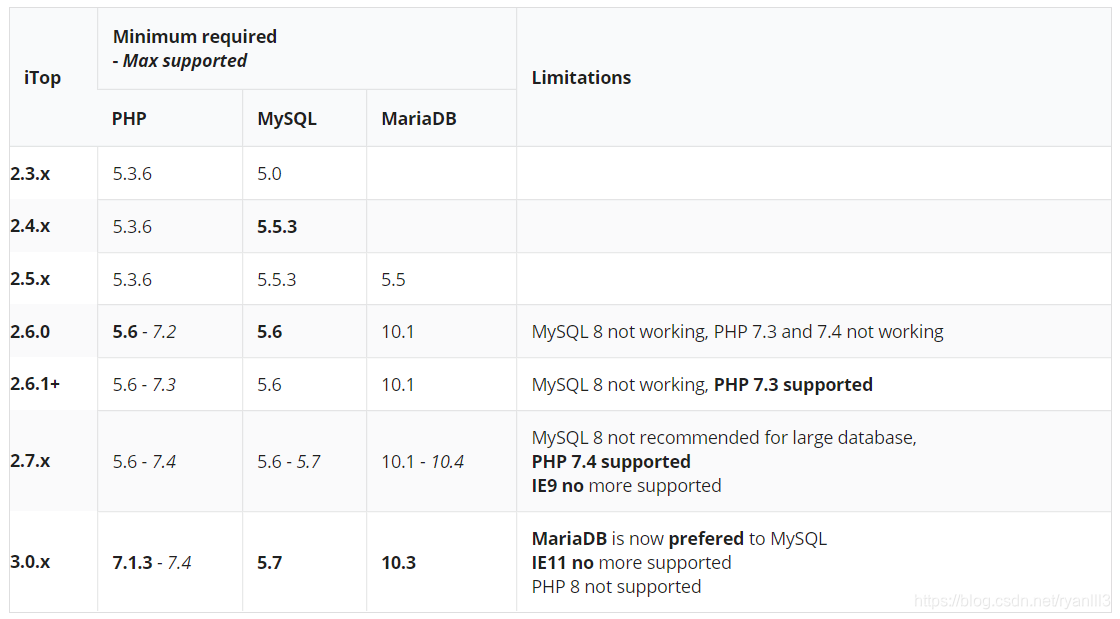
服务器规格与软件版本限制
服务器规格推荐
软件版本限制
LAMP Web服务器部署
安装apache2,mariadb,php
Mariadb root密码与创建itop用户
关闭ubuntu防火墙
查看和重启服务
PHP配置
Mariadb配置
安装ITOP 2.7.4 或 3.0beta
ITOP Background Task for SLA/Notification Features
添加计划任务
创建参数文件
赋予执行权限
Automated installation
官方资料
itop website: https://www.combodo.com/itop
itop wiki: https://www.itophub.io/wiki/page
itop download: https://sourceforge.net/projects/itop/files/itop/
Installation Guide: https://www.itophub.io/wiki/page?id=2_7_0%3Ainstall%3Astart
ITOP特性介绍:https://www.combodo.com/itop-193
ITOP包含基于ITIL的ITSM流程管理,故障管理 Incident,服务请求管理 Service Request,问题管理 Problem,变更管理 Change,配置管理 CMDB,Known Error管理,知识库管理/文档管理,用户门户,服务目录,服务协议等等。
服务器规格与软件版本限制
服务器规格推荐
软件版本限制
系统环境Ubuntu 20.04.2 LTS
Unbuntu Server Download: https://ubuntu.com/download/server
LAMP Web服务器部署
准备工作完成,开始部署LAMP Web服务器套件:Apache, PHP, Mariadb;
安装apache2,mariadb,php
#安装apache
sudo apt-get install apache2#安装数据库mariadb
sudo apt-get install mariadb-server#查看安装的数据库版本
#ryan@itop:~$ mysql -V
#mysql  Ver 15.1 Distrib 10.3.29-MariaDB, for debian-linux-gnu (x86_64) using readline 5.2#安装PHP和各种依赖
sudo apt-get install php php-mysql php-ldap php-cli php-soap php-json graphviz
sudo apt-get install php-xml php-gd php-zip libapache2-mod-php php-mbstring#查看php版本
#ryan@itop:~$ php -v
#PHP 7.4.3 (cli) (built: Oct  6 2020 15:47:56) ( NTS )
#Copyright (c) The PHP Group
#Zend Engine v3.4.0, Copyright (c) Zend Technologies
#    with Zend OPcache v7.4.3, Copyright (c), by Zend Technologies
Mariadb root密码与创建itop用户
#登录mysql
sudo mysql#选择mysql数据库
use mysql;#设置root本地用户的密码为root
set password for ‘root’@‘localhost’ = password(‘root’);#创建新用户itop,并且支持远程登录;
create user 'itop'@'%' identified by 'itop';#赋予itop全部的数据库权限
GRANT ALL PRIVILEGES ON *.* TO 'itop'@'%';#使设置的密码生效
FLUSH PRIVILEGES;
#退出
quit#验证itop用户登录;
#ryan@itop:~$ mysql -uitop -p
#Enter password:
#Welcome to the MariaDB monitor.  Commands end with ; or \g.
#Your MariaDB connection id is 53
#Server version: 10.3.29-MariaDB-0ubuntu0.20.04.1 Ubuntu 20.04
#Copyright (c) 2000, 2018, Oracle, MariaDB Corporation Ab and others.
#Type 'help;' or '\h' for help. Type '\c' to clear the current input statement.
#MariaDB [(none)]> quit
关闭ubuntu防火墙
sudo systemctl stop ufw
sudo systemctl disable ufw
查看和重启服务
systemctl status apache2
systemctl status mysqlsudo systemctl restart apache2
sudo systemctl restart mysql
PHP配置
#备份配置文件
cp /etc/php/7.4/apache2/php.ini ~/php.ini.bak.20210619#创建一个上传文件的临时目录
sudo mkdir -p /opt/itop/tmp/
sudo chown www-data:www-data -R /opt/itop/#编辑配置文件
sudo vim /etc/php/7.4/apache2/php.ini #编辑memory_limit = 256M
max_input_vars = 5000
upload_tmp_dir = /opt/itop/tmp/
upload_max_filesize = 10M
post_max_size = 16M#下面随意
; also check those options for attachments (se dedicated chapter below)
; adapt values depending of your preferences!; - max_file_uploads
; - max_input_time:wq! #保存退出
Mariadb配置
#备份数据库配置文件
cp /etc/mysql/my.cnf ~/my.cnf.bak.20210620
#编辑配置文件
sudo vim /etc/mysql/my.cnfinnodb_buffer_pool_size = 512M
query_cache_size = 32M
query_cache_limit = 1Minnodb_default_row_format = DYNAMIC
innodb_large_prefix = truemax_allowed_packet = 20M
安装ITOP 2.7.4 或 3.0beta
2.7.4版本下载:https://sourceforge.net/projects/itop/files/itop/2.7.4/
3.0Beta版本下载,UI更新颖:https://sourceforge.net/projects/itop/files/itop/3.0.0-beta/iTop-3.0.0-beta-7312.zip/download
#下载版本2.7.4,可以在sourceforge查看最新版本,下载并上传到服务器上,然后:#安装个解压缩工具
sudo apt install unzip -y#解压缩2.7.4版本至apache目录
sudo unzip iTop-2.7.4-7194.zip -d /var/www/html/itop/#解压缩3.0beta版本至apache目录,取决于你下载的哪个版本。
sudo unzip iTop-3.0.0-beta-7312.zip -d /var/www/html/itop/#赋予权限
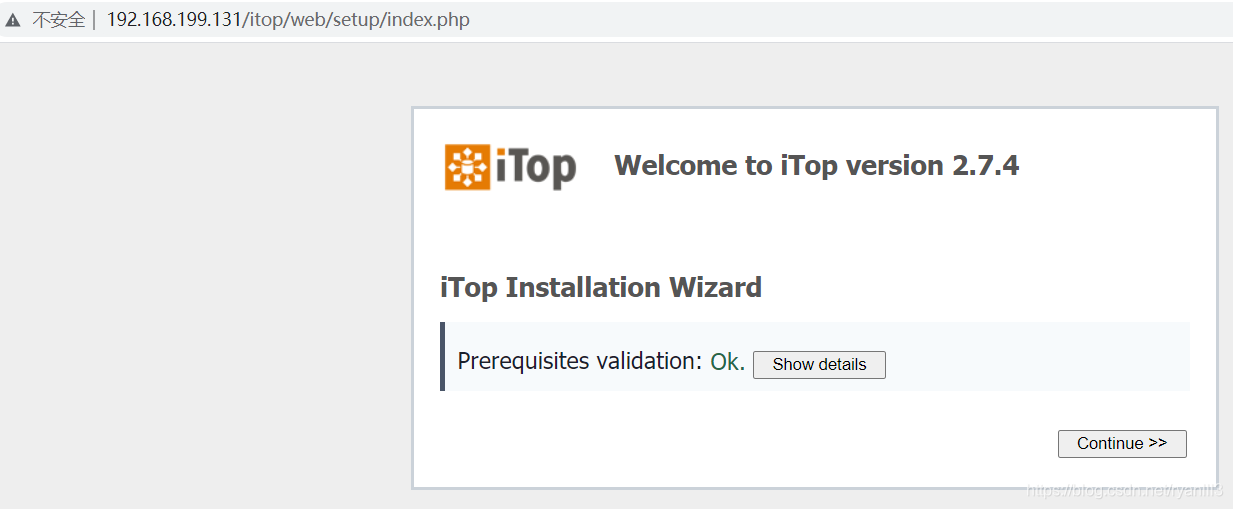
sudo chown www-data:www-data -R /var/www/浏览器访问 http://your_server_ip/itop/web/
条件验证成功:
输入之前准备好的,数据库账号itop和密码itop。数据库在本地,所以直接输入localhost。
后续选择,建议选择ITIL的流程。直至下图,选择 Enter ITOP.
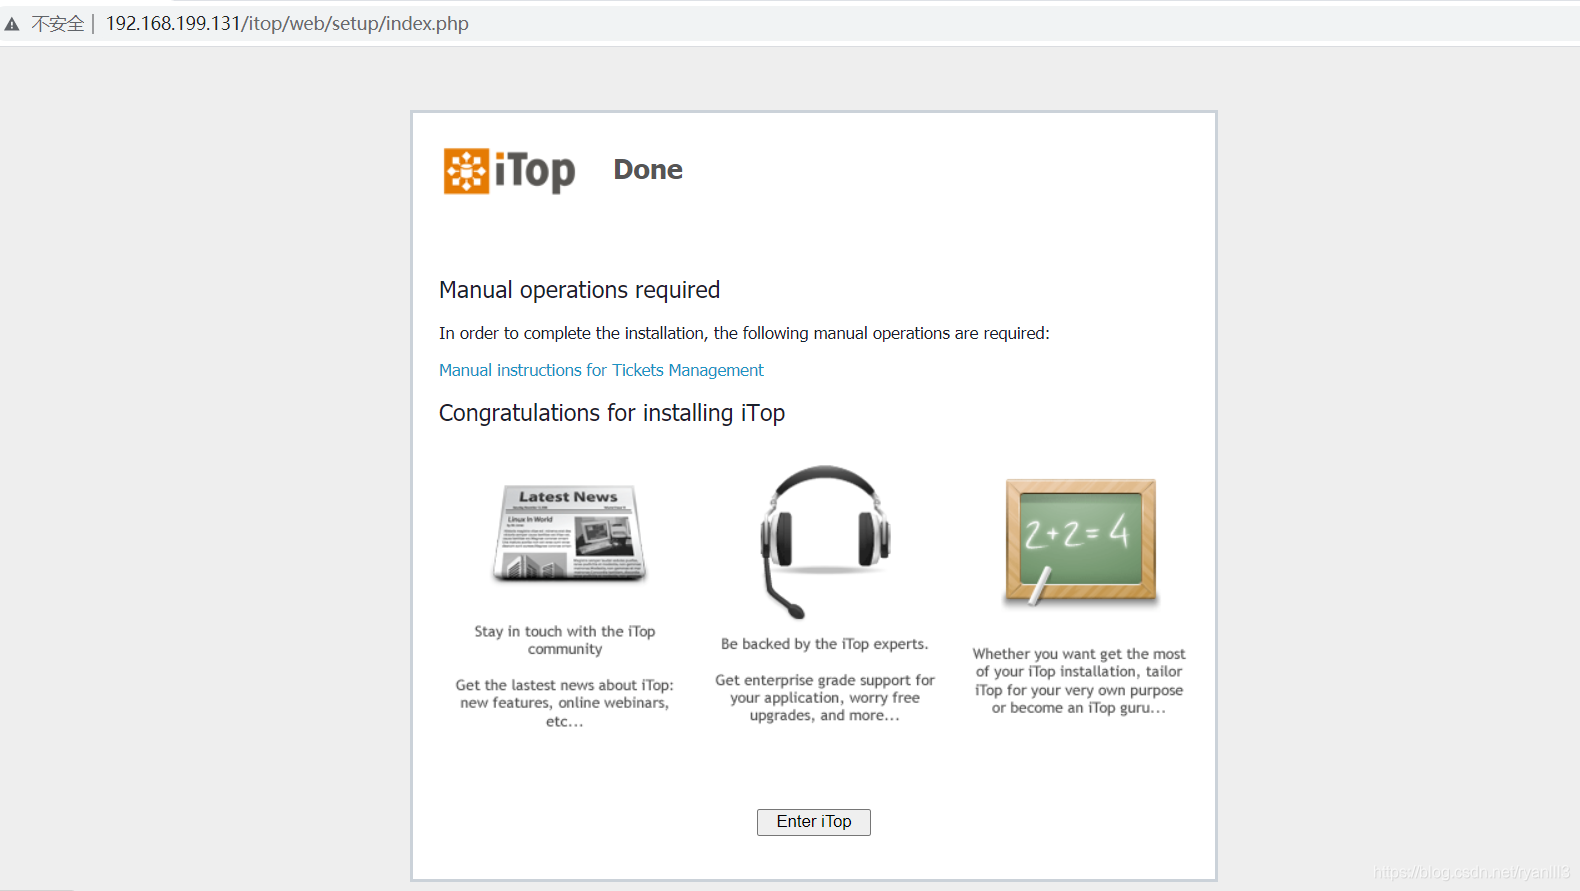
恭喜你,成功安装,开始你的admin工作吧。
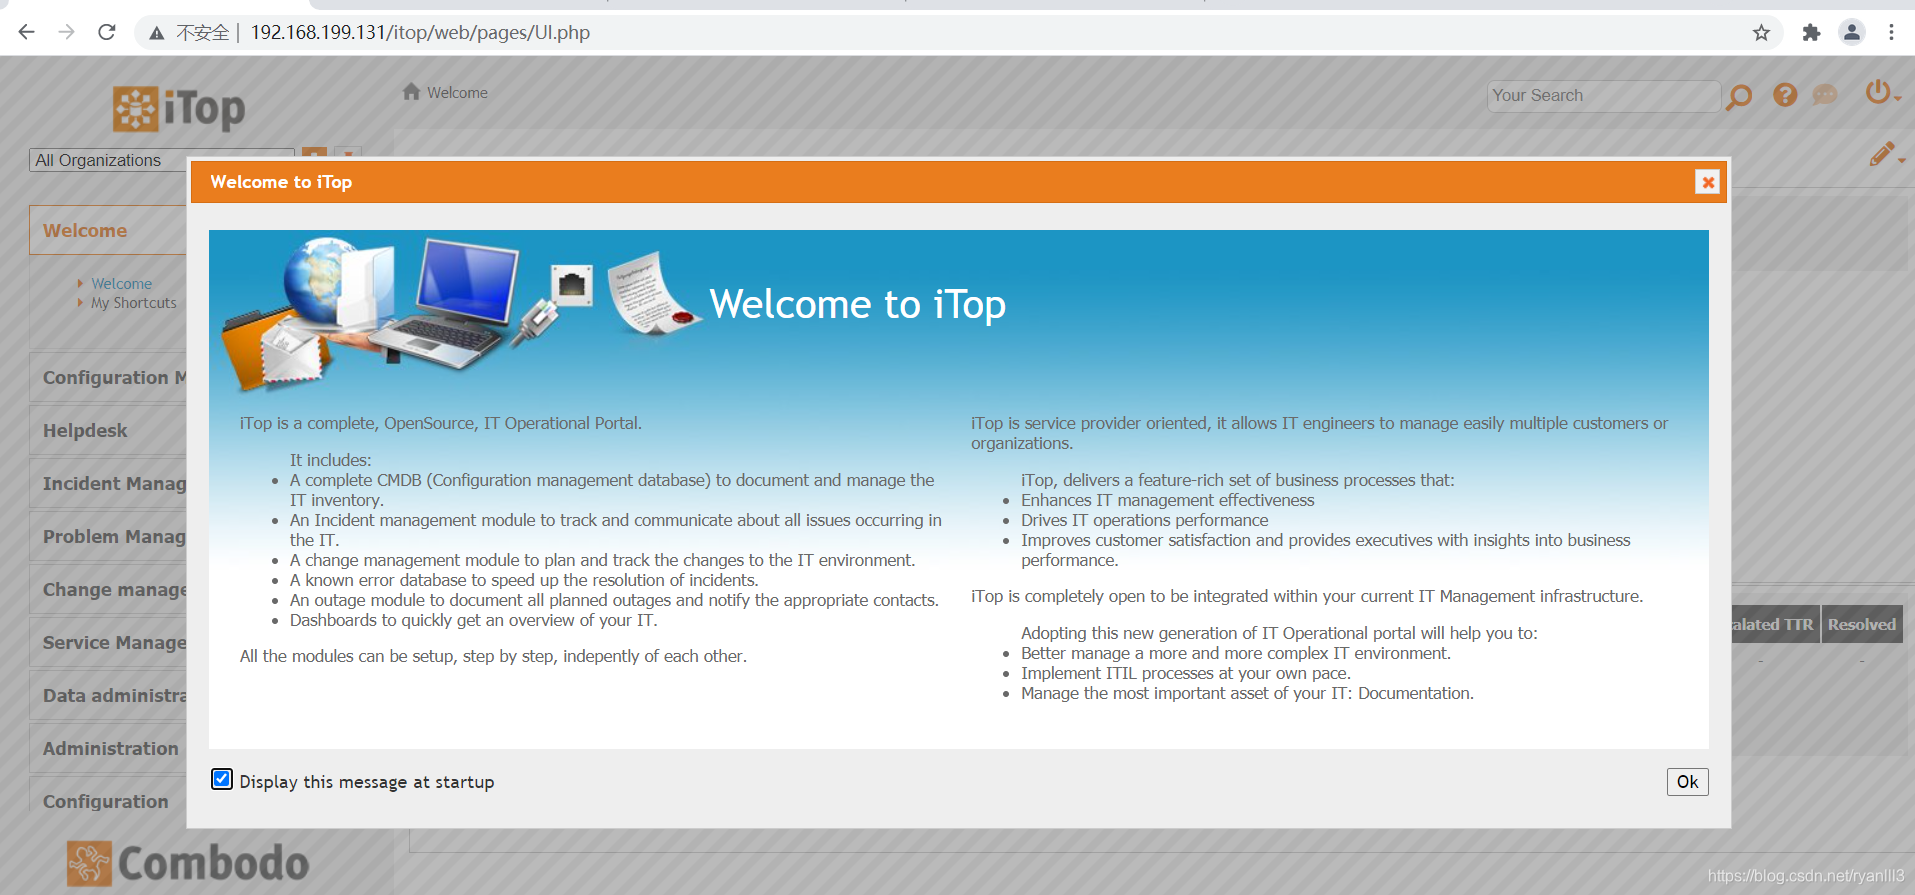
2.7.4版本登录:
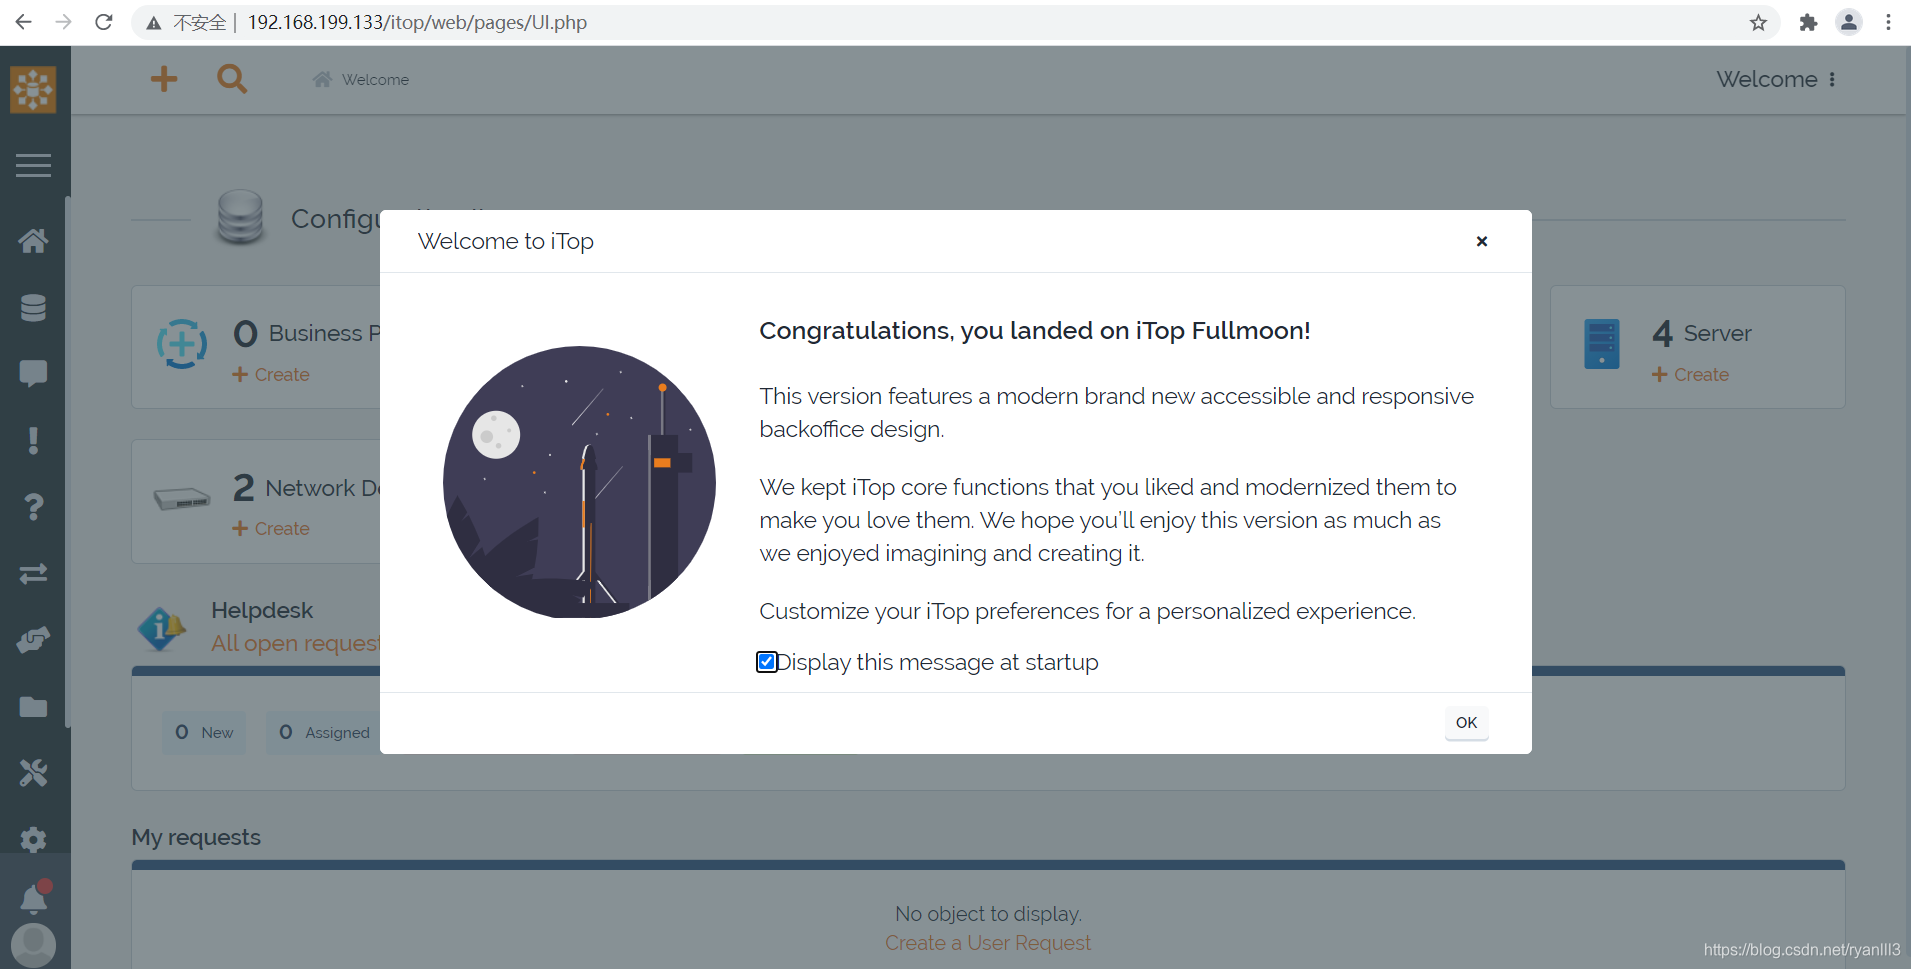
3.0beta版本登录:
ITOP Background Task for SLA/Notification Features
添加计划任务
sudo vim /etc/crontab# 添加如下计划任务到最后一行*/5 * * * * www-data /usr/bin/php /var/www/html/itop/webservices/cron.php --param_file=/etc/itop-cron.params >>/var/log/itop-cron.log 2>&1#保存退出

创建参数文件
添加上面需要的参数文件
sudo vim /etc/itop-cron.params添加下面内容到打开的参数文件中
# This is a parameter file
#
# If a parameter is given both in the file and in the arguments,
# then the value given as argument is retained
## Authentication
auth_user = admin
auth_pwd = admin# My web service
size_min = 20 # Megabytes
time_limit = 40 # Minutes
赋予执行权限
赋予文件属主www-data执行该文件的权限
#赋予文件属主www-data执行该文件的权限
sudo chmod u+x cron.php#重启计划任务
sudo systemctl restart cron
登录浏览器界面,开始你的配置吧。
管理员文档:https://www.itophub.io/wiki/page?id=3_0_0%3Aadmin%3Astart
以下内容可以忽略。
Below official documents/features are for more automation functions on iTop.
Background tasks (automation setup for itop)
Read: https://www.itophub.io/wiki/page?id=3_0_0%3Aadmin%3Acron
n order to operate properly, iTop maintenance operations and asynchronous tasks must be executed on a regular basis. In order to ease the installation, all the background tasks have been grouped to be launched from a single file: webservices/cron.php
The following features rely on the activation of cron.php
-
Notification when a ticket reach a threshold (TTO/TTR) will not happen without this web service to be called. (Task:CheckStopWatchThresholds)
-
Check ticket SLA. Tickets reaching the limits will be passed into Escalation TTO/TTR states.
-
Automated Backups.
-
Automatic deletion of useless attachments and in-line images, created during an object creation or edition which was cancelled (Task: InlineImageGC which runs hourly)
-
Asynchronous emails. By default, this option is disabled. To enable it, set 'email_asynchronous' to 1 in the configuration file (Task: ExecAsyncTask)
-
Many Extensions rely on this cron as well, for exemple: Ticket Creation from Email, Approval Automation, Communication to Customers,…
Edit the crontab to execute the script every 5 minutes:
*/5 * * * * www-data /usr/bin/php /var/www/html/itop/webservices/cron.php --param_file=/etc/itop-cron.params >>/var/log/itop-cron.log 2>&1Do not run cron.php using root user! You must launch the command with the same user that is used by the web server running iTop.
Automated installation
Read: https://www.itophub.io/wiki/page?id=3_0_0%3Aadvancedtopics%3Aautomatic_install