НщЩмдкЪїнЎХЩЩЯЪЙгУДЎПкНјааЪ§ОнЪеЗЂЁЃПЊЗЂЛЗОГвРШЛЪЙгУжЎЧАНщЩмЕФPyCharmБраДpythonДњТыКЭдЖГЬПЊЗЂЃЌШЛКѓЪЙгУQtCreatorБраДQMLЕФGUIНчУцЁЃ
1ЁЂаТНЈЯюФП
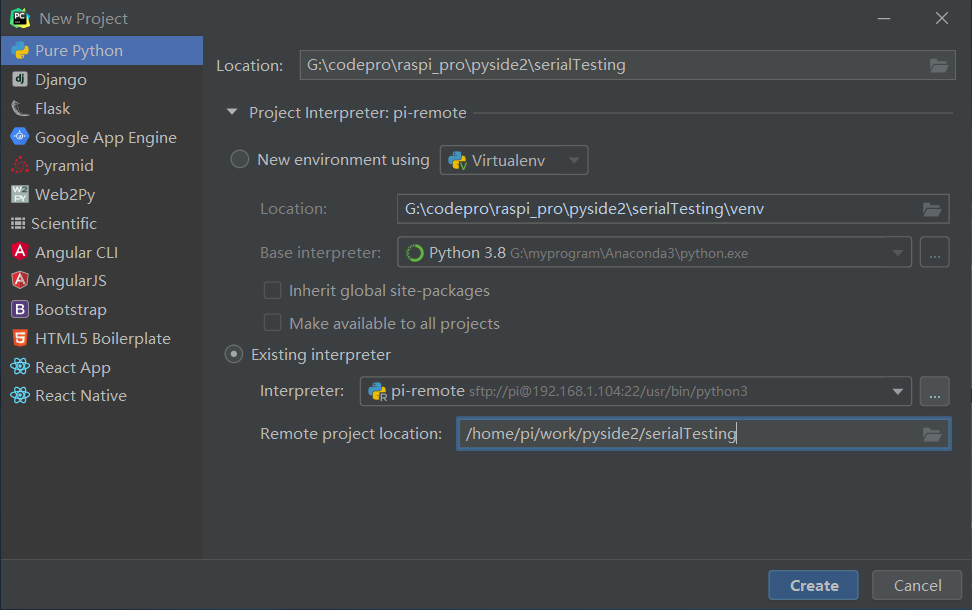
1.1ЁЂаТНЈЙЄГЬ
ДђПЊPyCharmЃЌаТНЈЙЄГЬserialTestingЃЌШчЯТЃК
1.2ЁЂЬэМгpythonжїГЬађ
serialTesting.py жїГЬађШчЯТЃК
import os
import sys
from pathlib import Pathimport serial
import threading
from PySide2 import QtCore
from PySide2.QtCore import Qt, QObject, Slot
from PySide2.QtQml import QQmlApplicationEngine
from PySide2.QtWidgets import QApplicationmserial1 = serial.Serial('/dev/ttyAMA1',115200)
mserial2 = serial.Serial('/dev/ttyAMA2',115200)def Serial1Reading():while True:while mserial1.inWaiting() > 0:s = mserial1.read(mserial1.inWaiting())s = s.decode()if s != "":print("serial1 recv:", s)controler.uart1sig.emit(s)def Serial2Reading():while True:while mserial2.inWaiting()>0:s = mserial2.read(mserial2.inWaiting())s = s.decode()if s != "":print("serail2 recv:",s)controler.uart2sig.emit(s)thread1 = threading.Thread(target=Serial1Reading)
thread2 = threading.Thread(target=Serial2Reading)class Controler(QObject):uart1sig = QtCore.Signal(str)uart2sig = QtCore.Signal(str)def __init__(self):super().__init__()@Slot()def exit(self):sys.exit()@Slot(str)def uart1send(self,s):print("uart1 send:",s)if mserial1.isOpen():mserial1.write(str(s).encode())@Slot(str)def uart2send(self,s):print("uart2 send:",s)if mserial2.isOpen():mserial2.write(str(s).encode())if __name__=='__main__':os.environ["QT_IM_MODULE"] = "qtvirtualkeyboard"a = QApplication(sys.argv)a.setOverrideCursor(Qt.BlankCursor)engine = QQmlApplicationEngine()controler = Controler()context = engine.rootContext()context.setContextProperty("_Controler", controler)engine.load(os.fspath(Path(__file__).resolve().parent / "ui/main.qml"))if not engine.rootObjects():sys.exit(-1)root = engine.rootObjects()[0]controler.uart1sig.connect(root.uart1ReadyRead)controler.uart2sig.connect(root.uart2ReadyRead)thread1.daemon=Truethread2.daemon=Truethread1.start()thread2.start()sys.exit(a.exec_())- ГЬађжаНЈСЂСЫвЛИіControlerРргУгкКЭqmlНчУцНјааНЛЛЅЃЌетбљОЭПЩвдЭЈЙ§НчУцРДНјааДЎПкЪ§ОнЕФЗЂЫЭКЭЯдЪОНгЪеЕНЕФЪ§ОнЃЛ
- ControlerРржагаСНИіаХКХКЭСНИіВлКЏЪ§ЗжБ№гУгкДЎПкЪ§ОнЕФНгЪеКЭДЎПкЪ§ОнЕФЗЂЫЭЙІФмЃЛ
- НЈСЂСЫСНИіЯпГЬРДНјааДЎПкЪ§ОнЖСШЁЃЌЕБгаДЎПкЪ§ОнЕНРДОЭЭЈЙ§аХКХВлЗНЪНЃЌНЋЪ§ОнЯдЪОЕННчУцЃЛ
1.3ЁЂЬэМгНчУцЮФМў
- дкЯюФПжаЬэМгuiЮФМўМаЃЌВЂаТНЈmain.qmlЮФМўЃЌШЛКѓЪЙгУQtCreatorРДБраДНчУцЃК
import QtQuick 2.11 import QtQuick.Window 2.4 import QtQuick.Controls 2.4 import QtQuick.Controls.Styles 1.4 import QtQuick.Extras 1.4 import QtGraphicalEffects 1.0 import QtQuick.VirtualKeyboard 2.1 import QtQuick.VirtualKeyboard.Settings 2.1ApplicationWindow{
    id:rootwidth: 800height: 480visible: truevisibility: Window.FullScreenfunction uart1ReadyRead(string){

//        console.log("uart1 recv:",string)uart1recv.append(string)}function uart2ReadyRead(string){

//        console.log("uart2 recv:",string)uart2recv.append(string)}background: Rectangle{
    color: "black"anchors.fill: parent}Button{
    id:btnexitbackground: Rectangle{
    color: "#a01010"anchors.fill: parentradius:12}width: 48height: 48anchors{
    top: parent.topright: parent.righttopMargin: 8rightMargin: 8}Text {
    text: qsTr("X")anchors.centerIn: parentfont{
    pointSize: 32}color: "white"}onClicked: {
    _Controler.exit();}}Text {
    id: titletext: qsTr("Serial Testing")anchors{
    top:  parent.tophorizontalCenter: parent.horizontalCentertopMargin: 20}font{
    pointSize: 24}color: "#a0a0a0"}TextField {
    id: uart1sendwidth: 200font.pointSize: 12placeholderText: qsTr("uart1 send text")anchors{
    top: title.bottomleft: parent.lefttopMargin: 20leftMargin: 30}color: "#DBD6D6"background: Rectangle{
    anchors.fill: parentcolor: "#303030"}}Button{
    id:btnsendtext: "Send"width: 100height: uart1send.heightanchors{
    left: uart1send.rightleftMargin: 40top: uart1send.top}background: Rectangle{
    anchors.fill: parentcolor: btnsend.pressed ? "#216CB8" : "#a0a0a0"radius: 10}font.pixelSize: 20font.bold: trueonClicked: {
    _Controler.uart1send(uart1send.text)}}TextArea{
    id:uart1recvwidth: 360height: 320anchors{
    top: uart1send.bottomtopMargin: 10left: parent.leftleftMargin: 20}font.pointSize: 12color: "#20a0a0"background: Rectangle{
    anchors.fill: parentcolor: "#202020"}}TextField {
    id: uart2sendwidth: 200font.pointSize: 12placeholderText: qsTr("uart2 send text")anchors{
    top: title.bottomright: btn2send.lefttopMargin: 20rightMargin: 20}color: "#DBD6D6"background: Rectangle{
    anchors.fill: parentcolor: "#303030"}}Button{
    id:btn2sendtext: "Send"width: 100height: uart2send.heightanchors{
    right: parent.rightrightMargin: 30leftMargin: 40top: uart1send.top}background: Rectangle{
    anchors.fill: parentcolor: btn2send.pressed ? "#216CB8" : "#a0a0a0"radius: 10}font.pixelSize: 20font.bold: trueonClicked: {
    _Controler.uart2send(uart2send.text)}}TextArea{
    id:uart2recvwidth: 360height: 320anchors{
    top: btn2send.bottomtopMargin: 10right: parent.rightrightMargin: 20}font.pointSize: 12color: "#a020b0"background: Rectangle{
    anchors.fill: parentcolor: "#202020"}}InputPanel {
    id: inputPanelz: 99x: 50y: parent.heightwidth: parent.width-100states: State {
    name: "visible"when: inputPanel.activePropertyChanges {
    target: inputPanely: parent.height - inputPanel.height}}transitions: Transition {
    from: ""to: "visible"reversible: trueParallelAnimation {
    NumberAnimation {
properties: "y"duration: 250easing.type: Easing.InQuart}}}}}/*##^## Designer {D{i:0;formeditorZoom:0.75;height:480;width:800} } ##^##*/НчУцЭъГЩКѓШчЯТЭМЃК

- НчУцжажївЊНЈСЂСЫСНИіЗЂЫЭКЭНгЪеДАПкЃЌШЛКѓПЩвдВтЪдЯђЖдЗНЗЂЫЭЪ§ОнКЭЪ§ОнЕФНгЪеЯдЪОЁЃ
2ЁЂжДааГЬађ
2.1ЁЂЩЯДЋГЬађЕНЪїнЎХЩ
дкЙЄГЬЩЯгвМќНЋетИіЯюФПЮФМўЩЯДЋЕНЪїнЎХЩжаЁЃ
2.2ЁЂжДааГЬађ
ЩЯДЋКѓЃЌдкЪїнЎХЩЖдгІЮФМўМажаЃЌжДааШчЯТУќСюжДааГЬађЃК
python3 serialTesting.py
жДааКѓПЩвдПДЕНЯдЪОШчЯТЃК
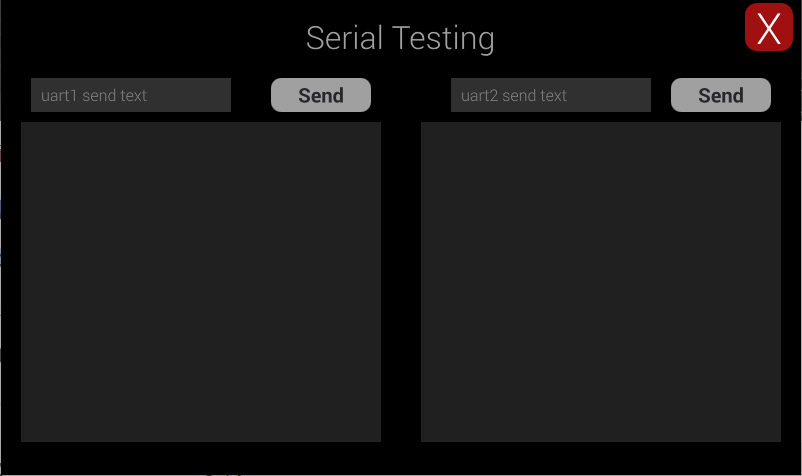
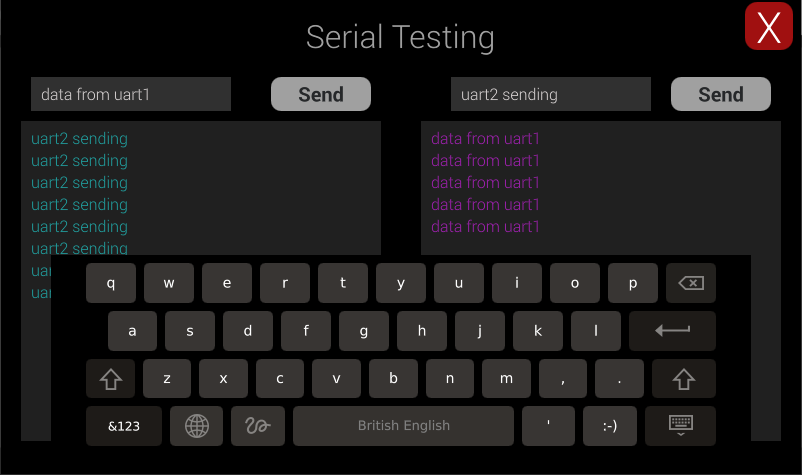
ШЛКѓПЩвддкЪфШыПђжаЗжБ№ЪфШыЪ§ОнЃЌШЛКѓЕуЛїЁАSendЁБЗЂЫЭЃЌетбљОЭПЩвдВтЪдДЎПк1КЭДЎПк2МфЪ§ОнЕФЗЂЫЭКЭНгЪеЃК
- ЭъећДњТыЃКGitHub
- ЪгЦЕаЇЙћЃК