下面还有静态代理和动态代理
1.构造注入
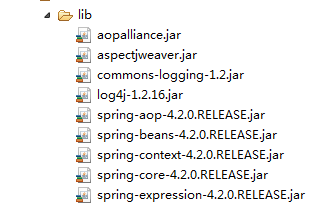
lib包:
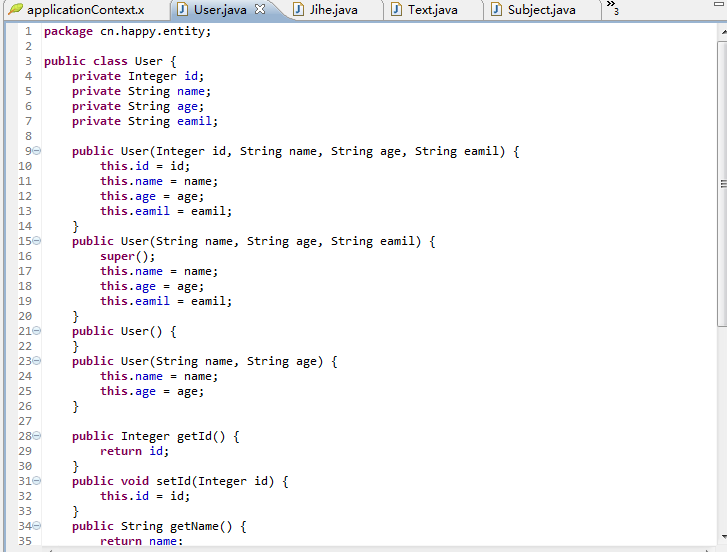
在entity包下新建一个实体类User
代码:


1 package cn.happy.entity; 2 3 public class User { 4 private Integer id; 5 private String name; 6 private String age; 7 private String eamil; 8 9 public User(Integer id, String name, String age, String eamil) {10 this.id = id;11 this.name = name;12 this.age = age;13 this.eamil = eamil;14 }15 public User(String name, String age, String eamil) {16 super();17 this.name = name;18 this.age = age;19 this.eamil = eamil;20 }21 public User() {22 }23 public User(String name, String age) {24 this.name = name;25 this.age = age;26 }27 28 public Integer getId() {29 return id;30 }31 public void setId(Integer id) {32 this.id = id;33 }34 public String getName() {35 return name;36 }37 public void setName(String name) {38 this.name = name;39 }40 public String getAge() {41 return age;42 }43 public void setAge(String age) {44 this.age = age;45 }46 public String getEamil() {47 return eamil;48 }49 public void setEamil(String eamil) {50 this.eamil = eamil;51 }52 @Override53 public String toString() {54 return "User [id=" + id + ", name=" + name + ", age=" + age55 + ", eamil=" + eamil + "]";56 }57 58 }
在applicationContext.xml里面写
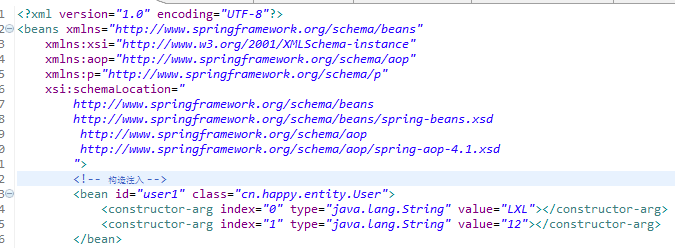
约束-头:
别忘记带这个不然会报错的applicationContext.xml里面!
1 <?xml version="1.0" encoding="UTF-8"?> 2 <beans xmlns="http://www.springframework.org/schema/beans" 3 xmlns:xsi="http://www.w3.org/2001/XMLSchema-instance" 4 xmlns:aop="http://www.springframework.org/schema/aop" 5 xmlns:p="http://www.springframework.org/schema/p" 6 xsi:schemaLocation=" 7 http://www.springframework.org/schema/beans 8 http://www.springframework.org/schema/beans/spring-beans.xsd 9 http://www.springframework.org/schema/aop10 http://www.springframework.org/schema/aop/spring-aop-4.1.xsd11 ">
代码:
1 <bean id="user1" class="cn.happy.entity.User">2 <constructor-arg index="0" type="java.lang.String" value="LXL"></constructor-arg>3 <constructor-arg index="1" type="java.lang.String" value="12"></constructor-arg>4 </bean>
测试类:Text
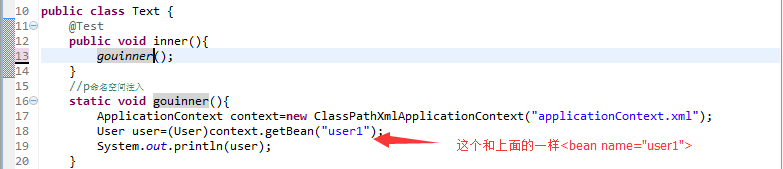
代码:
1 public class Text { 2 @Test 3 public void inner(){ 4 gouinner(); 5 } 6 //p命名空间注入 7 static void gouinner(){ 8 ApplicationContext context=new ClassPathXmlApplicationContext("applicationContext.xml"); 9 User user=(User)context.getBean("user1");10 System.out.println(user);11 }
结果:
2.P命名空间注入
这个实体类和上面的一样就演示了
在applicationContext.xml里面写

代码:
1 <!-- p命名空间注入 -->2 <bean id="user2" class="cn.happy.entity.User" p:name="你的肉" p:age="1" p:eamil="niderou@123.com"/>3
测试类Text:
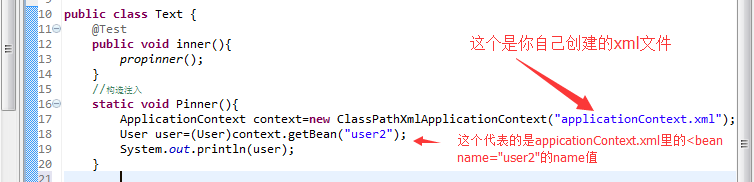
代码:
1 @Test 2 public void inner(){ 3 Pinner(); 4 } 5 //构造注入 6 static void Pinner(){ 7 ApplicationContext context=new ClassPathXmlApplicationContext("applicationContext.xml"); 8 User user=(User)context.getBean("user2"); 9 System.out.println(user);10 }
结果:

3.注入集合的属性
List
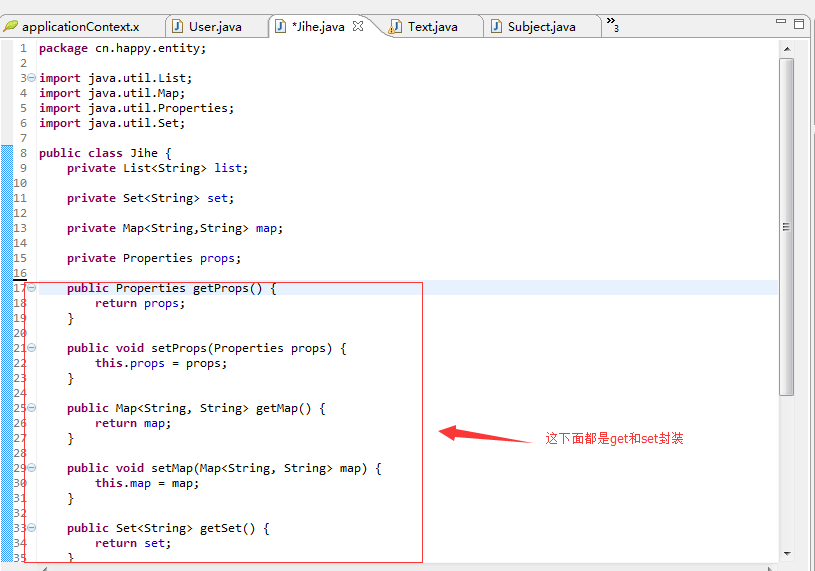
实体类Jihe:
代码:
1 package cn.happy.entity; 2 3 import java.util.List; 4 import java.util.Map; 5 import java.util.Properties; 6 import java.util.Set; 7 8 public class Jihe { 9 private List<String> list;10 11 private Set<String> set;12 13 private Map<String,String> map;14 15 private Properties props;16 17 public Properties getProps() {18 return props;19 }20 21 public void setProps(Properties props) {22 this.props = props;23 }24 25 public Map<String, String> getMap() {26 return map;27 }28 29 public void setMap(Map<String, String> map) {30 this.map = map;31 }32 33 public Set<String> getSet() {34 return set;35 }36 37 public void setSet(Set<String> set) {38 this.set = set;39 }40 41 public List<String> getList() {42 return list;43 }44 45 public void setList(List<String> list) {46 this.list = list;47 }48 49 }
在applicationContext.xml里面写
代码:
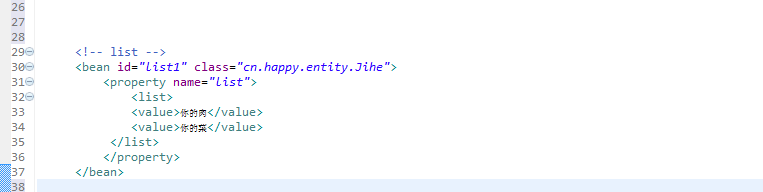
1 <!-- list -->2 <bean id="list1" class="cn.happy.entity.Jihe">3 <property name="list">4 <list>5 <value>你的肉</value>6 <value>你的菜</value>7 </list> 8 </property> 9 </bean>
测试类Text:
代码:
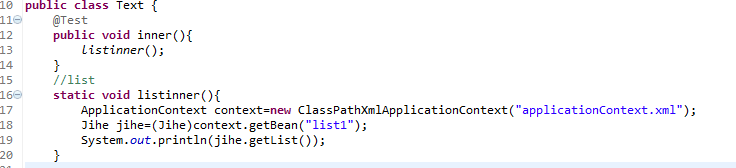
1 public class Text { 2 @Test 3 public void inner(){ 4 listinner(); 5 } 6 //list 7 static void listinner(){ 8 ApplicationContext context=new ClassPathXmlApplicationContext("applicationContext.xml"); 9 Jihe jihe=(Jihe)context.getBean("list1");10 System.out.println(jihe.getList());11 }
结果:

Set:
实体类和List的实体类一样
在applicationContext.xml里面写
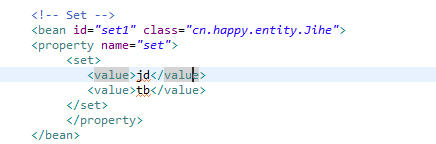
代码:
1 2 <!-- Set --> 3 <bean id="set1" class="cn.happy.entity.Jihe"> 4 <property name="set"> 5 <set> 6 <value>jd</value> 7 <value>tb</value> 8 </set> 9 </property>10 </bean>
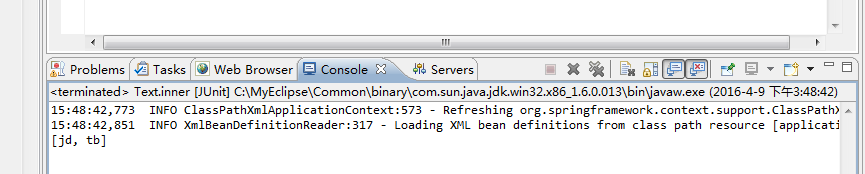
测试类Text:

代码:
1 @Test 2 public void inner(){ 3 setinner(); 4 } 5 6 //set 7 static void setinner(){ 8 ApplicationContext context=new ClassPathXmlApplicationContext("applicationContext.xml"); 9 Jihe jihe=(Jihe)context.getBean("set1");10 System.out.println(jihe.getSet());11 }
结果:
Map
实体类和List的也一样
在applicationContext.xml里面写

代码:
1 <!-- map -->2 <bean id="map1" class="cn.happy.entity.Jihe">3 <property name="map">4 <map>5 <entry key="football" value="足球"></entry>6 <entry key="basketball" value="篮球"></entry>7 </map> 8 </property>9 </bean>
测试类Text:
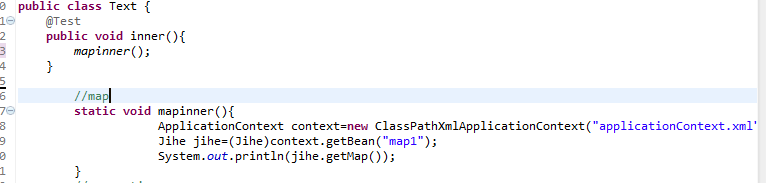
代码:
1 public class Text { 2 @Test 3 public void inner(){ 4 mapinner(); 5 } 6 7 //map 8 static void mapinner(){ 9 ApplicationContext context=new ClassPathXmlApplicationContext("applicationContext.xml");10 Jihe jihe=(Jihe)context.getBean("map1");11 System.out.println(jihe.getMap());12 }
结果:

properties
实体类和List的也一样
在applicationContext.xml里面写
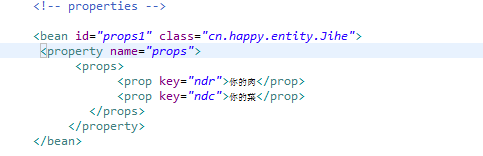
代码:
1 <!-- properties --> 2 3 <bean id="props1" class="cn.happy.entity.Jihe"> 4 <property name="props"> 5 <props> 6 <prop key="ndr">你的肉</prop> 7 <prop key="ndc">你的菜</prop> 8 </props> 9 </property>10 </bean>
测试类Text:
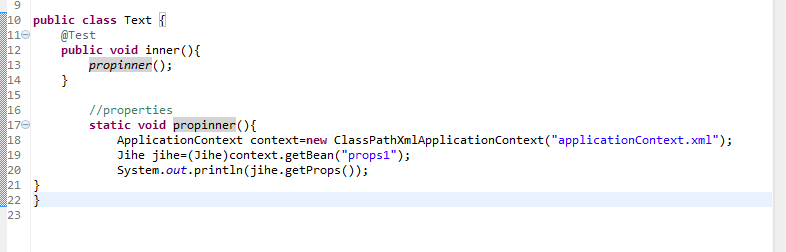
代码:
1 public class Text { 2 @Test 3 public void inner(){ 4 propinner(); 5 } 6 7 //properties 8 static void propinner(){ 9 ApplicationContext context=new ClassPathXmlApplicationContext("applicationContext.xml");10 Jihe jihe=(Jihe)context.getBean("props1");11 System.out.println(jihe.getProps());12 }
结果:

-------------------------------------------------------------------------------------------------------------------
接下来是!!!
静态代理
代理模式 (静态代理)
接口 :方法
---->RealClass:接口
---->ProxyClass:接口
private 接口类型 接口变量;
public void 同名方法(){
syso("增强处理");
接口变量.同名方法();
}
列表
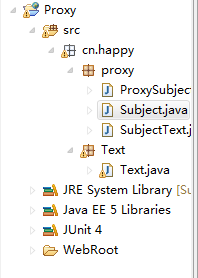
创建一个接口Subject:

代码:
1 package cn.happy.proxy;2 3 public interface Subject {4 String quest();5 }
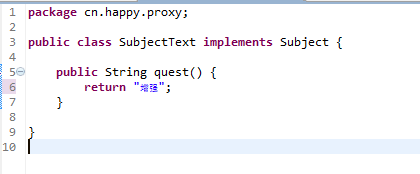
在创建一个SubjectText类继承Subject:
代码:
1 package cn.happy.proxy;2 3 public class SubjectText implements Subject {4 5 public String quest() {6 return "增强";7 }8 9 }
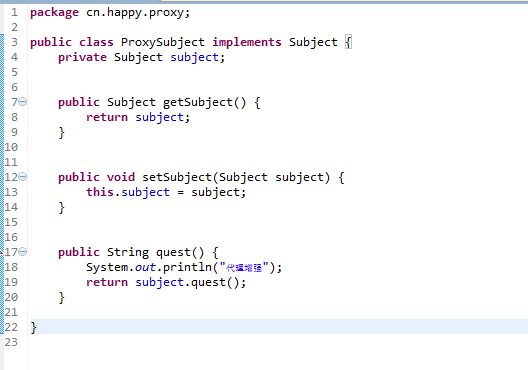
在创建一个代理类ProxySubject同样继承Subject:
代码:
1 package cn.happy.proxy; 2 3 public class ProxySubject implements Subject { 4 private Subject subject; 5 6 7 public Subject getSubject() { 8 return subject; 9 }10 11 12 public void setSubject(Subject subject) {13 this.subject = subject;14 }15 16 17 public String quest() {18 System.out.println("代理增强");19 return subject.quest();20 }21 22 }
测试类Text:

代码:
1 package cn.happy.Text; 2 3 4 import java.lang.reflect.InvocationHandler; 5 import java.lang.reflect.Method; 6 import java.lang.reflect.Proxy; 7 8 import org.junit.Test; 9 10 import cn.happy.proxy.ProxySubject;11 import cn.happy.proxy.Subject;12 import cn.happy.proxy.SubjectText;13 14 public class Text {15 @Test16 public void inner(){17 Subject sub=new SubjectText();//被代理的对象18 ProxySubject proxy=new ProxySubject();//代理对象19 proxy.setSubject(sub);20 String quest = proxy.quest();21 System.out.println(quest);22 }23 }24
结果:
动态代理
proxy包里的类和静态代理的一样只是测试类换了
测试类Text:
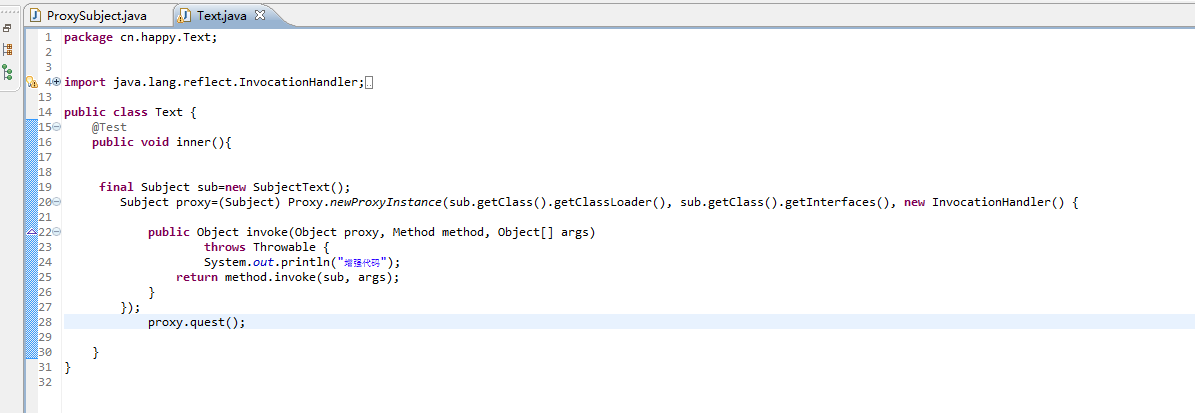
代码:
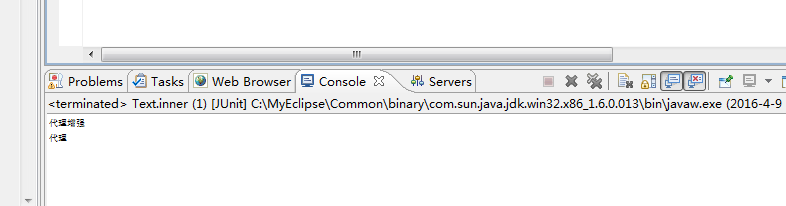
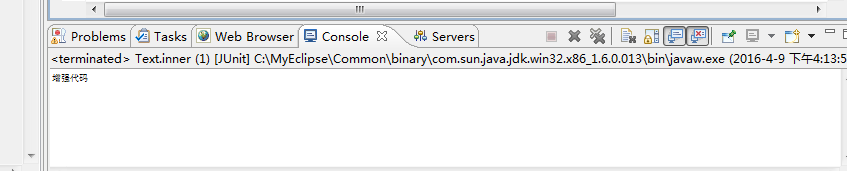
1 package cn.happy.Text; 2 3 4 import java.lang.reflect.InvocationHandler; 5 import java.lang.reflect.Method; 6 import java.lang.reflect.Proxy; 7 8 import org.junit.Test; 9 10 import cn.happy.proxy.ProxySubject;11 import cn.happy.proxy.Subject;12 import cn.happy.proxy.SubjectText;13 14 public class Text {15 @Test16 public void inner(){17 18 19 final Subject sub=new SubjectText();20 Subject proxy=(Subject) Proxy.newProxyInstance(sub.getClass().getClassLoader(), sub.getClass().getInterfaces(), new InvocationHandler() {21 22 public Object invoke(Object proxy, Method method, Object[] args)23 throws Throwable {24 System.out.println("增强代码");25 return method.invoke(sub, args);26 }27 });28 proxy.quest();29 30 }31 }
结果:
- 1楼浮夸半生『
- 666,已收藏
- Re: 京灬小涛
- @浮夸半生『,一天不装!你浑身难受.....
