Window������ɶ������Ͳ��ϻ��ˣ��������������Ҳ���ϻ��ˣ���������ƪ����ֻ������������vs2012�д���window����ľ�����ϣ����������������
���⣺���ڱ�д��������вο��� Professional C# 2012 and .NET 4.5
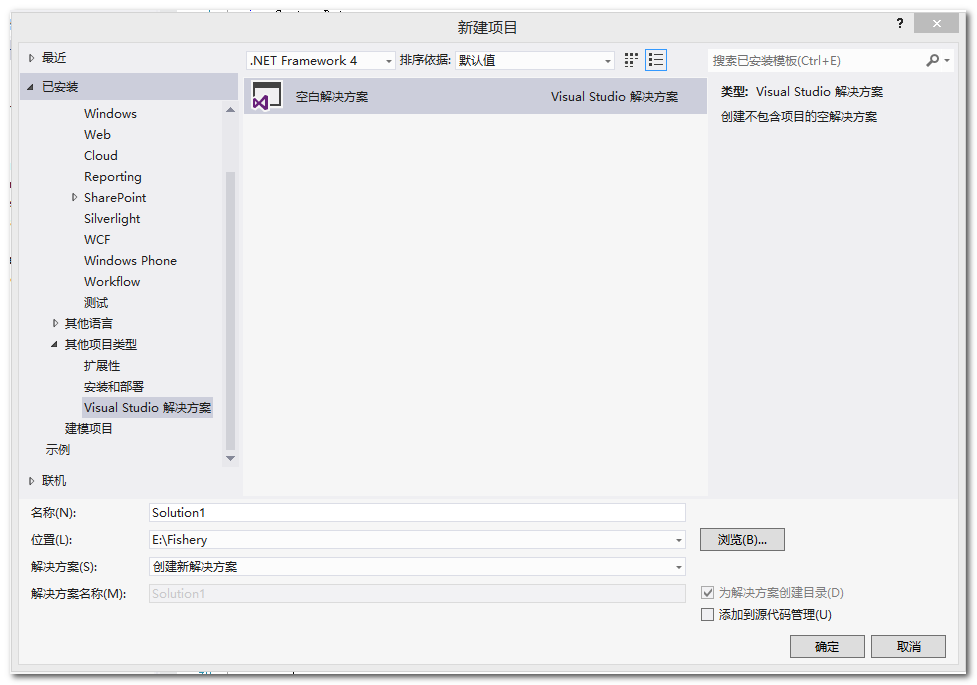
��һ��������һ�������������MonitoringFish
�������ϻ�����϶��ᣬ���ֱ��ȥ��һ���������IJ����������
����
�ڶ������ӷ����õ������ĿSensor
���������ļ�QuoteException.cs��SensorFish.cs
������������Ĺ��ܲ�����Ҫ����Ҫ�Ǹ��������õģ���Ҳ����д�Լ������ļ������߸ɴҪ��ֱ���ڷ��������д������
����QuoteException.cs�������£�
����


1 using System; 2 using System.Collections.Generic; 3 using System.Linq; 4 using System.Text; 5 6 namespace Sensor 7 { 8 /// <summary> 9 /// �Զ����쳣10 /// </summary>11 [Serializable]12 class QuoteException : Exception13 {14 public QuoteException() { }15 public QuoteException(string message) : base(message) { }16 public QuoteException(string message, Exception inner) : base(message, inner) { }17 protected QuoteException(18 System.Runtime.Serialization.SerializationInfo info,19 System.Runtime.Serialization.StreamingContext context)20 : base(info, context) { }21 }22 }
����SensorFish.cs�������£�
����
1 using System; 2 using System.Collections.Generic; 3 using System.Linq; 4 using System.Text; 5 using System.IO; 6 using System.Net; 7 using System.Net.Sockets; 8 using System.Threading.Tasks; 9 using System.Diagnostics.Contracts; 10 using System.Diagnostics; 11 12 namespace Sensor 13 { 14 /// <summary> 15 /// ��������� 16 /// </summary> 17 public class SensorFish 18 { 19 20 21 private TcpListener listener; 22 private int port;//�˿ں� 23 private string filename; 24 private List<string> quotes; 25 private Random random; 26 private Task listenerTask; 27 28 /// <summary> 29 /// ������������ 30 /// </summary> 31 public SensorFish() 32 : this("quotes.txt") 33 { 34 35 } 36 37 /// <summary> 38 /// ������������ 39 /// </summary> 40 /// <param name="fileName"></param> 41 public SensorFish(string fileName) 42 : this(fileName, 7890) 43 { 44 45 } 46 47 /// <summary> 48 /// ������������ 49 /// </summary> 50 /// <param name="fileName"></param> 51 /// <param name="port"></param> 52 public SensorFish(string fileName, int port) 53 { 54 //Contract.Requires<ArgumentNullException>(fileName != null); 55 //Contract.Requires<ArgumentException>(port >= IPEndPoint.MinPort && port <= IPEndPoint.MaxPort); 56 this.filename = fileName; 57 this.port = port; 58 } 59 60 protected void ReadQuotes() 61 { 62 try 63 { 64 quotes = File.ReadAllLines(filename).ToList(); 65 if (quotes.Count == 0) 66 { 67 throw new QuoteException("quotes file is empty"); 68 } 69 random = new Random(); 70 } 71 catch (IOException ex) 72 { 73 throw new QuoteException("I/O Error", ex); 74 } 75 } 76 77 protected string GetRandomQuoteOfTheDay() 78 { 79 int index = random.Next(0, quotes.Count); 80 return quotes[index]; 81 } 82 83 84 /// <summary> 85 /// �������� 86 /// </summary> 87 public void Start() 88 { 89 ReadQuotes(); //��ȡ�ļ� 90 listenerTask = Task.Factory.StartNew(Listener, TaskCreationOptions.LongRunning);//�첽�������� 91 } 92 93 private void Listener() 94 { 95 try 96 { 97 IPAddress ipAddress = IPAddress.Any;//�ṩһ��ip��ַ��ֻ�Ƿ�����Ӧ������������ӿ��ϵĿͻ��˻�����ֶ�Ϊֻ�� 98 listener = new TcpListener(ipAddress, port);//ָ���ڱ��ص�IP��ַ�Ͷ˿ں��������Ƿ��д�������ӳ��� 99 listener.Start();//��ʼ�����������������100 while (true)101 {102 Socket clientSocket = listener.AcceptSocket();//���ܹ������������103 string message = GetRandomQuoteOfTheDay();104 var encoder = new UnicodeEncoding();105 byte[] buffer = encoder.GetBytes(message);106 clientSocket.Send(buffer, buffer.Length, 0);//��ָ�����ֽ������͵������ӵ�Socket107 clientSocket.Close();//�ر�Socket�����ͷ����еĹ�������Դ108 }109 }110 catch (SocketException ex)111 {112 Trace.TraceError(string.Format("QuoteServer {0}", ex.Message));113 throw new QuoteException("socket error", ex);114 }115 }116 117 118 /// <summary>119 /// ֹͣ����120 /// </summary>121 public void Stop()122 {123 listener.Stop();//�ر�����124 }125 126 /// <summary>127 /// �ݶ�����128 /// </summary>129 public void Suspend()130 {131 listener.Stop();132 }133 134 /// <summary>135 /// ���¿�ʼ����136 /// </summary>137 public void Resume()138 {139 Start();140 }141 142 /// <summary>143 /// ����144 /// </summary>145 public void RefreshSensor()146 {147 ReadQuotes();148 }149 }150 }
����
���������ӿ���̨Ӧ�ó���SensorServiceTest
��������Ҫ˵��Ϊʲô�����������̨�����ˡ�
������Ϊ�ڿ���������Ҫ��Sensor��Ŀ���е��ԣ�Ϊ�˷����� SensorServiceTest���������⣬��Ϊ����ʹ�á��ڵ��IJ��ij����н��������������Ա���֤Sensor�еĸ�������Ƿ�������
����
����ֱ���������м�����룬���£�
����
1 /// <summary> 2 /// ������Գ��� 3 /// </summary> 4 class Program 5 { 6 static void Main(string[] args) 7 { 8 9 var qs = new SensorFish("Quotes.txt", 4567);10 qs.Start();11 Console.WriteLine("Hit return to exit");12 Console.ReadLine();13 qs.Stop();14 }15 }
���IJ�����wpfӦ�ó�����ĿServiceTestClicent
����������ϵ����������������Sensor��Ŀ����ע��������Ŀ����ҳ�ġ����á�ѡ��ļ�ֵ����ͼ��ʾ
����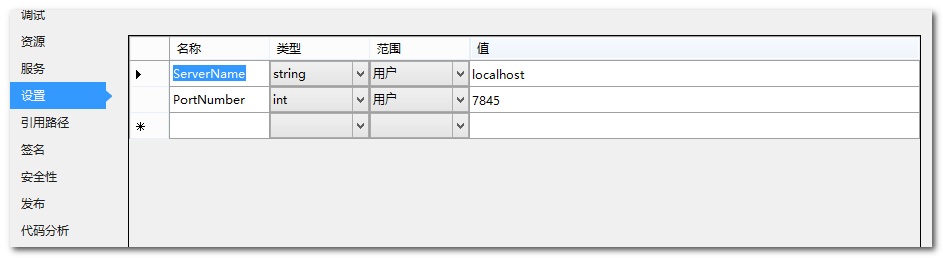
���������Ŀ���Ҵ�����һ��MainWindow.xaml�ļ���QuoteInformation.cs�����ڿͻ��˳���ĵ��ã���Ȼ�ڴ���wpf��Ŀʱ���Զ�������app.config���DZ��룩��App.xaml�����룩
����xaml�ļ��������£�
����
1 <Window x:Class="ServiceTestClicent.MainWindow" 2 xmlns="http://schemas.microsoft.com/winfx/2006/xaml/presentation" 3 xmlns:x="http://schemas.microsoft.com/winfx/2006/xaml" 4 Title="MainWindow" Height="200" Width="300"> 5 <Grid> 6 <Grid.RowDefinitions> 7 <RowDefinition Height="*" MinHeight="30"></RowDefinition> 8 <RowDefinition Height="3*"></RowDefinition> 9 </Grid.RowDefinitions>10 11 <Button Margin="3" VerticalAlignment="Stretch" Grid.Row="0" Background="{DynamicResource {x:Static SystemColors.ActiveCaptionBrushKey}}"12 IsEnabled="{Binding EnableRequset}" Click="OnGetQuote" >Get Quote</Button>13 <TextBlock Margin="6" Grid.Row="1" TextWrapping="Wrap" Text="{Binding Quote}" />14 </Grid>15 </Window>
����
1 using System; 2 using System.Net.Sockets; 3 using System.Text; 4 using System.Windows; 5 using System.Windows.Input; 6 7 namespace ServiceTestClicent 8 { 9 /// <summary>10 /// MainWindow.xaml �Ľ�����11 /// </summary>12 public partial class MainWindow : Window13 {14 private QuoteInformation quoteInfo = new QuoteInformation();15 public MainWindow()16 {17 InitializeComponent();18 this.DataContext = quoteInfo;19 }20 21 private async void OnGetQuote(object sender, RoutedEventArgs e)22 {23 const int bufferSize = 1024;24 Cursor currentCursor = this.Cursor; //�����������ָ���ͼ��25 quoteInfo.EnableRequest = false;26 27 string serverName = Properties.Settings.Default.ServerName; //url28 int port = Properties.Settings.Default.PortNumber;//�˿�29 var client = new TcpClient();//30 NetworkStream stream = null;31 try32 {33 await client.ConnectAsync(serverName, port);34 stream = client.GetStream();35 byte[] buffer = new Byte[bufferSize];36 int received = await stream.ReadAsync(buffer, 0, bufferSize);37 if (received <= 0)38 {39 return;40 }41 42 quoteInfo.Quote = Encoding.Unicode.GetString(buffer).Trim('\0');43 44 }45 catch (SocketException ex)46 {47 MessageBox.Show(ex.Message, "Error Quote of the day", MessageBoxButton.OK, MessageBoxImage.Error);48 }49 finally50 {51 if (stream != null)52 {53 stream.Close();54 }55 56 if (client.Connected)57 {58 client.Close();59 }60 this.Cursor = currentCursor;61 quoteInfo.EnableRequest = true;62 }63 64 65 }66 }67 68 69 70 }
����QuoteInformation.cs���������
����
1 using System; 2 using System.Collections.Generic; 3 using System.ComponentModel; 4 using System.Linq; 5 using System.Runtime.CompilerServices; 6 using System.Text; 7 8 namespace ServiceTestClicent 9 {10 class QuoteInformation : INotifyPropertyChanged11 {12 public QuoteInformation()13 {14 EnableRequest = true;15 }16 private string quote;17 public string Quote18 {19 get20 {21 return quote;22 }23 internal set24 {25 SetProperty(ref quote, value);26 }27 }28 29 private bool enableRequest;30 public bool EnableRequest31 {32 get33 {34 return enableRequest;35 }36 internal set37 {38 SetProperty(ref enableRequest, value);39 }40 }41 42 private void SetProperty<T>(ref T field, T value, [CallerMemberName] string propertyName = "")43 {44 if (!EqualityComparer<T>.Default.Equals(field, value))45 {46 field = value;47 var handler = PropertyChanged;48 if (handler != null)49 {50 handler(this, new PropertyChangedEventArgs(propertyName));51 }52 }53 }54 55 public event PropertyChangedEventHandler PropertyChanged;56 }57 }
��������ĿSensorServiceTestClient��ServiceTestClicent���Ҽ�-���ɺ���ڸ�����Ŀ�е�Debug�ļ������ҵ�exe��ִ���ļ�,��������SensorServiceTestClient.exeȻ������ServiceTestClicent.exe
��������ServiceTestClicent.exe����ͼ��ʾ����ʾ��������������
����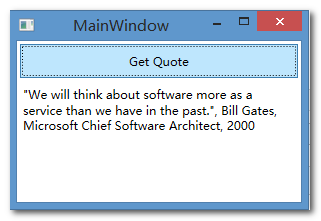
�����������Թ����������Ϳ��������ı�дwindows������
���岽���ӷ�����ĿSensorFishService
��������һ��������FisheryMonitoring.cs
����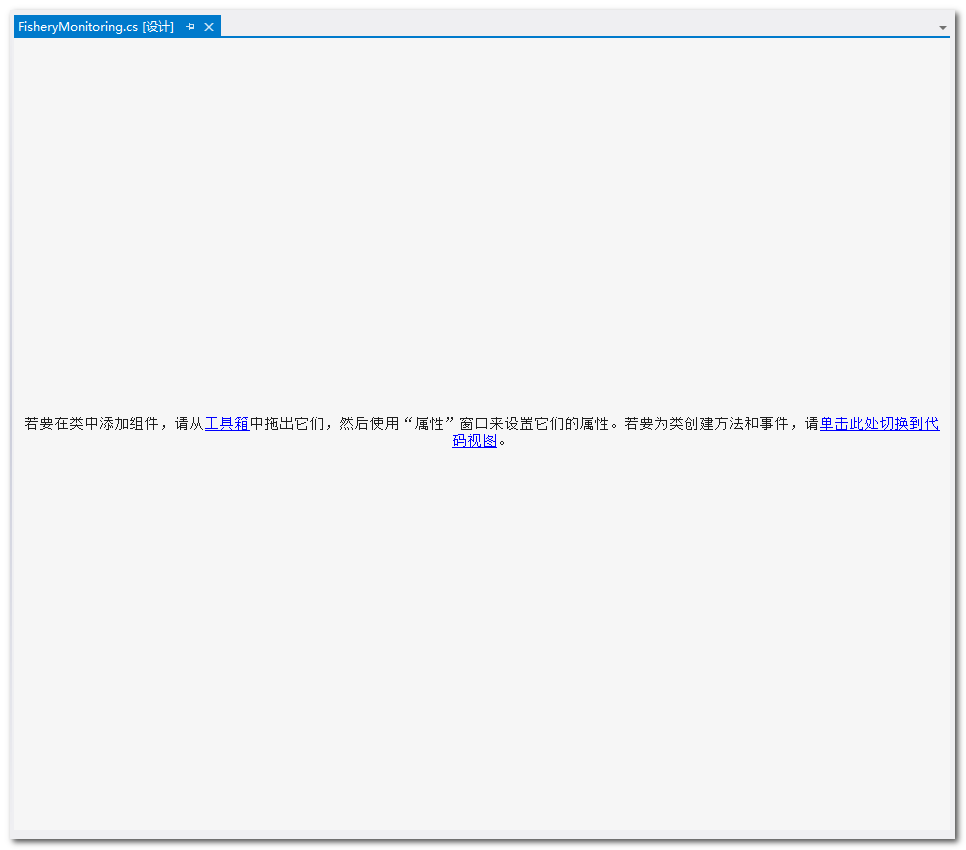
�����ڿհ״����һ�£��Ա�ѡ�и�ѡ���Ȼ������Դ��ڿ�����ͼ��ʾ
����
����
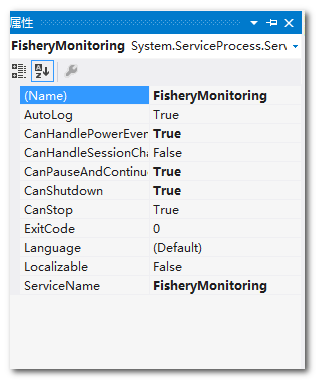
������Name����Ӧ���Ƿ����������
����AutoLogָ����������ֹͣ������¼��Զ�д���¼���־��
����CanPauseAndContinue��CanShutdown��CanStopָ��������Դ�����ͣ���������رպ�ֹͣ���������
����ServiceName��д��ע����еķ�������ƣ�ʹ��������ƿ��Կ��Ʒ���
����CanHandleSessionChangeEventȷ�������Ƿ��ܴ����ն˷������Ự�еĸı��¼�
����CanHandlePowerEventѡ��������ڱʼDZ����Ի��ƶ��豸�ϵķ�����Ч������������ѡ�����Ϳ�����Ӧ�͵�Դ�¼�������Ӧ�ĸı�������Ϊ����Դ�¼����������͡���Դ״̬�ı䣨��ΪA/C��Դ֮����л������غ�Ϊ�ϵ�
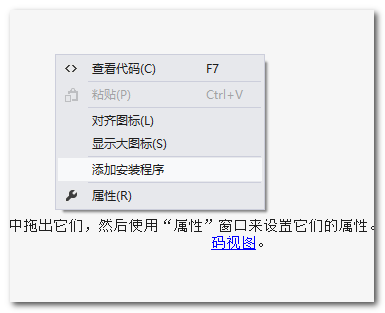
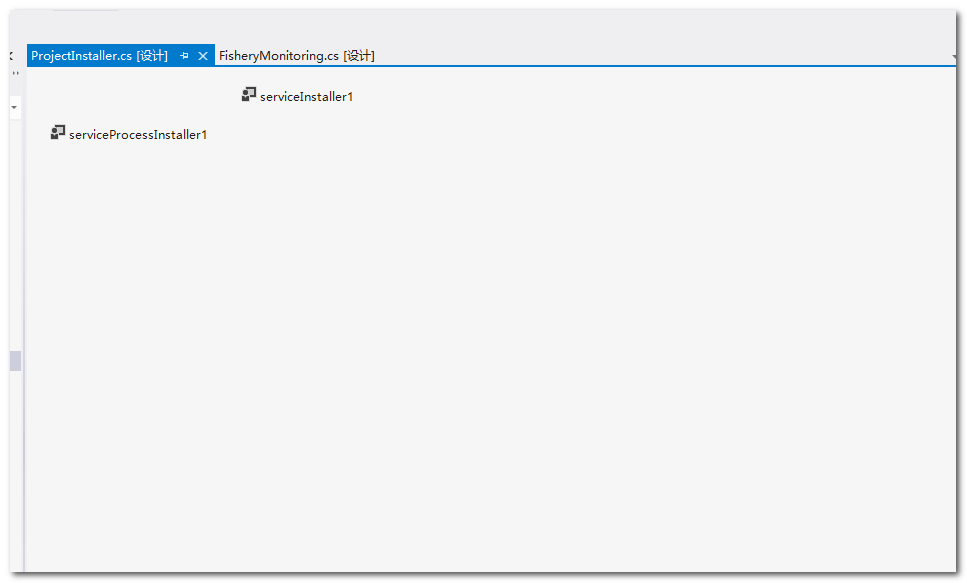
�������úø������Ժ��ڷ������ѡ����Ҽ���ѡ�����Ӱ�װ����
����
����
����
����ѡ�� ServiceProcessInstaller1������ѡ�
����
��������һ�� Account�����������ֵ����ΪUser��ô�ڰ�װ�����ʱ���Ҫָ��һ��������˻���ֻ������˻�����ʹ��������������IJ��꣬�������������
����ѡ��serviceInstaller1��������ѡ�
����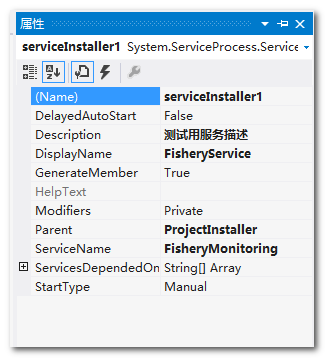
��������һ�¸������ԣ���λ���������ж������Ե����ã���ͼ��ϵͳ�����еĽ�ͼ
����
����
����ֵ��ע����� ServiceName������������ᵽ��ServiceName��ͬ��������Ϊʲô
���������ص�IJ��ֽ������
��Ȼ����ͷ�IJ��ֻ��ں�ߣ����λ����ע��
��������SensorFishService��Ŀ��������Program.cs
�����������ģ���Ϊ�����˳�����ڣ��������ֲ��ܱ䣬��������
1 static class Program 2 { 3 static void Main(string[] args) 4 { 5 6 ServiceBase[] ServicesToRun; 7 ServicesToRun = new ServiceBase[]{ 8 new FisheryMonitoring() 9 };10 11 //������Ӧ12 ServiceBase.Run(ServicesToRun); 13 // ServiceBase.Run(new FisheryMonitoring()); 14 }15 }
��������windows�����д�Ѿ���ɣ���һƪ���߽����ܰ�װ��ж�ط���Ĺ���
ע�����λ��������������Ŀ֮������ú���Ŀ�ϵij������ã��ܼ�
��Դ�룺http://files.cnblogs.com/netqq/Fishery.zip
- 1¥���S
- mark
