上次摸Google Android的模拟器已经是去年这玩意刚发布没多久的时候了。嘛,本来我也没太着急在Android上做开发。这个学期开学之后,我们这边的毕业设计也正式开始了。
邵栋老师带了几个组是做Android应用程序开发的课题的。正好附近两个宿舍都有人是做这个课题的。语仔他们组想做的是一个*个人理财软件*,之前就在国内的一些Android开发论坛到处看啊找啊,在学习相关技术知识。不过前几天碰到了很奇怪的NullPointerException,问我怎么办。这样我也就又摸出Android来玩了。
正好3月3号Google更新了Android SDK到m5-rc15,而我之前用的SDK都不记得是m多少的了(m3?),干脆就连SDK和Eclipse+ADT都一并更新过来。
到Eclipse官网去看,现在的版本已经到3.3.2了。正好连机上的别的Eclipse也一起更新。先是下了Eclipse Classic 3.3.2,结果到安装ADT的时候出现require "org.eclipse.wst.sse.ui"的错误。很明显是要装WTP了。以前装过的老版本的ADT明明不需要的……
装WTP就得连什么GEF啊之类的一堆东西都分别装上。嫌麻烦,就重新下了个Eclipse IDE for Java Developers。然后安装ADT就没问题了。
顺带记下官网对于安装ADT插件的说明:
引用
To download and install the ADT plugin, follow the steps below.
[list]Start Eclipse, then select Help > Software Updates > Find and Install.... In the dialog that appears, select Search for new features to install and press Next. Press New Remote Site.In the resulting dialog box, enter a name for the remote site (e.g. Android Plugin) and enter this as its URL:
Press OK.You should now see the new site added to the search list (and checked). Press Finish. In the subsequent Search Results dialog box, select the checkbox for Android Plugin > Developer Tools. This will check both features: "Android Developer Tools", and "Android Editors". The Android Editors feature is optional, but recommended. If you choose to install it, you need the WST plugin mentioned earlier in this page. Now press Next.
Read the license agreement and then select Accept terms of the license agreement, if appropriate. Press Next. Press Finish.The ADT plugin is not signed; you can accept the installation anyway by pressing Install All. Restart Eclipse.After restart, update your Eclipse preferences to point to the SDK directory:
1. Select Window > Preferences... to open the Preferences panel. (Mac OS X: Eclipse > Preferences)
2. Select Android from the left panel.
3. For the SDK Location in the main panel, press Browse... and locate the SDK directory.
4. Press Apply, then OK.[/list]
[list]
https://dl-ssl.google.com/android/eclipse/
Press OK.
1. Select Window > Preferences... to open the Preferences panel. (Mac OS X: Eclipse > Preferences)
2. Select Android from the left panel.
3. For the SDK Location in the main panel, press Browse... and locate the SDK directory.
4. Press Apply, then OK.[/list]
===========================================================================
关于某NPE问题
OK,东西都装上了,开始解决问题。之前语仔遇到的NPE是基于这样的代码:
/src/com/my/MyActivity.java:
package com.my;import android.app.Activity;import android.os.Bundle;import android.view.View;import android.view.View.OnClickListener;import android.widget.Button;import android.widget.EditText;import android.widget.TextView;public class MyActivity extends Activity { private EditText edAdmin = null; private EditText edPassword = null; private Button confirm = null; /** Called when the activity is first created. */ @Override public void onCreate(Bundle icicle) { super.onCreate(icicle); setContentView(R.layout.main); edAdmin = (EditText) findViewById(R.id.Admin); edPassword = (EditText) findViewById(R.id.Password); confirm = (Button) findViewById(R.id.confirm); confirm.setOnClickListener(o); } private OnClickListener o = new OnClickListener() { public void onClick(View v) { //... } };}/res/layout/main.xml:
<?xml version="1.0" encoding="utf-8"?><LinearLayout xmlns:android="http://schemas.android.com/apk/res/android" android:orientation="vertical" android:layout_width="fill_parent" android:layout_height="fill_parent" ><TextView android:layout_width="fill_parent" android:layout_height="wrap_content" android:text="Hello World, MyProject" /><TextView android:layout_width="fill_parent" android:layout_height="wrap_content" android:text="Admin1" /><EditText id="@+id/Admin" android:layout_width="fill_parent" android:layout_height="wrap_content" /> <TextView android:layout_width="fill_parent" android:layout_height="wrap_content" android:text="Admin2" /><EditText id="@+id/Password" android:layout_width="fill_parent" android:layout_height="wrap_content" /><Button id="@+id/confirm" android:layout_width="fill_parent" android:layout_height="wrap_content" android:text="confirm" /></LinearLayout>
这代码看起来似乎没什么问题。我之前又没怎么看过Android的教程或者文档之类的东西,觉得不知道该从何入手。总之第一能想到的就是看看stack trace;但当在Android里遇到异常时,它就这么在屏幕上显示个简单的提示:
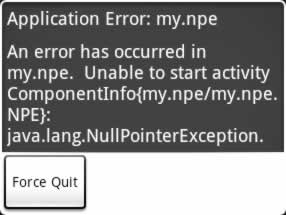
(这图是我另外开的一个project,故意引发了一个NPE而已……)
感觉好可怜,啥也看不出来。
然后查了下如何向输出写自定义的log,发现android.util.Log类可以做这件事。用Log.v(/*String*/tag, /*String*/message, /*Throwable*/obj)就能把日志写出来。这个静态的Log.v()方法用于输出VERBOSE级日志,其中包括了stack trace。输出的目标是logcat。
那么把前面的Java代码中onCreate()方法里的内容整个用try-block包起来,然后catch Exception并将异常状况写到log里。然后运行……没看到NPE了,但那个按钮里的代码却没起作用。在Eclipse里的output窗口也没看到任何log,超郁闷。
没办法,又查了下如何查看日志。发现在android_sdk/tools目录有一个叫DDMS的程序。执行它,并且执行其中的logcat就能看到日志。于是终于看到了那个NPE的位置:在onCreate()方法中的confirm.setOnClickListener(o);这行。
接下来,在onCreate()方法里另外加了句log,当o为null的时候输出一句话;然后没看到输出。这才发现confirm是null……觉得超诡异,大家都是这么findViewById()来得到layout中指定的UI组件的引用,这里怎么会null了呢。
然后才发觉在M3到M5的变化的文档中有提到,原本在layout的XML文件里的id的属性,要改为使用前缀的android:id。于是把main.xml改过来,就好了
T T
更详细的API变化,看这里:http://code.google.com/android/migrating/m3-to-m5/changes.html
===========================================================================
关于模拟器总是disconnect的问题
语仔从Eclipse运行Android模拟器的时候总是会出现disconnected现象,非得多run几次才好。我也不知道是为什么。
不过后来发觉实在不行的话就干脆不要从Eclipse启动模拟器了……直接“热安装”就是
在Eclipse里把代码写好,保存了之后,这么做:
1. 任意启动一个Android模拟器进程,在“热安装”之前最好让它处于home状态
2. 在命令行,转到项目的/bin目录,然后用adb直接把程序装上去:
adb install yourProject.apk
3. 程序已经“热安装”完成。可以从Android界面里的ALL那边运行新装的程序看看
装新的apk或者更新旧的apk都可以这样……至少,只要有一次能正常从Eclipse启动模拟器的话,就让它一直开着,然后不停把修改过的apk文件这么“热安装”上去就行了……
=_=|||
===========================================================================
关于log的问题
前天给语仔找NPE的原因时,傻乎乎的另外开了一个DDMS来监视logcat的日志。我应该更加信赖ADT的……
实际上在Eclipse装了ADT之后,在Windows > Preferences > Android > DDMS > Advanced里就可以设置监听log的等级。把等级设到Verbose就能看到全部的log了。我是用Log.v()来输出的,所以不调到这个等级就看不到之前写的那log。诶,果然还是应该多看看文档再说的。
===========================================================================
关于Notepad Tutorial
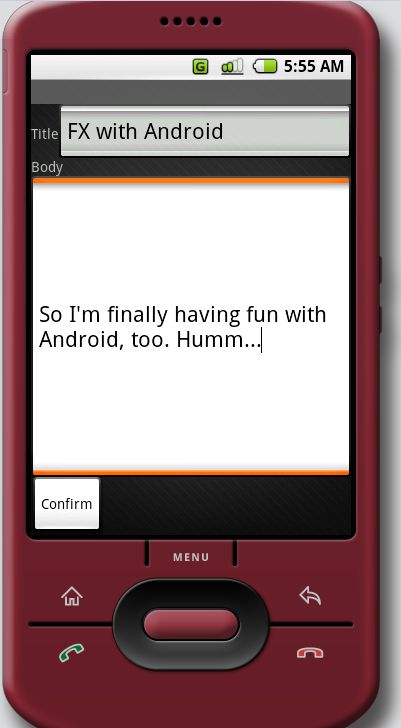
Google Android官网上有个不错的教程,Tutorial: A Notepad Application。跟着这个教程走就能了解到Android开发中的许多重要方面,像是Activity的使用(包括sub activity的使用),Intent的使用,SQLite的使用,使用XML的layout、resource、manifest,整个应用程序的流程/生命周期(life-cycle)等。我也跟着这个教程做了一遍,做到Notepad v3。下面这张是运行的截图:
关于life-cycle,这几个方法很重要:
// Called when the activity is first created.public void onCreate(Bundle icicle)// called by Android if the Activity is being stopped and may be killed before it is resumed!// complement of onCreate()protected void onFreeze(Bundle outState)// called when the Activity ends// should release any resources that can be releasedprotected void onPause()// complement of onPause()protected void onResume()
当然这个地方说得更详细一些:Life Cycle of an Android Application
===========================================================================
关于卸载Android模拟器中已经安装了的程序
在启动了一个Android模拟器进程之后,在命令行使用adb来卸载已经安装的程序:(一定要启动至少一个模拟器实例)
D:\android\android-sdk_m5-rc15_windows\tools>adb shell# cd /data/appcd /data/app# lslsNotepadv3.apkApiDemos.apkNotepadv1.apkNotepadv2.apk# rm Notepadv1.apkrm Notepadv1.apk# rm Notepadv2.apkrm Notepadv2.apk# exitexit
这样就把前面装的Notepad v1和v2都卸载了。清爽。
===========================================================================
其它
不知道实际的Dalvik VM在手机上跑速度如何呢,在模拟器上感觉还可以。只是模拟器的启动时间总是很长……
不过在我的机上跑模拟器明显比在语仔机上要快。不知道是不是因为我这边没怎么装游戏的缘故……
呵呵,开发机与游戏机总是无法并存的,除非开发的就是游戏……|||
1 楼 seya 2008-03-05
有时候在启动模拟器的情况下,用adb devices命令,显示出的emulator-list却为空。
2 楼 seya 2008-03-05
那个模拟器效率真是底,慢的不行。
3 楼 mwjian 2008-03-08
呵呵,遇到问题干嘛不debug呢?直接就找到出错的位置。如果不能,模拟器也提供了一个工具来定位出错的代码,DevTools > Exception Browser
4 楼 RednaxelaFX 2008-03-08
惭愧,一开始没想debug,一个是因为对Andriod SDK/ADT还不熟悉,另一个是很多时候看看log也就能解决问题了...
可能是被这样的习惯害的吧: 平时写Java应用的时候,如果不确定会出现些什么问题,可能会直接throws Exception,然后跑一下看看会不会出现异常,出现的话就直接会看到stack trace了;而有时候即使确定会出现些什么问题,还是可能会习惯性用e.printStackTrace()来看看stack trace.习惯了这样,而Android的模拟器里只给出那么句错误信息,就不习惯了...然后习惯性的想看看stack trace,就这样 ^ ^
可能是被这样的习惯害的吧: 平时写Java应用的时候,如果不确定会出现些什么问题,可能会直接throws Exception,然后跑一下看看会不会出现异常,出现的话就直接会看到stack trace了;而有时候即使确定会出现些什么问题,还是可能会习惯性用e.printStackTrace()来看看stack trace.习惯了这样,而Android的模拟器里只给出那么句错误信息,就不习惯了...然后习惯性的想看看stack trace,就这样 ^ ^