写道
在我们开发一些如短消息、应用商店等应用时,会考虑在短消息的图标上加上未读短信的数量,在应用商店上加上可以升级的应用数量,这样不占太大空间还能达到提示的目的。
本节就以一个展示手机内联系人数量的例子来演示怎么在一个图标的上面加上数字的例子,也就是一个数字overlay..做过google map开发的知道overlay这个东西。。
本节就以一个展示手机内联系人数量的例子来演示怎么在一个图标的上面加上数字的例子,也就是一个数字overlay..做过google map开发的知道overlay这个东西。。
?一:你可学到
- 手机内依据Uri查看联系人
- 权限的添加
- 获取手机内任意一款应用的应用图标
- 对图形的处理,如复制,为图片加上覆盖层--数字。
- 使用RemoteView自定义Notification
二:开始行动
- 新建名为NotificationIconCount的Android Project。附件中有最终版本的项目工程
- 首先修改AndroidManifest.xml,加入权限<uses-permission android:name="android.permission.READ_CONTACTS"></uses-permission>,因为我们要读取联系人。
- 修改main.xml如下,这里定义一个ImageView,勇于预览我们处理好的加上数字的图标。Xml代码
 ?
?
- <?xml?version="1.0"?encoding="utf-8"?>??
- <LinearLayout?xmlns:android="http://schemas.android.com/apk/res/android"??
- ????android:orientation="vertical"??
- ????android:layout_width="fill_parent"??
- ????android:layout_height="fill_parent"??
- ????>??
- ????<ImageView? ??
- ????????android:id="@+id/icon"??
- ????????android:layout_width="wrap_content"??
- ????????android:layout_height="wrap_content"??
- ????????android:scaleType="center"??
- ????????android:adjustViewBounds="true"/>??
- </LinearLayout>??
<?xml version="1.0" encoding="utf-8"?><LinearLayout xmlns:android="http://schemas.android.com/apk/res/android" android:orientation="vertical" android:layout_width="fill_parent" android:layout_height="fill_parent" > <ImageView android:id="@+id/icon" android:layout_width="wrap_content" android:layout_height="wrap_content" android:scaleType="center" android:adjustViewBounds="true"/></LinearLayout>
? - 先来获取手机内通讯录的图标,如果没有获取到,则使用该应用的图标.Java代码?
- super.onCreate(savedInstanceState); ??
- ????????setContentView(R.layout.main); ??
- ????????mImageView=(ImageView)findViewById(R.id.icon); ??
- ????????//优先采用联系人的图标,如果不存在则采用该应用的图标 ??
- ????????Drawable?contactIcon; ??
- ????????try?{ ??
- ????????????contactIcon?=?getPackageManager().getApplicationIcon("com.android.contacts"); ??
- ????????}?catch?(NameNotFoundException?e)?{ ??
- ????????????contactIcon=null; ??
- ????????} ??
- ????????Bitmap?icon; ??
- ????????if(contactIcon?instanceof?BitmapDrawable){ ??
- ????????????icon=((BitmapDrawable)contactIcon).getBitmap(); ??
- ????????}else{ ??
- ????????????icon=getResIcon(getResources(),?R.id.icon); ??
- ????????}??
super.onCreate(savedInstanceState); setContentView(R.layout.main); mImageView=(ImageView)findViewById(R.id.icon); //优先采用联系人的图标,如果不存在则采用该应用的图标 Drawable contactIcon; try { contactIcon = getPackageManager().getApplicationIcon("com.android.contacts"); } catch (NameNotFoundException e) { contactIcon=null; } Bitmap icon; if(contactIcon instanceof BitmapDrawable){ icon=((BitmapDrawable)contactIcon).getBitmap(); }else{ icon=getResIcon(getResources(), R.id.icon); }?这里用到一个自定义的根据资源图标id获取图片的函数,很简单,代码如下:Java代码?- /** ?
- ????*?根据id获取一个图片 ?
- [email protected] ?
- [email protected] ?
- [email protected] ?
- ????*/??
- ???private?Bitmap?getResIcon(Resources?res,int?resId){ ??
- ????Drawable?icon=res.getDrawable(resId); ??
- ????if(icon?instanceof?BitmapDrawable){ ??
- ????????BitmapDrawable?bd=(BitmapDrawable)icon; ??
- ????????return?bd.getBitmap(); ??
- ????}else{ ??
- ????????return?null; ??
- ????} ??
- ???}??
/** * 根据id获取一个图片 * @param res * @param resId * @return */ private Bitmap getResIcon(Resources res,int resId){ Drawable icon=res.getDrawable(resId); if(icon instanceof BitmapDrawable){ BitmapDrawable bd=(BitmapDrawable)icon; return bd.getBitmap(); }else{ return null; } }? - 获取到图标之后就要对这个图标进行处理了,要为该图标加上联系人数量的覆盖,首先我们看获取联系人个数的函数。Java代码?
- /** ?
- ?????*?获取联系人的个数 ?
- [email protected] ?
- ?????*/??
- ????private?int?getContactCount(){ ??
- ????????Cursor?c=getContentResolver().query(ContactsContract.Contacts.CONTENT_URI,?new?String[]{ContactsContract.Contacts._COUNT},?null,?null,?null); ??
- ????????try{ ??
- ????????????c.moveToFirst(); ??
- ????????????return?c.getInt(0); ??
- ????????}catch(Exception?e){ ??
- ????????????return?0; ??
- ????????}finally{ ??
- ????????????c.close(); ??
- ????????} ??
- ????}??
/** * 获取联系人的个数 * @return 手里通讯录中联系人的个数 */ private int getContactCount(){ Cursor c=getContentResolver().query(ContactsContract.Contacts.CONTENT_URI, new String[]{ContactsContract.Contacts._COUNT}, null, null, null); try{ c.moveToFirst(); return c.getInt(0); }catch(Exception e){ return 0; }finally{ c.close(); } }?这里采用Uri的方式获取联系人的cursor,然后获取个数。 - 有了图标和联系人个数就可以生成带联系人个数的图标了,我们看下生成的这个函数。Java代码?
- /** ?
- ?????*?在给定的图片的右上角加上联系人数量。数量用红色表示 ?
- [email protected] ?
- [email protected] ?
- ?????*/??
- ????private?Bitmap?generatorContactCountIcon(Bitmap?icon){ ??
- ????????//初始化画布 ??
- ????????int?iconSize=(int)getResources().getDimension(android.R.dimen.app_icon_size); ??
- ????????Log.d(TAG,?"the?icon?size?is?"+iconSize); ??
- ????????Bitmap?contactIcon=Bitmap.createBitmap(iconSize,?iconSize,?Config.ARGB_8888); ??
- ????????Canvas?canvas=new?Canvas(contactIcon); ??
- ???????? ??
- ????????//拷贝图片 ??
- ????????Paint?iconPaint=new?Paint(); ??
- ????????iconPaint.setDither(true);//防抖动 ??
- ????????iconPaint.setFilterBitmap(true);//用来对Bitmap进行滤波处理,这样,当你选择Drawable时,会有抗锯齿的效果 ??
- ????????Rect?src=new?Rect(0,?0,?icon.getWidth(),?icon.getHeight()); ??
- ????????Rect?dst=new?Rect(0,?0,?iconSize,?iconSize); ??
- ????????canvas.drawBitmap(icon,?src,?dst,?iconPaint); ??
- ???????? ??
- ????????//在图片上创建一个覆盖的联系人个数 ??
- ????????int?contacyCount=getContactCount(); ??
- ????????//启用抗锯齿和使用设备的文本字距 ??
- ????????Paint?countPaint=new?Paint(Paint.ANTI_ALIAS_FLAG|Paint.DEV_KERN_TEXT_FLAG); ??
- ????????countPaint.setColor(Color.RED); ??
- ????????countPaint.setTextSize(20f); ??
- ????????countPaint.setTypeface(Typeface.DEFAULT_BOLD); ??
- ????????canvas.drawText(String.valueOf(contacyCount),?iconSize-18,?25,?countPaint); ??
- ????????return?contactIcon; ??
- ????}??
/** * 在给定的图片的右上角加上联系人数量。数量用红色表示 * @param icon 给定的图片 * @return 带联系人数量的图片 */ private Bitmap generatorContactCountIcon(Bitmap icon){ //初始化画布 int iconSize=(int)getResources().getDimension(android.R.dimen.app_icon_size); Log.d(TAG, "the icon size is "+iconSize); Bitmap contactIcon=Bitmap.createBitmap(iconSize, iconSize, Config.ARGB_8888); Canvas canvas=new Canvas(contactIcon); //拷贝图片 Paint iconPaint=new Paint(); iconPaint.setDither(true);//防抖动 iconPaint.setFilterBitmap(true);//用来对Bitmap进行滤波处理,这样,当你选择Drawable时,会有抗锯齿的效果 Rect src=new Rect(0, 0, icon.getWidth(), icon.getHeight()); Rect dst=new Rect(0, 0, iconSize, iconSize); canvas.drawBitmap(icon, src, dst, iconPaint); //在图片上创建一个覆盖的联系人个数 int contacyCount=getContactCount(); //启用抗锯齿和使用设备的文本字距 Paint countPaint=new Paint(Paint.ANTI_ALIAS_FLAG|Paint.DEV_KERN_TEXT_FLAG); countPaint.setColor(Color.RED); countPaint.setTextSize(20f); countPaint.setTypeface(Typeface.DEFAULT_BOLD); canvas.drawText(String.valueOf(contacyCount), iconSize-18, 25, countPaint); return contactIcon; }?注释的很详细,就不解释了,无非就是定义一个画布(Canvas),然后在上面画图标,画数字文本。 - 然后我们把得到的这个处理过的Bitmap放在我们在main.xml里定义的ImageView里展示就可以看到效果了.Java代码?
- mImageView.setImageBitmap(contactCountIcon);??
mImageView.setImageBitmap(contactCountIcon);
? - 我们启动应用看看效果.
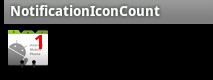
?我们看到了,右上角红色的1代表我手机中有一个联系人

三:采用状态栏通知的办法展示联系人的数量
- 如果我们监听未读短信的数量,展示在状态栏通知了,就可以用这个方法,我这里还是以联系人的数量为例
- 由于Notification默认的icon字段使用的是一个一个资源的引用类型int,所以我们这里采用RemoteView的方式自定义Notification。定义RemoteView,需要一个layout,用于定义展示的Notification样式,我们新建一个notification.xml布局文件如下:Java代码?
- <?xml?version="1.0"?encoding="utf-8"?> ??
- <LinearLayout?xmlns:android="http://schemas.android.com/apk/res/android"??
- ??????????????android:orientation="horizontal"??
- ??????????????android:layout_width="fill_parent"??
- ??????????????android:layout_height="fill_parent"??
- ??????????????android:padding="3dp"??
- ??????????????> ??
- ????<ImageView?android:id="@+id/image"??
- ??????????????android:layout_width="wrap_content"??
- ??????????????android:layout_height="fill_parent"??
- ??????????????android:layout_marginRight="10dp"??
- ??????????????/> ??
- ????<TextView?android:id="@+id/text"??
- ??????????????android:layout_width="wrap_content"??
- ??????????????android:layout_height="fill_parent"??
- ??????????????android:textColor="#000"??
- ??????????????/> ??
- </LinearLayout>??
<?xml version="1.0" encoding="utf-8"?><LinearLayout xmlns:android="http://schemas.android.com/apk/res/android" android:orientation="horizontal" android:layout_width="fill_parent" android:layout_height="fill_parent" android:padding="3dp" > <ImageView android:id="@+id/image" android:layout_width="wrap_content" android:layout_height="fill_parent" android:layout_marginRight="10dp" /> <TextView android:id="@+id/text" android:layout_width="wrap_content" android:layout_height="fill_parent" android:textColor="#000" /></LinearLayout>
?很简单,一个ImageView和一个TextView,用于显示提示的图标和文字。 - 要想使用Notification,我们必须获取一个Service--NotificationManager,Android中由它来管理我们的Notification,获取NotificationManager的代码如下,卸载onCreate方法里Java代码?
- nm=(NotificationManager)getSystemService(Context.NOTIFICATION_SERVICE);??
nm=(NotificationManager)getSystemService(Context.NOTIFICATION_SERVICE);
? - 然后紧接着我们就调用我们定义好的方法来显示通知:Java代码?
- showNotifacation(contactCountIcon);??
showNotifacation(contactCountIcon);
? - 下面我们看一下方法showNotifacation的具体实现:Java代码?
- /** ?
- ?*?显示状态栏通知 ?
- [email protected] ?
- ?*/??
- private?void?showNotifacation(Bitmap?icon){ ??
- ????Notification?notification=new??Notification(R.drawable.icon,"联系人数量",System.currentTimeMillis()); ??
- ????//使用RemoteView自定义通知视图 ??
- ????RemoteViews?contentView=new?RemoteViews(getPackageName(),?R.layout.notification); ??
- ????contentView.setImageViewBitmap(R.id.image,?icon); ??
- ????contentView.setTextViewText(R.id.text,?"图标上的红色数字表示手机中联系人的数量"); ??
- ????notification.contentView=contentView; ??
- ????Intent?notificationIntent=new?Intent(this,?NotificationIconActivity.class); ??
- ????PendingIntent?contentIntent=PendingIntent.getActivity(this,?0,?notificationIntent,?0); ??
- ????notification.contentIntent=contentIntent; ??
- ????nm.notify(NOTIFICATION_CONTACT_ID,?notification); ??
- }??
/** * 显示状态栏通知 * @param icon 通知内容图标 */ private void showNotifacation(Bitmap icon){ Notification notification=new Notification(R.drawable.icon,"联系人数量",System.currentTimeMillis()); //使用RemoteView自定义通知视图 RemoteViews contentView=new RemoteViews(getPackageName(), R.layout.notification); contentView.setImageViewBitmap(R.id.image, icon); contentView.setTextViewText(R.id.text, "图标上的红色数字表示手机中联系人的数量"); notification.contentView=contentView; Intent notificationIntent=new Intent(this, NotificationIconActivity.class); PendingIntent contentIntent=PendingIntent.getActivity(this, 0, notificationIntent, 0); notification.contentIntent=contentIntent; nm.notify(NOTIFICATION_CONTACT_ID, notification); }?注释的都很详细,就不一一解释了 - 最后的就是重写onDestroy,在Android销毁该Activity的时候清除我们的通知。Java代码?
- @Override??
- ????protected?void?onDestroy()?{ ??
- ????????super.onDestroy(); ??
- ????????nm.cancel(NOTIFICATION_CONTACT_ID); ??
- ????}??
@Override protected void onDestroy() { super.onDestroy(); nm.cancel(NOTIFICATION_CONTACT_ID); }? - 运行,可以看到如下效果
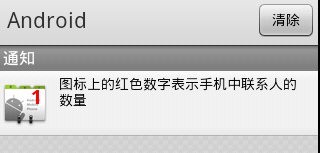
?可以看到,效果已经出来了。。
四:小结和一点引申
这结的主要关键还是对图片的处理,比如这里的加上数字,当时你也可以加上其他的东西,Canvas里有很多相应的函数可以使用。。
?
这里说的都是应用内、状态通知等一些显示处理后图片的办法,那么有没有方法处理手机主屏幕上的图标的办法,为他们加上数字呢。比如在短信息的应用图标的右上角加上未读短信数目等,答案是有的,不过是迂回实现的,给个思路就是使用AppWidget,这个可以实现,还能动态更新,具体怎么实现,大家可以自己摸索下,这里只提供个思路,整体和这节的例子差不多,只不过呢,要做成AppWidget。。。
转载:http://flysnow.iteye.com/blog/906770