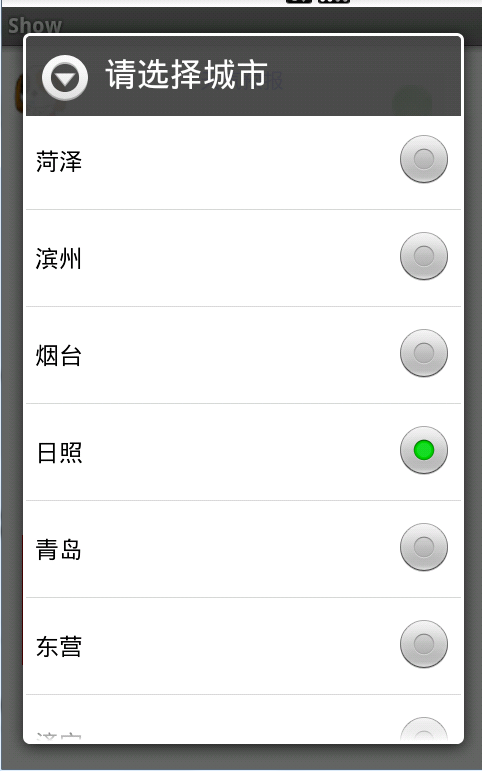
按照惯例,首先上一张效果图。

本篇文章实现的效果就是如图中所圈的那样,实现类似于HTML中的二级联动的效果。
对于第一个选项我们读取的是本地xml文件来填充数据的,
对于第二个选项我们读取的是通过中央气象台提供的API返回的xml格式的数据来填充的。
首先是主页面排版,由于我做的是一个天气预报的功能,所以添加了很多与本文无关的控件,在代码注释中写的很清楚,大家可以直接略过。
public class WeatherPage extends RelativeLayout{ private Context parentContext; /**监听*/ private MyButtonListen mylisten; /**定义天气对象*/ private GetWeatherService service; private RelativeLayout toplayout; private int toplayoutid=100; private RelativeLayout centerlayout; private int centerlayoutid=200; private RelativeLayout footlayout; private int footlayoutid=300; /** topView*/ private ImageView dogpetimg; private TextView titleview; private ImageButton switchBtn; /** showweatherView*/ private RelativeLayout showWeather; private int showWeatherid=201; private TextView datetext; /** functionView*/ private LinearLayout functionLayout; private TextView selectCitytext; private Spinner selectProvince; private ArrayAdapter<CharSequence> adapterProvince; private Map<String,String> provincemap; private Spinner selectCity; private Map<Integer,CityWeather> citymap; private ArrayAdapter<CharSequence> adapterCity; private ImageButton okBtn; private ImageButton selectBtn; /** 本类对象的样式 */ private LayoutParams lp;//准备放入ViewFlipper中,所以暂且准备一下, public WeatherPage(Context context) { super(context); this.parentContext=context; mylisten=new MyButtonListen(); service=new GetWeatherService(); init(); } private void init() { toplayout=new RelativeLayout(parentContext); toplayout.setId(toplayoutid); LayoutParams lptoplayout=new LayoutParams(-1,-2); lptoplayout.setMargins(0, 20, 0, 0); //添加组件 addTopLayout(lptoplayout); addView(toplayout,lptoplayout); centerlayout=new RelativeLayout(parentContext); centerlayout.setId(centerlayoutid); LayoutParams lpcenterlayout=new LayoutParams(-1,370); lpcenterlayout.setMargins(0, 30, 0, 0); lpcenterlayout.addRule(RelativeLayout.BELOW,toplayoutid); //添加组件 addCenterLayout(lpcenterlayout); addView(centerlayout,lpcenterlayout); footlayout=new RelativeLayout(parentContext); footlayout.setBackgroundColor(Color.RED); footlayout.setId(footlayoutid); LayoutParams lpfootlayout=new LayoutParams(-1,-2); lpfootlayout.setMargins(20, 10, 20, 0); //添加组件 addFootLayout(lpfootlayout); lpfootlayout.addRule(RelativeLayout.BELOW,centerlayoutid); addView(footlayout,lpfootlayout); } public LayoutParams getLp() { this.lp=new LayoutParams(-1,-1); return lp; } public void addTopLayout(LayoutParams lp){ dogpetimg=new ImageView(parentContext); LayoutParams lpdogpetimg=new LayoutParams(60,60); lpdogpetimg.addRule(RelativeLayout.ALIGN_PARENT_LEFT); dogpetimg.setBackgroundResource(R.drawable.dogsmall); lpdogpetimg.setMargins(10, 0, 0, 0); titleview=new TextView(parentContext); titleview.setText("天气预报"); titleview.setTextColor(Color.BLUE); LayoutParams lptitleview=new LayoutParams(-2,-2); lptitleview.addRule(RelativeLayout.CENTER_HORIZONTAL); switchBtn=new ImageButton(parentContext); //先进行判断,判断原来的开关状态,然后再添加背景图片,标记位设置在helper类中。 switchBtn.setBackgroundResource(R.drawable.start); LayoutParams lpswitchBtn=new LayoutParams(40,40); lpswitchBtn.addRule(RelativeLayout.ALIGN_PARENT_RIGHT); lpswitchBtn.setMargins(0, 20, 50, 0); //添加监听 switchBtn.setOnClickListener(mylisten); toplayout.addView(dogpetimg,lpdogpetimg); toplayout.addView(titleview, lptitleview); toplayout.addView(switchBtn,lpswitchBtn); } public void addCenterLayout(LayoutParams lp) { showWeather=new RelativeLayout(parentContext); showWeather.setId(showWeatherid); LayoutParams lpshowWeather=new LayoutParams(400,300); lpshowWeather.addRule(RelativeLayout.CENTER_HORIZONTAL); showWeather.setBackgroundColor(Color.CYAN); datetext=new TextView(parentContext); LayoutParams lpdatetext=new LayoutParams(400,-2); lpdatetext.addRule(RelativeLayout.CENTER_HORIZONTAL); lpdatetext.addRule(RelativeLayout.BELOW,showWeatherid); lpdatetext.setMargins(20, 20, 20, 0);// datetext.setBackgroundColor(Color.LTGRAY); datetext.setText(TimeHelper.getDateInChina()); datetext.setGravity(Gravity.CENTER_HORIZONTAL); centerlayout.addView(showWeather, lpshowWeather); centerlayout.addView(datetext, lpdatetext); } public void addFootLayout(LayoutParams lp) { functionLayout=new LinearLayout(parentContext); functionLayout.setId(301);// functionLayout.setBackgroundColor(Color.YELLOW); LayoutParams lpfunctionLayout=new LayoutParams(-2,-2); lpfunctionLayout.addRule(RelativeLayout.ALIGN_PARENT_TOP); lpfunctionLayout.addRule(RelativeLayout.CENTER_HORIZONTAL); lpfunctionLayout.setMargins(10, 0, 0, 0); //添加显示文字 selectCitytext=new TextView(parentContext); selectCitytext.setText("请设置:"); //添加选择省 selectProvince=new Spinner(parentContext); selectProvince.setPrompt("请选择省份"); //获取省份Map<序列号,省份对象> provincemap=service.getProvinceMap(); String[] provinceData=service.getProvinceArray(provincemap); //定义下拉列表适配器,用于填充内容 adapterProvince=null; adapterProvince=new ArrayAdapter<CharSequence>(parentContext,android.R.layout.simple_spinner_item,provinceData); //设置列表显示风格 adapterProvince.setDropDownViewResource(android.R.layout.simple_spinner_dropdown_item); selectProvince.setAdapter(adapterProvince); selectProvince.setOnItemSelectedListener(new MyOnItemSelectedListen()); //添加选择市 selectCity=new Spinner(parentContext); selectCity.setPrompt("请选择城市"); //定义下拉列表适配器,用于填充内容 adapterCity=null; //设置列表显示风格 selectCity.setAdapter(adapterCity); functionLayout.addView(selectCitytext); functionLayout.addView(selectProvince); functionLayout.addView(selectCity); okBtn=new ImageButton(parentContext); okBtn.setBackgroundResource(R.drawable.okbtn);//给绑定按钮添加背景图片 LayoutParams lpokBtn=new LayoutParams(-2,-2); lpokBtn.setMargins(20, 20, 0, 0); lpokBtn.addRule(RelativeLayout.ALIGN_PARENT_LEFT); lpokBtn.addRule(RelativeLayout.BELOW,301); //添加监听 okBtn.setOnClickListener(mylisten); selectBtn=new ImageButton(parentContext); selectBtn.setBackgroundResource(R.drawable.selectbn);//给查询按钮添加背景图片 LayoutParams lpselectBtn=new LayoutParams(-2,-2); lpselectBtn.setMargins(0, 20, 20, 0); lpselectBtn.addRule(RelativeLayout.ALIGN_PARENT_RIGHT); lpselectBtn.addRule(RelativeLayout.BELOW,301); //添加监听 selectBtn.setOnClickListener(mylisten); footlayout.addView(functionLayout,lpfunctionLayout); footlayout.addView(okBtn, lpokBtn); footlayout.addView(selectBtn, lpselectBtn); } /** * 监听各种按钮的点击事件 * @author Administrator */ class MyButtonListen implements OnClickListener{ @Override public void onClick(View v) { // TODO Auto-generated method stub if(v==switchBtn){ //关闭外显示功能 System.out.println("点击外显示开关"); //换色 switchBtn.setBackgroundResource(R.drawable.end); }else if(v==okBtn){ //确定,对城市进行保存。写入小型数据库 System.out.println("点击保存开关"); }else if(v==selectBtn){ //确定,对城市进行查询,不保存 System.out.println("点击查询开关"); }else{ Log.e("tag", "问题,输入的值不对"); } } } /** * 监听第一个选项的选择,当地一个选项框被选择数据的时候出发该类中的事件 * @author Administrator */ class MyOnItemSelectedListen implements OnItemSelectedListener{ @Override public void onItemSelected(AdapterView<?> item, View view, int position, long arg3) { String provincename = item.getAdapter().getItem(position).toString(); System.out.println(provincename); String pinyin = provincemap.get(provincename); Map<String, String> cityIdMap = service.getCityMap(pinyin); String[] cityArray = service.getCityArray(cityIdMap); adapterCity=new ArrayAdapter<CharSequence>(parentContext,android.R.layout.simple_spinner_item,cityArray); //设置列表显示风格 adapterCity.setDropDownViewResource(android.R.layout.simple_spinner_dropdown_item); selectCity.setAdapter(adapterCity); } @Override public void onNothingSelected(AdapterView<?> arg0) { // TODO Auto-generated method stub } }}完成了这些代码,已经基本可以实现骨架的二级联动了。
我这里第一级的连动使用的是读取本地xml文件,
第二级的联动使用的读取API,所以专门建立了一个service类来处理这些事件:
public class GetWeatherService { private GetWeatherDao dao; public GetWeatherService() { dao=new GetWeatherDao(); } /** * 获取城市气象信息的流程 * @param province * @param selectcity * @return */ public CityWeather getWeatherDay(String province,String selectcity){ //首先,获取所有省份名和拼音的map Map<String, String> provincemap = getProvinceMap(); //根据所有的省份名 获取 所需要的省份名拼音 String provincexml = provincemap.get(province); if(provincexml==null){ //有问题,省份不存在 return null; } //其次,输入值省份名拼音,获取指定市的城市气象id Map<String, String> citymap = getCityMap(provincexml); if(citymap==null){ //有问题,城市不存在 return null; } String cityid = citymap.get(selectcity); //根据id获取城市的json数据,并且解析该数据返回城市未来七天气象信息 CityWeather cityWeather = getCityWeather(cityid); if(cityWeather==null){ //有问题,解析不正确 return null; } return cityWeather; } /** * 获取所有省份名和拼音的map */ public Map<String, String> getProvinceMap() { Map<String, String> proMap = new HashMap<String, String>(); String res = ""; try { InputStream in = Helper.getHelper().getContext().getResources() .getAssets().open("province.xml"); InputStream is = IOHelper.fromInputStreamToInputStreamInCharset(in,"utf-8");// int length = in.available();// byte[] buffer = new byte[length];// in.read(buffer);// res = EncodingUtils.getString(buffer, "UTF-8");// InputStream is = IOHelper.fromStringToIputStream(res); SAXReader sr = new SAXReader();// 获取读取xml的对象。 Document document = sr.read(is); Element root = document.getRootElement(); List<?> elementlist = root.elements("city"); for (Object obj : elementlist) { Element row = (Element) obj; String quName = row.attribute("quName").getText(); String pyName = row.attribute("pyName").getText(); proMap.put(quName, pyName); } } catch (Exception e) { Log.e("tag", "读取配置失败"); e.printStackTrace(); } return proMap; } /** * 获取指定省份的城市列表 */ public Map<String, String> getCityMap(String provincename) { InputStream cityXml = dao.getCityXml(provincename); Map<String,String> citymap=new HashMap<String,String>(); try { SAXReader sr = new SAXReader();// 获取读取xml的对象。 Document document = sr.read(cityXml); Element root = document.getRootElement(); List<?> elementlist = root.elements("city"); for (Object obj : elementlist) { Element row = (Element) obj; String cityname = row.attribute("cityname").getText(); String cityid =row.attribute("url").getText(); citymap.put(cityname,cityid); } } catch (Exception e) { e.printStackTrace(); Log.e("tag", "问题"+e.toString()); return null; } return citymap; } /** * 根据指定的城市气象id获取该城市未来七天的天气信息 */ public CityWeather getCityWeather(String cityid) { CityWeather cityWeather=null; String weatherJson = dao.getWeatherJson(cityid); weatherJson="["+weatherJson+"]"; try { // 对json数组进行循环,一般应该只返回一个。 JSONTokener jsonParser = new JSONTokener(weatherJson); JSONObject object = (JSONObject) jsonParser.nextValue(); // 接下来的就是JSON对象的操作了 JSONObject weatherday = object.getJSONObject("weatherinfo"); cityWeather = new CityWeather(); String city = weatherday.get("city").toString(); String city_en = weatherday.get("city_en").toString(); String date_y = weatherday.get("date_y").toString(); String week = weatherday.get("week").toString(); String temp1 = weatherday.get("temp1").toString();// 今天温度 String temp2 = weatherday.get("temp2").toString();// 明天温度 String temp3 = weatherday.get("temp3").toString();// 后天温度 String weather1 = weatherday.get("weather1").toString();// 今天温度 String weather2 = weatherday.get("weather2").toString();// 明天温度 String weather3 = weatherday.get("weather3").toString();// 后天温度 cityWeather.setCityname(city); cityWeather.setCity_en(city_en); cityWeather.setCityid(cityid); cityWeather.setDate_y(date_y); cityWeather.setWeek(week); cityWeather.setTempToday(temp1); cityWeather.setTempTommorrow(temp2); cityWeather.setTempAt(temp3); cityWeather.setWeatherToday(weather1); cityWeather.setWeatherTommorrow(weather2); cityWeather.setWeatherAt(weather3); } catch (Exception e) { // TODO: handle exception return null; } return cityWeather; } /** * 返回省名称的数组 * @param map * @return */ public String[] getProvinceArray(Map<String, String> map){ String[] provinceArray=new String[map.size()]; int i=0; for(String key:map.keySet()){ provinceArray[i++]=key; } return provinceArray; } public String[] getCityArray(Map<String, String> map){ String[] cityArray=new String[map.size()]; int k=0; for(String key:map.keySet()){ cityArray[k++]=key; } return cityArray; }}程序中经常涉及到io流的处理,所以为了方法处理,专门写了一个工具类,为了便于大家调试,也附上代码:
public class IOHelper { /** * 输入InputStream流,返回字符串文字。 * @param is * @return */ public static String fromIputStreamToString(InputStream is){ ByteArrayOutputStream baos = new ByteArrayOutputStream(); int i = -1; try { while ((i = is.read()) != -1) { baos.write(i); } } catch (IOException e) { // TODO Auto-generated catch block e.printStackTrace(); } return baos.toString(); } /** * 输入InputStream流和文件地址,返回成功与否。 * @param is * @return */ public static boolean fromIputStreamToFile(InputStream is,String outfilepath){ byte[] b=new byte[1024]; FileOutputStream fos=null; try { fos=new FileOutputStream(new File(outfilepath)); while((is.read(b, 0, 1024))!=-1){ fos.write(b); } fos.flush(); } catch (IOException e) { // TODO Auto-generated catch block e.printStackTrace(); return false; }finally{ try { fos.close(); } catch (IOException e) { // TODO Auto-generated catch block e.printStackTrace(); } } return true; } /** * 输入文件地址,返回inputStream流。 * @param is * @return */ public static InputStream fromFileToIputStream(String infilepath){ FileInputStream fis=null; try { fis=new FileInputStream(new File(infilepath)); } catch (IOException e) { // TODO Auto-generated catch block e.printStackTrace(); } return fis; } public static InputStream fromStringToIputStream(String s) { if (s != null && !s.equals("")) { try { ByteArrayInputStream stringInputStream = new ByteArrayInputStream( s.getBytes()); return stringInputStream; } catch (Exception e) { e.printStackTrace(); } } return null; } //把输入流转换为存有UTF-8格式数据的输入流 public static InputStream fromInputStreamToInputStreamInCharset( InputStream in, String charset) throws Exception { StringBuilder builder=new StringBuilder(); byte[] buffer = new byte[2048]; int len = -1; while ((len = in.read(buffer)) != -1) { builder.append(EncodingUtils.getString(buffer, 0, len, "UTF-8")); } return IOHelper.fromStringToIputStream(builder.toString()); } }本类中的主要实现效果是二级联动,所以API调用的DAO层代码我就不上传了。。
疑问:大家可能也注意到了,我的IOHelper类中,专门写了一个方法fromInputStreamToInputStreamInCharset来处理输入流,那是因为我发现我直接通过SAXReader.read(io)读取的时候,出现了乱码的现象,我知道是编码格式的问题,本来想直接让SAXReader以UTF-8格式来读取,可以搜了一圈,没找到合适的方法就专门写了一个这样的方法。希望更好处理方式的朋友麻烦告之下。
另外我现在实现的方式两个选项栏里面的数据都是无序的,大家有兴趣的可以写一个比较器来实现排序的效果。
最后附上最终实现的效果图: