本文主要介绍Android ViewGroup/View的绘制流程,及常用的自定义ViewGroup的方法。在此基础上介绍动态控制View的位置的三种方法,并给出最佳的一种方法。
一、ViewGroup/View的绘制流程
简单的说一个View从无到有需要三个步骤,onMeasure、onLayout、onDraw,即测量大小、放置位置、绘制三个步骤。而ViewGroup的onMeasure、onLayout流程里,又会遍历每个孩子,并最终调到孩子的measure()、layout()函数里。与View不同的是,ViewGroup没有onDraw流程,但有dispatchDraw()流程,该函数最终又调用drawChild()绘制每个孩子,调每个孩子View的onDraw流程。
在onMeasure流程里是为了获得控件的高和宽,这块有个getWidth()和getMeasuredWidth()的概念,前者指宽度,后者是测量宽度。一般来说,一个自定义VIewGroup(如继承自RelativeLayout)一般要进两次onMeasure,一次onLayout,一次drawChild()。虽然onMeasure流程是测量大小,且进了两次。但直到最后一次出去的时候调用getWidth()得到的仍然是0.getWidth()的数值一直到onSizeChanged()的时候才能够得到正确的,此后进到onLayout里当然也能正常得到。
下面是我截的一段代码:
@Override protected void onMeasure(int widthMeasureSpec, int heightMeasureSpec) { // TODO Auto-generated method stub Log.i(TAG, "onMeasure enter..."); Log.i(TAG, "width = " + getWidth() + " height = " + getHeight()); Log.i(TAG, "MeasuredWidth = " + getMeasuredWidth() + " MeasuredHeight = " + getMeasuredHeight()); super.onMeasure(widthMeasureSpec, heightMeasureSpec); Log.i(TAG, "00000000000 width = " + getWidth() + " height = " + getHeight()); Log.i(TAG, "00000000000 MeasuredWidth = " + getMeasuredWidth() + " MeasuredHeight = " + getMeasuredHeight()); Log.i(TAG, "onMeasure exit..."); }打印信息:
Line 355: 01-03 10:15:40.526 I/YanZi (10793): onMeasure enter... Line 357: 01-03 10:15:40.526 I/YanZi (10793): width = 0 height = 0 Line 359: 01-03 10:15:40.527 I/YanZi (10793): MeasuredWidth = 0 MeasuredHeight = 0 Line 361: 01-03 10:15:40.531 I/YanZi (10793): 00000000000 width = 0 height = 0 Line 363: 01-03 10:15:40.532 I/YanZi (10793): 00000000000 MeasuredWidth = 1080 MeasuredHeight = 1701 Line 365: 01-03 10:15:40.532 I/YanZi (10793): onMeasure exit... Line 367: 01-03 10:15:40.532 I/YanZi (10793): onMeasure enter... Line 369: 01-03 10:15:40.533 I/YanZi (10793): width = 0 height = 0 Line 371: 01-03 10:15:40.533 I/YanZi (10793): MeasuredWidth = 1080 MeasuredHeight = 1701 Line 373: 01-03 10:15:40.536 I/YanZi (10793): 00000000000 width = 0 height = 0 Line 375: 01-03 10:15:40.536 I/YanZi (10793): 00000000000 MeasuredWidth = 1080 MeasuredHeight = 1701 Line 377: 01-03 10:15:40.537 I/YanZi (10793): onMeasure exit... Line 379: 01-03 10:15:40.537 I/YanZi (10793): onSizeChanged enter... Line 381: 01-03 10:15:40.538 I/YanZi (10793): width = 1080 height = 1701 Line 383: 01-03 10:15:40.538 I/YanZi (10793): onSizeChanged exit... Line 385: 01-03 10:15:40.538 I/YanZi (10793): onLayout enter... Line 387: 01-03 10:15:40.539 I/YanZi (10793): width = 1080 height = 1701 Line 389: 01-03 10:15:40.540 I/YanZi (10793): onLayout exit...可以看到,在第一次进到onMeasure里执行完super.onMeasure(widthMeasureSpec, heightMeasureSpec);后就能够得到MeasureWidth和MeasureHeight了。
至于为啥要进两次onMeasure,翻遍了网络么有找到合理的解释。有人说是大小发生变化时要进两次,如Linearlayout里设置了weight属性,则第一次测量时得到一个大小,第二次测量时把weight加上得到最终的大小。可是我用Linearlayout把里面所有的母和子的view大小都写死,onMeasure还是进了两次。RelativeLayout就不用说了也是进的两次。国外文档也有解释说,当子view不能够填满父控件时,要第二次进到onMeasure里。经我测试,貌似也是扯淡。我全都match_parent还是进了两次。
当然在onMeasure里可以直接setMeasuredDimension(measuredWidth, measuredHeight)设置控件宽和高,这样不管xml里咋写的,最终以此句设置的width和height进行放置、显示。关于View/ViewGroup绘制原理本文就介绍到这,更详细请参考:链接1 链接2 链接3 链接4 都大同小异,可以看看。
二、常见的两种自定义ViewGroup的方法
方法一:
c_nanshi_guide.xml布局文件
<?xml version="1.0" encoding="utf-8"?><RelativeLayout xmlns:android="http://schemas.android.com/apk/res/android" android:layout_width="match_parent" android:layout_height="match_parent" > <FrameLayout android:id="@+id/guide_nan_layout" android:layout_width="200dp" android:layout_height="150dp" android:background="@drawable/nan1" > <TextView android:id="@+id/guide_nan_text" android:layout_width="wrap_content" android:layout_height="wrap_content" android:layout_gravity="bottom|center_horizontal" android:gravity="center" android:text="南公怀瑾." android:textColor="@android:color/white" android:textSize="20sp" /> </FrameLayout></RelativeLayout>可以看到布局里并没出现任何自定义信息。NanShiGuide.java
package org.yanzi.ui;import org.yanzi.util.DisplayUtil;import android.R.color;import android.content.Context;import android.graphics.Canvas;import android.graphics.Point;import android.graphics.drawable.Drawable;import android.util.Log;import android.view.LayoutInflater;import android.view.View;import android.widget.RelativeLayout;import android.widget.TextView;import com.example.test1.R;public class NanShiGuide extends BaseGuideView { private static final String TAG = "YanZi"; int LAYOUT_ID = R.layout.c_nanshi_guide; View guideNanLayout; TextView guideNanText; private Drawable mDrawable; private Context mContext = null; public NanShiGuide(Context context, GuideViewCallback callback) { super(context, callback); // TODO Auto-generated constructor stub mContext = context; initView(); mDrawable = context.getResources().getDrawable(R.drawable.ong); } @Override protected void initView() { // TODO Auto-generated method stub Log.i(TAG, "NanShiGuide initView enter..."); View v = LayoutInflater.from(mContext).inflate(LAYOUT_ID, this, true); guideNanLayout = v.findViewById(R.id.guide_nan_layout); guideNanText = (TextView) v.findViewById(R.id.guide_nan_text); } @Override protected void onFinishInflate() { // TODO Auto-generated method stub Log.i(TAG, "onFinishInflate enter..."); super.onFinishInflate(); } @Override protected void onLayout(boolean changed, int l, int t, int r, int b) { // TODO Auto-generated method stub Log.i(TAG, "onLayout enter..."); Log.i(TAG, "width = " + getWidth() + " height = " + getHeight()); int transX = 0; int transY = 0; if(mOrientation == 0){ guideNanLayout.setRotation(0); transX += 0; transY += 0; }else if(mOrientation == 270){ guideNanLayout.setRotation(90); transX += -DisplayUtil.dip2px(mContext, 25) + DisplayUtil.dip2px(mContext, 210); transY += DisplayUtil.dip2px(mContext, 25); }else if(mOrientation == 180){ guideNanLayout.setRotation(180); transX += DisplayUtil.dip2px(mContext, 160); transY += b - DisplayUtil.dip2px(mContext, 150); }else if(mOrientation == 90){ guideNanLayout.setRotation(270); transX += -DisplayUtil.dip2px(mContext, 25); transY += b - DisplayUtil.dip2px(mContext, 200 - 25); } guideNanLayout.setTranslationX(transX); guideNanLayout.setTranslationY(transY);// this.setTranslationX(transX);// this.setTranslationY(transY); RelativeLayout.LayoutParams params = (RelativeLayout.LayoutParams) guideNanLayout.getLayoutParams(); params.leftMargin = 100; params.topMargin = 100; guideNanLayout.setLayoutParams(params); super.onLayout(changed, l, t, r, b); Log.i(TAG, "onLayout exit..."); } @Override protected void onMeasure(int widthMeasureSpec, int heightMeasureSpec) { // TODO Auto-generated method stub Log.i(TAG, "onMeasure enter..."); Log.i(TAG, "width = " + getWidth() + " height = " + getHeight()); Log.i(TAG, "MeasuredWidth = " + getMeasuredWidth() + " MeasuredHeight = " + getMeasuredHeight()); super.onMeasure(widthMeasureSpec, heightMeasureSpec); Log.i(TAG, "00000000000 width = " + getWidth() + " height = " + getHeight()); Log.i(TAG, "00000000000 MeasuredWidth = " + getMeasuredWidth() + " MeasuredHeight = " + getMeasuredHeight()); Log.i(TAG, "onMeasure exit..."); } @Override protected void onSizeChanged(int w, int h, int oldw, int oldh) { // TODO Auto-generated method stub Log.i(TAG, "onSizeChanged enter..."); Log.i(TAG, "width = " + getWidth() + " height = " + getHeight()); super.onSizeChanged(w, h, oldw, oldh); Log.i(TAG, "onSizeChanged exit..."); } @Override protected void onDraw(Canvas canvas) { // TODO Auto-generated method stub Log.i(TAG, "onDraw enter..."); super.onDraw(canvas); } @Override protected void dispatchDraw(Canvas canvas) { // TODO Auto-generated method stub Log.i(TAG, "dispatchDraw enter..."); super.dispatchDraw(canvas); } @Override protected boolean drawChild(Canvas canvas, View child, long drawingTime) { // TODO Auto-generated method stub Log.i(TAG, "drawChild enter..."); int w = getWidth(); int h = getHeight(); Point centerPoint = new Point(w / 2, h / 2); canvas.save(); mDrawable.setBounds(centerPoint.x - 150, centerPoint.y - 150, centerPoint.x + 150, centerPoint.y + 150); mDrawable.draw(canvas); canvas.restore(); return super.drawChild(canvas, child, drawingTime); } }BaseGuideView.java如下:
package org.yanzi.ui;import org.yanzi.util.OrientationUtil;import android.content.Context;import android.graphics.Canvas;import android.util.Log;import android.view.MotionEvent;import android.view.View;import android.widget.RelativeLayout;import android.widget.TextView;public abstract class BaseGuideView extends RelativeLayout implements Rotatable, View.OnClickListener { protected int mOrientation = 0; protected Context mContext; private GuideViewCallback mGuideViewCallback; public interface GuideViewCallback{ public void onGuideViewClick(); } public BaseGuideView(Context context, GuideViewCallback callback) { super(context); // TODO Auto-generated constructor stub mContext = context; mGuideViewCallback = callback; setOnClickListener(this); mOrientation = OrientationUtil.getOrientation(); } @Override public void setOrientation(int orientation, boolean animation) { // TODO Auto-generated method stub mOrientation = orientation; requestLayout(); } protected abstract void initView(); @Override public boolean onInterceptTouchEvent(MotionEvent ev) { // TODO Auto-generated method stub return true; //super.onInterceptTouchEvent(ev) } @Override public void onClick(View v) { // TODO Auto-generated method stub mGuideViewCallback.onGuideViewClick(); } }这是一种最常用的方法,核心是initView里通过LayoutInflater.from(mContext).inflate(LAYOUT_ID, this, true);完成布局xml文件的映射。LayoutInflater使用参见这里。这种写法最大的好处是即可以用java语句new一个view add到母布局里。也可以通过<org.yanzi.ui.NanShiGuide>在xml里使用。个人比较推荐此写法。动态添加示例:
if(baseGuideView == null){ baseGuideView = new NanShiGuide(getApplicationContext(), new GuideViewCallback() { @Override public void onGuideViewClick() { // TODO Auto-generated method stub hideGuideView(); } }); guideLayout.addView(baseGuideView); }方法二:不通过LayoutInflater来映射,而是直接使用类名映射
请参考我的前文:http://blog.csdn.net/yanzi1225627/article/details/30763555 的HeadControlPanel.java的封装方法。这种方法不适合做动态添加,因为它不能new,只能通过在母布局里include来添加。正因为它是从布局里加载的,因此会调用onFinishInflate()流程,当执行到此时表示布局已经加载进来了,里面的孩子view可以实例化了。 但第一种方法是不会调用onFinishInflate的,所以必须用LayoutInflator。 再者,使用第二种方法也就意味着自定义view的构造函数只能是:
public NanShiGuide(Context context, AttributeSet attrs) {
super(context, attrs);
// TODO Auto-generated constructor stub
}
无法再多传递其他重要变量。
综合两种方法的优缺点,我个人强烈建议使用第一种方式来自定义ViewGroup,但google的部分原生应用里使用的是第二种方法。本文代码使用第一种方式。另外,这两种加载机制不同,所以在对view动态改变位置时也会不同。
三、三种动态改变View位置的方法
方法一:设置LayoutParams,通过params设置四个margin来改变
方法二:通过setX()、setY()这两个函数直接设置坐标位置。
方法三:通过setTranslationX、setTranslationY来设置相对偏移量,当然是在onLayout流程里。
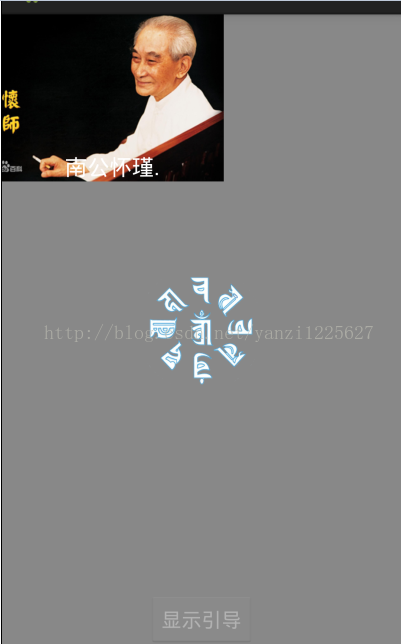
这三种方法里个人最推荐的是第三种,除此外方法1在有些场合下也会用到,方法2比较坑爹一般不用。下面是方法3的示例,先来看一副图片:
自然状态下,图片靠左上顶点摆放:
下图为旋转了90°后,我在代码里guideNanLayout.setRotation()进行旋转后的。guideNanLayout就是那个图片的布局。
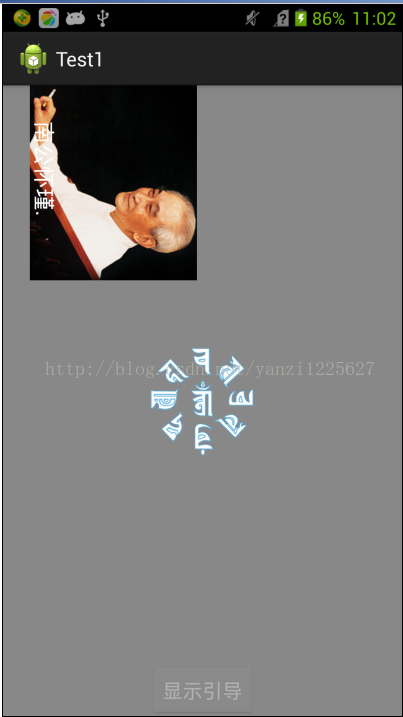
记View的宽度为W,高度为H。如上图所示,在旋转90°后,图片在x轴和y轴上分别塌缩了Abs(W - H) / 2的像素。为此,我们可以首先把这个“塌缩”给补回来,让旋转90°后的view还是以左上顶点为基准点,之后用如下代码进行平移。
guideNanLayout.setTranslationX(transX);
guideNanLayout.setTranslationY(transY);
最终的onLayout函数如下:
@Override protected void onLayout(boolean changed, int l, int t, int r, int b) { // TODO Auto-generated method stub Log.i(TAG, "onLayout enter..."); Log.i(TAG, "width = " + getWidth() + " height = " + getHeight()); int transX = 0; int transY = 0; if(mOrientation == 0){ guideNanLayout.setRotation(0); transX += 0; transY += 0; }else if(mOrientation == 270){ guideNanLayout.setRotation(90); transX += -DisplayUtil.dip2px(mContext, 25) + DisplayUtil.dip2px(mContext, 210); transY += DisplayUtil.dip2px(mContext, 25); }else if(mOrientation == 180){ guideNanLayout.setRotation(180); transX += DisplayUtil.dip2px(mContext, 160); transY += b - DisplayUtil.dip2px(mContext, 150); }else if(mOrientation == 90){ guideNanLayout.setRotation(270); transX += -DisplayUtil.dip2px(mContext, 25); transY += b - DisplayUtil.dip2px(mContext, 200 - 25); } guideNanLayout.setTranslationX(transX); guideNanLayout.setTranslationY(transY);// this.setTranslationX(transX);// this.setTranslationY(transY); // RelativeLayout.LayoutParams params = (RelativeLayout.LayoutParams) guideNanLayout.getLayoutParams();// params.leftMargin = 100;// params.topMargin = 100;// guideNanLayout.setLayoutParams(params); super.onLayout(changed, l, t, r, b); Log.i(TAG, "onLayout exit..."); }最终旋转屏幕时效果图如下: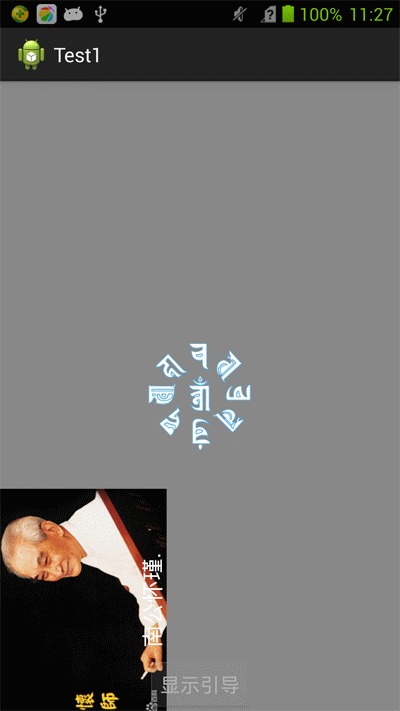
注意这块我并没用android自有的让布局旋转的那种机制,那个效果不好,转换太慢。因为onLayout里设置偏移量是在onDraw前,所以此方法方向变换时不会有残留。即便一开始就90°拿手机,不会出现那种先是正常显示再转过去的现象。每次方向变时就设置下角度,然后调用requestLayout():
@Override
public void setOrientation(int orientation, boolean animation) {
// TODO Auto-generated method stub
mOrientation = orientation;
requestLayout();
}
可以参考这里,当调用requestLayout时会让View重新measure、layout。
为什么不用setX()这种方法呢?查看其api解释:
/** * Sets the visual x position of this view, in pixels. This is equivalent to setting the * [email protected] #setTranslationX(float) translationX} property to be the difference between * the x value passed in and the current [email protected] #getLeft() left} property. * * @param x The visual x position of this view, in pixels. */ public void setX(float x) { setTranslationX(x - mLeft); }其实setX最终还是调用的setTranslationX,因此不如直接调用setTranslationX。在本文的示例代码中将:
// guideNanLayout.setTranslationX(transX);
// guideNanLayout.setTranslationY(transY);
换成:
guideNanLayout.setX(transX);
guideNanLayout.setY(transY);
得到的结果是一模一样的,这是因为这里的mLeft等于0的原因。
再来看方法1,通过设置LayoutParams来动态改变位置,这有时好用,但有时完全没有效果。因为要改变LayoutParams首先view要加载进来,才能get得到。2,这种设params的方法一旦rotate后本身的margins就变了,很难计算旋转后的margins。
而且更严重的是,在本例中在onLayout里通过
// RelativeLayout.LayoutParams params = (RelativeLayout.LayoutParams) guideNanLayout.getLayoutParams();
// params.leftMargin = 100;
// params.topMargin = 100;
// guideNanLayout.setLayoutParams(params);
是看不到一点效果的,这是个十分诡异的事情。但将其放在initView或onMeasure里则是ok的。根据这个现象我认为,在onlayout的时候再对子view设置margins已经晚了,不起作用了,要设margins也必须在onlayout进来之前就设好。
另外有个问题,在onlayout里默认的setX这些都是this.setX()对应的是母布局的设置,如果对里面的孩子设置前面必须加上孩子的名字。还有,在super.onLayout(changed, l, t, r, b);之前设置好setTranslationX就好了,并不需要再super.onLayout(changed, l, t, r, b);对这里的五个参数进行改变。
其实看setLayoutParams(params)的流程可以知道:
public void setLayoutParams(ViewGroup.LayoutParams params) { if (params == null) { throw new NullPointerException("Layout parameters cannot be null"); } mLayoutParams = params; resolveLayoutParams(); if (mParent instanceof ViewGroup) { ((ViewGroup) mParent).onSetLayoutParams(this, params); } requestLayout(); }设完参数后最终调的是requestLayout(),即请求对自身重新measure和layout.从这个角度讲,通过params来改变位置比较低效,还需要再走一遍自己的流程。而在母布局里的onLayout里setTranslateX则不额外增加流程。至于为啥在onLayout里设置子view的params无效,这个着实无从查起,个人猜测是母布局onLayout的时候不额外获取子view的其他参数,仅仅从xml里读的。但是在上面介绍自定义VIewGroup的时候,里面的方法2是可以在onlayout里通过设置margin来动态布局子view的。参见我的前文:Android应用经典主界面框架之一:仿QQ (使用Fragment, 附源码)里的layoutItems()函数。
至此旋转搞好了,接下来是如何获得角度:
mOrientationEvent= new OrientationEventListener(this) { @Override public void onOrientationChanged(int orientation) { // TODO Auto-generated method stub if(orientation == OrientationEventListener.ORIENTATION_UNKNOWN){ return; } mOrientation = RoundUtil.roundOrientation(orientation, mOrientation); int orientationCompensation = (mOrientation + RoundUtil .getDisplayRotation(MainActivity.this)) % 360; if(mOrientationCompensation != orientationCompensation){ mOrientationCompensation = orientationCompensation; Log.i("YanZi", "mOrientationCompensation = " + mOrientationCompensation); OrientationUtil.setOrientation(mOrientationCompensation == -1 ? 0 : mOrientationCompensation); setOrientation(OrientationUtil.getOrientation(), false); } } @Override protected void onResume() { // TODO Auto-generated method stub super.onResume(); mOrientationEvent.enable(); } @Override protected void onPause() { // TODO Auto-generated method stub super.onPause(); mOrientationEvent.disable(); }用到的RoundUtil:package org.yanzi.util;import android.app.Activity;import android.view.OrientationEventListener;import android.view.Surface;public class RoundUtil { public static final int ORIENTATION_HYSTERESIS = 5; public static int roundOrientation(int orientation, int orientationHistory) { boolean changeOrientation = false; if (orientationHistory == OrientationEventListener.ORIENTATION_UNKNOWN) { changeOrientation = true; } else { int dist = Math.abs(orientation - orientationHistory); dist = Math.min( dist, 360 - dist ); changeOrientation = ( dist >= 45 + ORIENTATION_HYSTERESIS ); } if (changeOrientation) { return ((orientation + 45) / 90 * 90) % 360; } return orientationHistory; } public static int getDisplayRotation(Activity activity) { int rotation = activity.getWindowManager().getDefaultDisplay() .getRotation(); switch (rotation) { case Surface.ROTATION_0: return 0; case Surface.ROTATION_90: return 90; case Surface.ROTATION_180: return 180; case Surface.ROTATION_270: return 270; } return 0; }}注:这个获得角度是正确的,且只有在该变量到一定程度时才通知更新view,比我之前的博文要严谨。
最后,一个view通过rotate()无论怎么转都是以自身的中心点进行旋转的,只要母布局么有旋转,坐标系原点就是屏幕左上角,且x、y轴不交换。
源码下载:http://download.csdn.net/detail/yanzi1225627/7681731
--------------------本文系原创,转载请注明作者yanzi1225627
