文章出处:http://blog.csdn.net/scarthr/article/details/42145015
我们今天来看窗口导航。
一 用Activity的启动模式
如何让我们的程序在启动了好多Activity之后回到主窗口的时候关闭其他所有窗口呢?一种实现方式是使用一个List集合,每创建一个Activity就放到这个List中,当最后需要返回主窗口的时候,遍历List集合,一个一个关闭即可。今天我们来学习另一种方式,这涉及到了Activity的启动模式。
那么如何设置Activity的启动模式呢?
在Manifest中配置Activity的launchMode属性即可,一共有4个方式:
1. standard:标准的(默认的),每次都会创建一个新实例放入任务栈中。
2. singleTop:如果任务的栈顶存在该Activity实例,就会重用该实例,否则就会创建新的实例放入栈顶(即使栈中存在,只要不在栈顶就会创建新实例)
3. singleTask:如果任务的栈中存在该Activity实例,就会重用该实例,并让改实例放入栈顶,它之前上面的实例将会被移除。如果栈中没有该实例就会创建该实例。
4. singleInstance:在一个新栈中创建改实例,并让多个应用共享该栈中的该实例。一旦该模式的Activity实例存在于某个栈中,任何应用再激活改实例都会重用该栈中的改实例,效果相当与应用程序共享一个应用,不管谁激活该Activity都会进入同一个应用中。
二 滑动导航
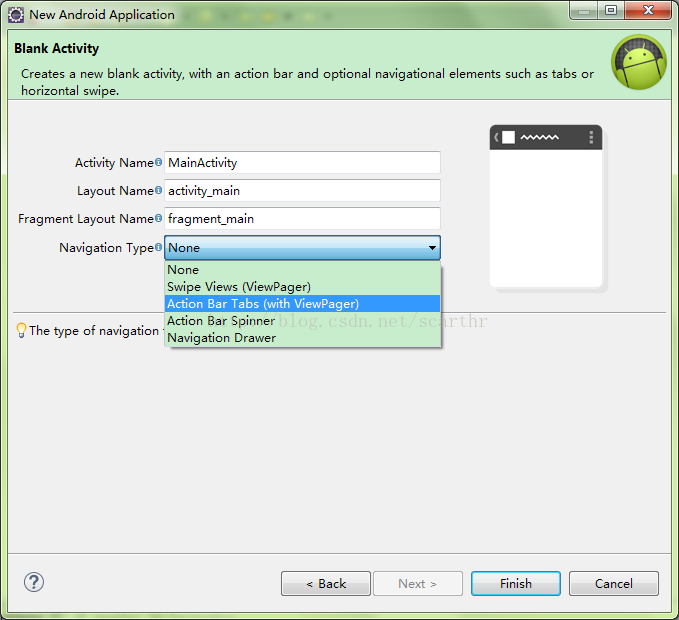
主布局就是一个ViewPager:
<android.support.v4.view.ViewPager xmlns:android="http://schemas.android.com/apk/res/android" xmlns:tools="http://schemas.android.com/tools" android:id="@+id/pager" android:layout_width="match_parent" android:layout_height="match_parent" tools:context="com.example.testviewpager.MainActivity" />然后是Activity:
package com.example.testviewpager;import java.util.Locale;import android.app.Activity;import android.app.ActionBar;import android.app.Fragment;import android.app.FragmentManager;import android.app.FragmentTransaction;import android.support.v13.app.FragmentPagerAdapter;import android.os.Bundle;import android.support.v4.view.ViewPager;import android.view.Gravity;import android.view.LayoutInflater;import android.view.Menu;import android.view.MenuItem;import android.view.View;import android.view.ViewGroup;import android.widget.TextView;public class MainActivity extends Activity implements ActionBar.TabListener { /** * The [email protected] android.support.v4.view.PagerAdapter} that will provide * fragments for each of the sections. We use a [email protected] FragmentPagerAdapter} * derivative, which will keep every loaded fragment in memory. If this * becomes too memory intensive, it may be best to switch to a * [email protected] android.support.v13.app.FragmentStatePagerAdapter}. */ SectionsPagerAdapter mSectionsPagerAdapter; /** * The [email protected] ViewPager} that will host the section contents. */ ViewPager mViewPager; @Override protected void onCreate(Bundle savedInstanceState) { super.onCreate(savedInstanceState); setContentView(R.layout.activity_main); // Set up the action bar. final ActionBar actionBar = getActionBar(); actionBar.setNavigationMode(ActionBar.NAVIGATION_MODE_TABS); // Create the adapter that will return a fragment for each of the three // primary sections of the activity. mSectionsPagerAdapter = new SectionsPagerAdapter(getFragmentManager()); // Set up the ViewPager with the sections adapter. mViewPager = (ViewPager) findViewById(R.id.pager); mViewPager.setAdapter(mSectionsPagerAdapter); // When swiping between different sections, select the corresponding // tab. We can also use ActionBar.Tab#select() to do this if we have // a reference to the Tab. mViewPager .setOnPageChangeListener(new ViewPager.SimpleOnPageChangeListener() { @Override public void onPageSelected(int position) { actionBar.setSelectedNavigationItem(position); } }); // For each of the sections in the app, add a tab to the action bar. for (int i = 0; i < mSectionsPagerAdapter.getCount(); i++) { // Create a tab with text corresponding to the page title defined by // the adapter. Also specify this Activity object, which implements // the TabListener interface, as the callback (listener) for when // this tab is selected. actionBar.addTab(actionBar.newTab() .setText(mSectionsPagerAdapter.getPageTitle(i)) .setTabListener(this)); } } @Override public boolean onCreateOptionsMenu(Menu menu) { // Inflate the menu; this adds items to the action bar if it is present. getMenuInflater().inflate(R.menu.main, menu); return true; } @Override public boolean onOptionsItemSelected(MenuItem item) { // Handle action bar item clicks here. The action bar will // automatically handle clicks on the Home/Up button, so long // as you specify a parent activity in AndroidManifest.xml. int id = item.getItemId(); if (id == R.id.action_settings) { return true; } return super.onOptionsItemSelected(item); } @Override public void onTabSelected(ActionBar.Tab tab, FragmentTransaction fragmentTransaction) { // When the given tab is selected, switch to the corresponding page in // the ViewPager. mViewPager.setCurrentItem(tab.getPosition()); } @Override public void onTabUnselected(ActionBar.Tab tab, FragmentTransaction fragmentTransaction) { } @Override public void onTabReselected(ActionBar.Tab tab, FragmentTransaction fragmentTransaction) { } /** * A [email protected] FragmentPagerAdapter} that returns a fragment corresponding to * one of the sections/tabs/pages. */ public class SectionsPagerAdapter extends FragmentPagerAdapter { public SectionsPagerAdapter(FragmentManager fm) { super(fm); } @Override public Fragment getItem(int position) { // getItem is called to instantiate the fragment for the given page. // Return a PlaceholderFragment (defined as a static inner class // below). return PlaceholderFragment.newInstance(position + 1); } @Override public int getCount() { // Show 3 total pages. return 3; } @Override public CharSequence getPageTitle(int position) { Locale l = Locale.getDefault(); switch (position) { case 0: return getString(R.string.title_section1).toUpperCase(l); case 1: return getString(R.string.title_section2).toUpperCase(l); case 2: return getString(R.string.title_section3).toUpperCase(l); } return null; } } /** * A placeholder fragment containing a simple view. */ public static class PlaceholderFragment extends Fragment { /** * The fragment argument representing the section number for this * fragment. */ private static final String ARG_SECTION_NUMBER = "section_number"; /** * Returns a new instance of this fragment for the given section number. */ public static PlaceholderFragment newInstance(int sectionNumber) { PlaceholderFragment fragment = new PlaceholderFragment(); Bundle args = new Bundle(); args.putInt(ARG_SECTION_NUMBER, sectionNumber); fragment.setArguments(args); return fragment; } public PlaceholderFragment() { } @Override public View onCreateView(LayoutInflater inflater, ViewGroup container, Bundle savedInstanceState) { View rootView = inflater.inflate(R.layout.fragment_main, container, false); TextView textView = (TextView) rootView .findViewById(R.id.section_label); textView.setText(Integer.toString(getArguments().getInt( ARG_SECTION_NUMBER))); return rootView; } }}英文注释已经写的很详细了,大家稍微看看应该会明白的。先创建继承自FragmentPagerAdapter的SectionsPagerAdapter适配器,获取到ViewPager后,指定好刚才创建的SectionsPagerAdapter,SectionsPagerAdapter的构造方法传FragmentManager,使用Activity的getFragmentManager()就可以得到。重写了FragmentPagerAdapter的几个方法,getItem返回一个Fragment,返回当前页面正在显示的Fragment,getCount返回总共Fragment的个数,getPageTitle可以获得每一个Fragment的标题。最后用setOnPageChangeListener给ViewPager设定了监听,可以重写onPageSelected方法,返回当前Fragment的序号。如果设定监听传的参数是OnPageChangeListener接口,那么需要重写OnPageChangeListener的3个方法:onPageSelected、onPageScrollStateChanged和onPageScrolled,看方法名也应该大概知道他们的意思了吧。
三 使用Fragment实现导航
package com.thr.testfragmentpager;import android.app.Activity;import android.app.FragmentManager;import android.app.FragmentManager.OnBackStackChangedListener;import android.app.FragmentTransaction;import android.os.Bundle;import android.view.View;public class MainActivity extends Activity implements OnBackStackChangedListener { private int count = 0; @Override protected void onCreate(Bundle savedInstanceState) { super.onCreate(savedInstanceState); setContentView(R.layout.activity_main); nextFragment(false); onBackStackChanged(); } private void nextFragment(boolean backStackFlag) { final FragmentManager manager = getFragmentManager(); FragmentTransaction transaction = manager.beginTransaction(); FragmentPage fragment = new FragmentPage(); transaction.add(R.id.fl, fragment); if (backStackFlag) { transaction.addToBackStack(manager.getBackStackEntryCount() + ""); } transaction.commit(); manager.addOnBackStackChangedListener(this); } public void showNext(View v) { if (count != 4) { count++; nextFragment(true); } else { return; } } public void showPre(View v) { if (count == 0) { return; } else { count--; FragmentManager manager = getFragmentManager(); manager.popBackStack(); } } @Override public void onBackStackChanged() { setTitle("当前是第" + (getFragmentManager().getBackStackEntryCount() + 1) + "页"); }}有两个按钮控制Fragment的切换,showPre是上一个,showNext是下一个,在第一个Fragment添加进来的时候,我们用backStackFlag控制不添加到BackStack栈中,从第二个开始添加到BackStack栈中,最大数量是5,用count控制。showNext会添加一个新的Fragment至BackStack中,showPre会执行popBackStack,移除最上面的一个Fragment。