一般组件的常用状态有一下几种
---------------------------------------------------------------
状态名 描述
android:state_pressed 该组件被触碰或被点击
android:state_focused 该组件被框选,使用焦点移动到该组件
android:state_selected 该组件已经被选择
android:state_checkable 该组件是可以被选择的
android:state_checked 该组件已经被选择
android:state_enable 该组件在作用中
android:state_window_focused 该组件所在的母窗口为正在作用中的
-------------------------------------------------------------------
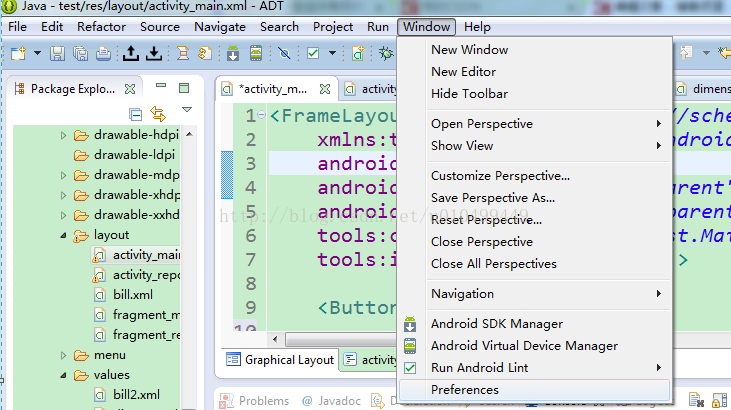
新建一个颜色组合的模板:
Window → Preference → XML → XML Files → Editor → Template → New
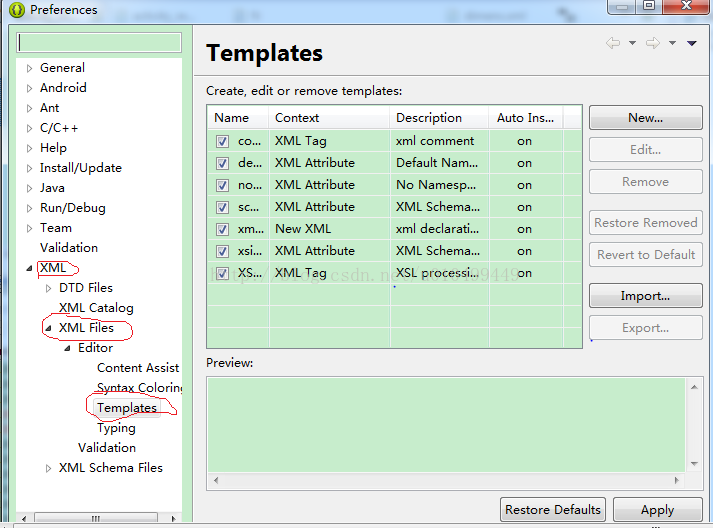
按New后,新建样板中加入颜色组合,点击OK
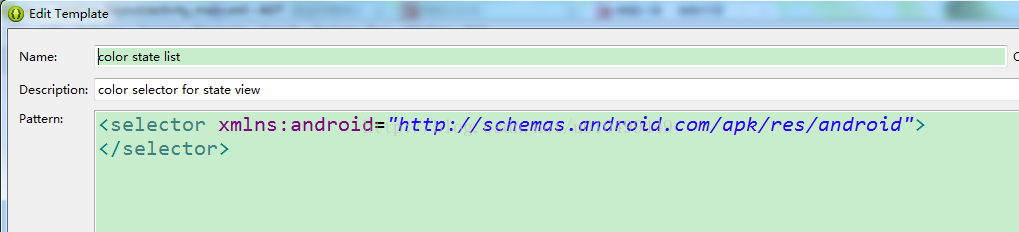
Name:color state list
Description:color selector for state view
Pattern:
<selector xmlns:android="http://schemas.android.com/apk/res/android">
</selector>
新建模板后就可以使用了。在res下新建一个子目录color,并且新建一个一般的XML文件,这里的XML文件不是 Android XML File。
File → New → Other
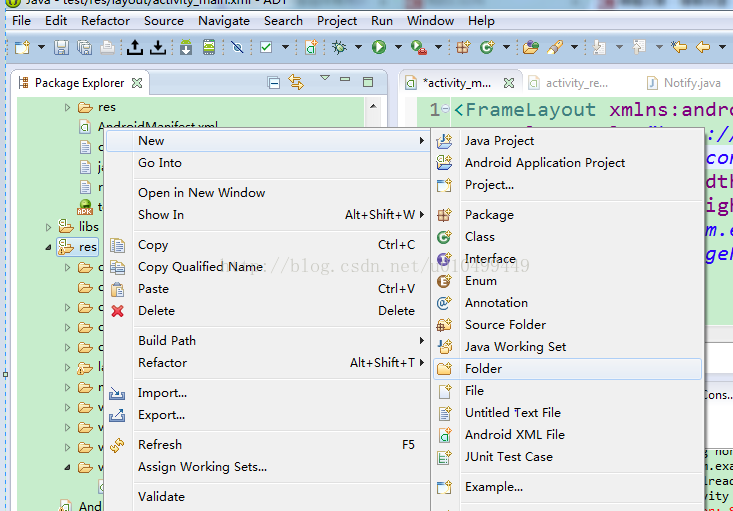

图:新建color文件
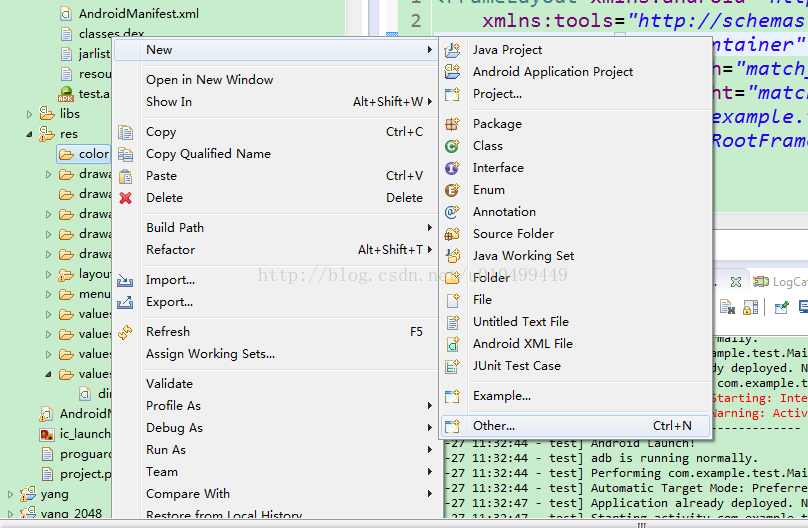
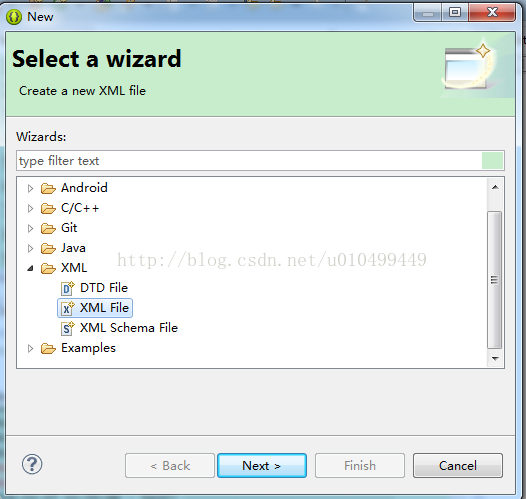

图:新建一般的XML文件
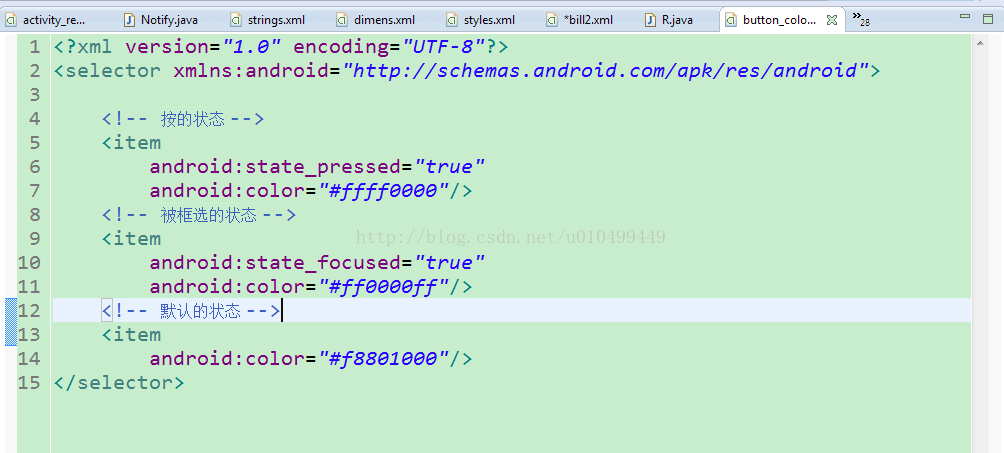
由于尚未完成会产生错误信息,按【Alt】+'/',选择刚才建立的节点color state list
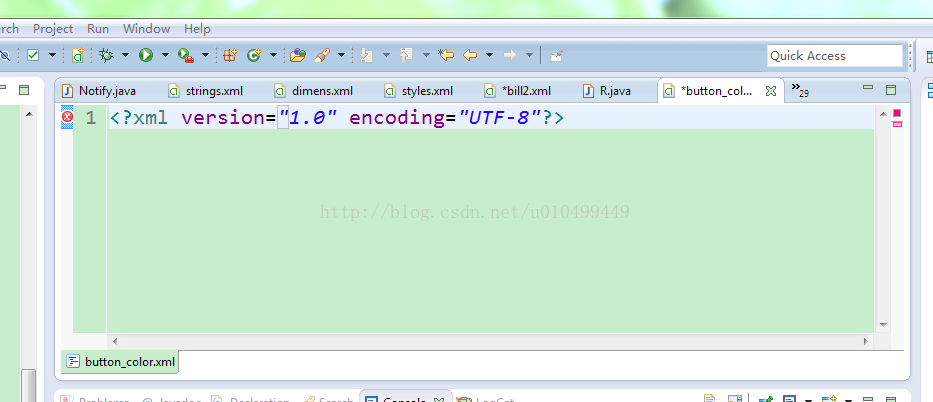

填入状态信息,保存
<?xml version="1.0" encoding="UTF-8"?><selector xmlns:android="http://schemas.android.com/apk/res/android"> <!-- 按的状态 --> <item android:state_pressed="true" android:color="#ffff0000"/> <!-- 被框选的状态 --> <item android:state_focused="true" android:color="#ff0000ff"/> <!-- 默认的状态 --> <item android:color="#f8801000"/></selector>
为了测试这个组合回到activity_main.XML添加两个按钮,如下代码
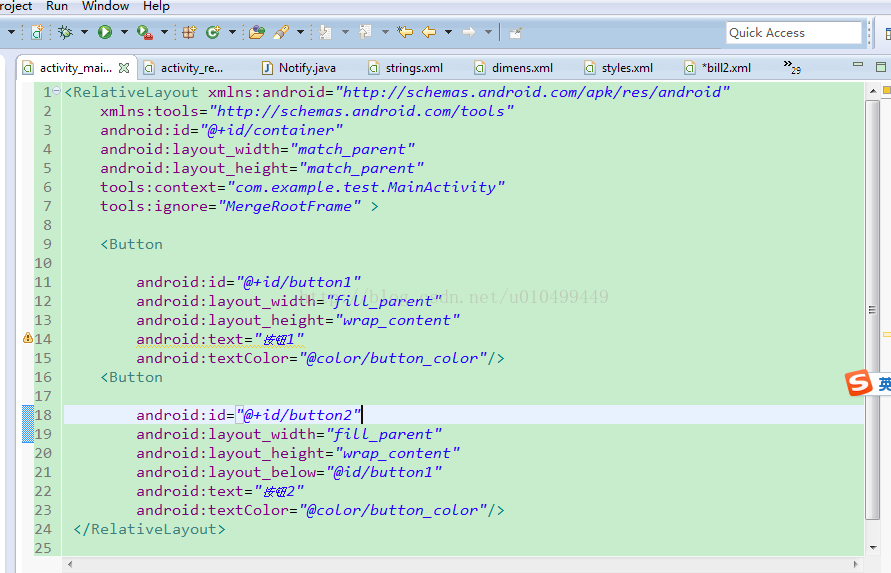
<RelativeLayout xmlns:android="http://schemas.android.com/apk/res/android" xmlns:tools="http://schemas.android.com/tools" android:id="@+id/container" android:layout_width="match_parent" android:layout_height="match_parent" tools:context="com.example.test.MainActivity" tools:ignore="MergeRootFrame" > <Button android:id="@+id/button1" android:layout_width="fill_parent" android:layout_height="wrap_content" android:text="按钮1" android:textColor="@color/button_color"/> <Button android:id="@+id/button2" android:layout_width="fill_parent" android:layout_height="wrap_content" android:layout_below="@id/button1" android:text="按钮2" android:textColor="@color/button_color"/> </RelativeLayout>
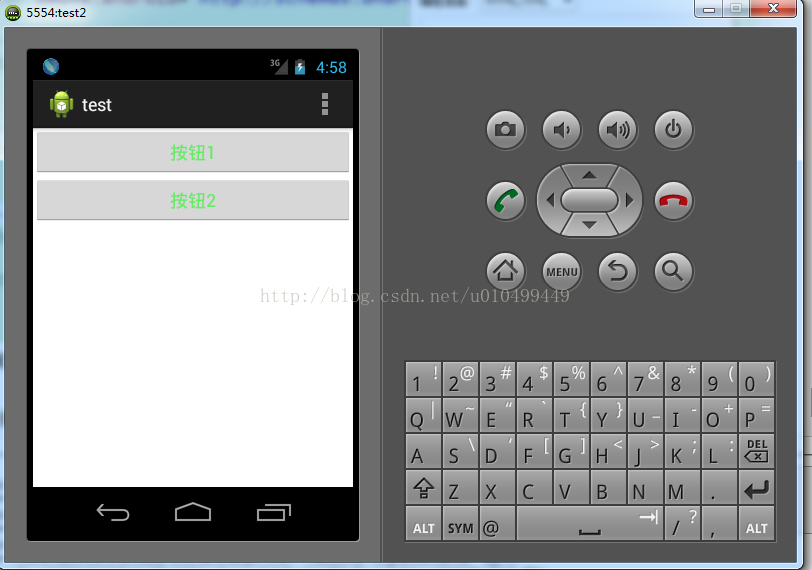
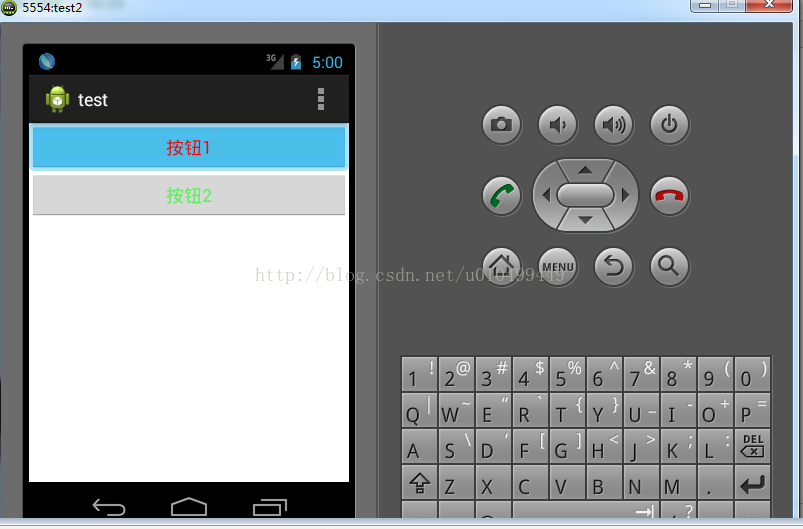
测试结果如下
转载请注明出处:http://blog.csdn.net/u010499449/article/details/42191917