博客为 有时个哥 原创,如需转载请标明出处:http://blog.csdn.net/ls703/article/details/46694967
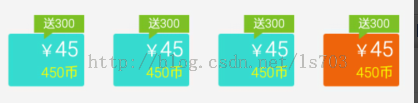
上面就是需求设计,4个类似的布局控件,每次只能选择一个,然后得到上面对应的钱数。(上面只是效果图,实际数据是从服务器获取,然后付到控件上)
看到这种,我们就回想到,几种实现方法。
1.把这个整体写一个布局,在xml布局中,复制粘贴,代码,凑够4个。非常不建议这样,因为4个的布局样式是一样的,只是数据可能不相同,所以我们应该写一个组合控件然后重复利用。
2.就是写一个 单个的布局控件,然后设置一些设置数据的方法,然后重复利用它。引入四个控件。这样在一定程度上达到了代码重复利用性,但是以后在布局中这一块要是去掉,可能你要修改的代码也是会比较多了。
3.还有一种就是使用GridView,我们看多多个相同的布局,就会相到使用listView和GridView。这种方法是可以使用的,不过在有个问题是,如果没有数据的前提下,它将会是一个空布局,不太好看,对于后期修改或去掉这一部分布局的话,相对来说好算比较好修改,去电一个GridView和他相对应的adapter就好了。
下面我们在针对第二种来说一下,解决一下他的不好修改的特点,因为,我们一般写完程序之后就会懒得修改,所以我们在第一次编写的时候,要为以后的修改做好准备,一切为了方便修改。因为程序员都知道,产品的需求是一直在变化,。。。。。你们懂就好,假如,产品想把这个东西换一个样式,或是直接其用掉这一部分布局,那我们就尽量做到,删除几行代码搞定它。那么就需要我们在2方式的基础上再封装一层。
把四个弄成一个控件,然后再整体加进去。
你们仔细看,上面的是不是一个单选按钮组?就和androd的radiobutton控件相似,然后用一个radioGroup包含。
所以我们可以针对这个写一个类似RadioGroup和RadioButton那样类似的东西。
首先先解决RadioButton类似的控件,先写一个布局,这样的布局。
布局为,
<RelativeLayout xmlns:android="http://schemas.android.com/apk/res/android" android:layout_width="match_parent" android:layout_height="match_parent" android:gravity="center" android:orientation="vertical" > <LinearLayout android:id="@+id/llbg" android:layout_width="wrap_content" android:layout_height="wrap_content" android:layout_alignParentRight="true" android:layout_marginTop="16dp" android:background="@drawable/btn_recharge" android:orientation="vertical" > <LinearLayout android:layout_width="wrap_content" android:layout_height="wrap_content" android:layout_gravity="right" android:layout_marginRight="5dp" android:orientation="horizontal" > <TextView android:layout_width="wrap_content" android:layout_height="wrap_content" android:text="¥" android:textColor="@color/white" /> <TextView android:id="@+id/tvMoney" android:layout_width="wrap_content" android:layout_height="wrap_content" android:text="0" android:textColor="@color/white" android:textSize="18sp" /> </LinearLayout> <TextView android:id="@+id/tvcords" android:layout_width="wrap_content" android:layout_height="wrap_content" android:layout_gravity="right" android:layout_marginRight="5dp" android:text="0币" android:textColor="@color/yellow" android:textSize="12sp" /> </LinearLayout> <TextView android:id="@+id/tvZengs" android:visibility="visible" android:layout_width="wrap_content" android:layout_height="wrap_content" android:layout_alignParentRight="true" android:background="@drawable/icon_recharge_discount" android:gravity="center_horizontal" android:text="送0" android:textColor="@color/white" android:textSize="10sp" /></RelativeLayout>
就这么简单写一下。
然后把其整体封装为一个组合控件,编写方法什么的。
public class RechargeValueLayout extends FrameLayout{ private View view; private TextView mZengs; private TextView mMoney; private TextView mCords; private String money; private LinearLayout mllbg; private Boolean isChecked; public RechargeValueLayout(Context context, AttributeSet attrs, int defStyle) { super(context, attrs, defStyle); // TODO Auto-generated constructor stub } public RechargeValueLayout(Context context, AttributeSet attrs) { super(context, attrs); view = View.inflate(context, R.layout.recharge_value_item, this); mllbg = (LinearLayout)view.findViewById(R.id.llbg); mZengs = (TextView)view.findViewById(R.id.tvZengs); mMoney = (TextView)view.findViewById(R.id.tvMoney); mCords = (TextView)view.findViewById(R.id.tvcords); } public RechargeValueLayout(Context context) { super(context); } public void setChecked(Boolean isChecked){ Log.i("TAG2", "isSelected===>>>>"+isChecked); if(isChecked==this.isChecked){ return; } if(isChecked){ mllbg.setBackgroundResource(R.drawable.btn_recharge_active); }else{ mllbg.setBackgroundResource(R.drawable.btn_recharge); } this.isChecked = isChecked; } public boolean isChecked(){ return this.isChecked; } public void setZengsValue(int value){ if(value>0){ mZengs.setVisibility(View.VISIBLE); mZengs.setText("送"+value+""); }else{ mZengs.setVisibility(View.GONE); } } public String getMoneyValue(){ return this.money; } public void setMoneyValue(int value){ if(value>0){ mMoney.setText(value+""); this.money = value+""; }else{ mMoney.setText("0币"); } } public void setCordsValue(int value){ if(value>0){ mCords.setText(value+"币"); }else{ mCords.setText("0币"); } } }这样,你就直接可以引用其路径,直接使用这个组合控件。其实到这里,就实现了2方式所说的。但是仅用这个,那么我们只是实现了布局重用,但是不好进行替换修改,你可以想想,这么一个控件里有3个textView,并且我们要对其textView进行赋值,也就是说我们要对12TextView经行操作,如果这12TextView放在我们activity里,一是代码过于臃肿,二是你想想,如果以后去掉的话,我们就得对这所有涉及到这12个TextView的代码都得进行删除。
所以我们现在要把这四个控件再给他们一个类似RadioGroup的容器,在RadioGroup里有一个点击事件,只要对RadioCroup设置上监听,那么在RadioGroup的控件就自动设置上了监听,所以,咱activity里面我们只需要这个RadioGroup的控件代码,1个对12个,你们想想到知道后续修改操作那种方便。
开始是想的定义的布局控件,这个布局控件得到自己里面的孩子数,然后再遍历循环给孩子设置上监听,可是失败了。
具体的说说失败的代码。
<com.song.components.RechargeValueGroup android:id="@+id/rechargeGroup" android:layout_width="fill_parent" android:layout_height="wrap_content" > <com.song.components.RechargeValueLayout android:id="@+id/tab1" android:layout_width="wrap_content" android:layout_height="wrap_content" android:layout_weight="1" > </com.song.components.RechargeValueLayout> <com.song.components.RechargeValueLayout android:id="@+id/tab2" android:layout_width="wrap_content" android:layout_height="wrap_content" android:layout_weight="1" > </com.song.components.RechargeValueLayout> <com.song.components.RechargeValueLayout android:id="@+id/tab3" android:layout_width="wrap_content" android:layout_height="wrap_content" android:layout_weight="1" > </com.song.components.RechargeValueLayout> <!-- <com.song.components.RechargeValueLayout android:id="@+id/tab4" android:layout_width="wrap_content" android:layout_height="wrap_content" android:layout_weight="1" > </com.song.components.RechargeValueLayout> --> </com.song.components.RechargeValueGroup>
这是布局,首先把RechargeValueLayout放到RechargeValueGroup里面,然后RechargeValueGroup里面得到自己的孩子数,
public class RechargeValueGroup extends FrameLayout { private OnItemTabClickListener listener; public RechargeValueGroup(Context context, AttributeSet attrs, int defStyle) { super(context, attrs, defStyle); // TODO Auto-generated constructor stub } public RechargeValueGroup(Context context, AttributeSet attrs) { super(context, attrs); init(); } public RechargeValueGroup(Context context) { super(context); // TODO Auto-generated constructor stub } private void init() { int count = getChildCount(); for (int i = 0; i < count; i++) { getChildAt(i).setOnClickListener(new OnClickListener() { @Override public void onClick(View v) { if(listener!=null){ listener.onItemClick(RechargeValueGroup.this,v.getId()); } } }); } } /** * 定义Group的监听,点击每一个子按钮就会返回相对应子按钮的信息,以方便操作 */ public interface OnItemTabClickListener { public void onItemClick(RechargeValueGroup view, int checkedId); } }
可是这样有个问题,在构造函数执行的时候是获得不到孩子数的,这样就没法给孩子设置上监听了。
然后我就想记得以前是在onMeasure里面可以得到孩子数,把init的部分放到onMeasure或onLayout方法里,孩子数是得到了,可是这两个方法是,只要布局有变化,其都会走一遍,也就是说只要你布局有变化,他们就会执行,所以出现了一些问题,所以在这两个方法中设置监听是不太好的。
那怎么样技能自动获得孩子数,又能给对应的孩子设置上监听呢?
于是我就去看了一下RadioGroup的源码。
/* * Copyright (C) 2006 The Android Open Source Project * * Licensed under the Apache License, Version 2.0 (the "License"); * you may not use this file except in compliance with the License. * You may obtain a copy of the License at * * http://www.apache.org/licenses/LICENSE-2.0 * * Unless required by applicable law or agreed to in writing, software * distributed under the License is distributed on an "AS IS" BASIS, * WITHOUT WARRANTIES OR CONDITIONS OF ANY KIND, either express or implied. * See the License for the specific language governing permissions and * limitations under the License. */package android.widget;import com.android.internal.R;import android.content.Context;import android.content.res.TypedArray;import android.util.AttributeSet;import android.view.View;import android.view.ViewGroup;import android.view.accessibility.AccessibilityEvent;import android.view.accessibility.AccessibilityNodeInfo;/** * <p>This class is used to create a multiple-exclusion scope for a set of radio * buttons. Checking one radio button that belongs to a radio group unchecks * any previously checked radio button within the same group.</p> * * <p>Intially, all of the radio buttons are unchecked. While it is not possible * to uncheck a particular radio button, the radio group can be cleared to * remove the checked state.</p> * * <p>The selection is identified by the unique id of the radio button as defined * in the XML layout file.</p> * * <p><strong>XML Attributes</strong></p> * <p>See [email protected] android.R.styleable#RadioGroup RadioGroup Attributes}, * [email protected] android.R.styleable#LinearLayout LinearLayout Attributes}, * [email protected] android.R.styleable#ViewGroup ViewGroup Attributes}, * [email protected] android.R.styleable#View View Attributes}</p> * <p>Also see * [email protected] android.widget.LinearLayout.LayoutParams LinearLayout.LayoutParams} * for layout attributes.</p> * * @see RadioButton * */public class RadioGroup extends LinearLayout { // holds the checked id; the selection is empty by default private int mCheckedId = -1; // tracks children radio buttons checked state private CompoundButton.OnCheckedChangeListener mChildOnCheckedChangeListener; // when true, mOnCheckedChangeListener discards events private boolean mProtectFromCheckedChange = false; private OnCheckedChangeListener mOnCheckedChangeListener; private PassThroughHierarchyChangeListener mPassThroughListener; /** * [email protected]} */ public RadioGroup(Context context) { super(context); setOrientation(VERTICAL); init(); } /** * [email protected]} */ public RadioGroup(Context context, AttributeSet attrs) { super(context, attrs); // retrieve selected radio button as requested by the user in the // XML layout file TypedArray attributes = context.obtainStyledAttributes( attrs, com.android.internal.R.styleable.RadioGroup, com.android.internal.R.attr.radioButtonStyle, 0); int value = attributes.getResourceId(R.styleable.RadioGroup_checkedButton, View.NO_ID); if (value != View.NO_ID) { mCheckedId = value; } final int index = attributes.getInt(com.android.internal.R.styleable.RadioGroup_orientation, VERTICAL); setOrientation(index); attributes.recycle(); init(); } private void init() { mChildOnCheckedChangeListener = new CheckedStateTracker(); mPassThroughListener = new PassThroughHierarchyChangeListener(); super.setOnHierarchyChangeListener(mPassThroughListener); } /** * [email protected]} */ @Override public void setOnHierarchyChangeListener(OnHierarchyChangeListener listener) { // the user listener is delegated to our pass-through listener mPassThroughListener.mOnHierarchyChangeListener = listener; } /** * [email protected]} */ @Override protected void onFinishInflate() { super.onFinishInflate(); // checks the appropriate radio button as requested in the XML file if (mCheckedId != -1) { mProtectFromCheckedChange = true; setCheckedStateForView(mCheckedId, true); mProtectFromCheckedChange = false; setCheckedId(mCheckedId); } } @Override public void addView(View child, int index, ViewGroup.LayoutParams params) { if (child instanceof RadioButton) { final RadioButton button = (RadioButton) child; if (button.isChecked()) { mProtectFromCheckedChange = true; if (mCheckedId != -1) { setCheckedStateForView(mCheckedId, false); } mProtectFromCheckedChange = false; setCheckedId(button.getId()); } } super.addView(child, index, params); } /** * <p>Sets the selection to the radio button whose identifier is passed in * parameter. Using -1 as the selection identifier clears the selection; * such an operation is equivalent to invoking [email protected] #clearCheck()}.</p> * * @param id the unique id of the radio button to select in this group * * @see #getCheckedRadioButtonId() * @see #clearCheck() */ public void check(int id) { // don't even bother if (id != -1 && (id == mCheckedId)) { return; } if (mCheckedId != -1) { setCheckedStateForView(mCheckedId, false); } if (id != -1) { setCheckedStateForView(id, true); } setCheckedId(id); } private void setCheckedId(int id) { mCheckedId = id; if (mOnCheckedChangeListener != null) { mOnCheckedChangeListener.onCheckedChanged(this, mCheckedId); } } private void setCheckedStateForView(int viewId, boolean checked) { View checkedView = findViewById(viewId); if (checkedView != null && checkedView instanceof RadioButton) { ((RadioButton) checkedView).setChecked(checked); } } /** * <p>Returns the identifier of the selected radio button in this group. * Upon empty selection, the returned value is -1.</p> * * @return the unique id of the selected radio button in this group * * @see #check(int) * @see #clearCheck() * * @attr ref android.R.styleable#RadioGroup_checkedButton */ public int getCheckedRadioButtonId() { return mCheckedId; } /** * <p>Clears the selection. When the selection is cleared, no radio button * in this group is selected and [email protected] #getCheckedRadioButtonId()} returns * null.</p> * * @see #check(int) * @see #getCheckedRadioButtonId() */ public void clearCheck() { check(-1); } /** * <p>Register a callback to be invoked when the checked radio button * changes in this group.</p> * * @param listener the callback to call on checked state change */ public void setOnCheckedChangeListener(OnCheckedChangeListener listener) { mOnCheckedChangeListener = listener; } /** * [email protected]} */ @Override public LayoutParams generateLayoutParams(AttributeSet attrs) { return new RadioGroup.LayoutParams(getContext(), attrs); } /** * [email protected]} */ @Override protected boolean checkLayoutParams(ViewGroup.LayoutParams p) { return p instanceof RadioGroup.LayoutParams; } @Override protected LinearLayout.LayoutParams generateDefaultLayoutParams() { return new LayoutParams(LayoutParams.WRAP_CONTENT, LayoutParams.WRAP_CONTENT); } @Override public void onInitializeAccessibilityEvent(AccessibilityEvent event) { super.onInitializeAccessibilityEvent(event); event.setClassName(RadioGroup.class.getName()); } @Override public void onInitializeAccessibilityNodeInfo(AccessibilityNodeInfo info) { super.onInitializeAccessibilityNodeInfo(info); info.setClassName(RadioGroup.class.getName()); } /** * <p>This set of layout parameters defaults the width and the height of * the children to [email protected] #WRAP_CONTENT} when they are not specified in the * XML file. Otherwise, this class ussed the value read from the XML file.</p> * * <p>See * [email protected] android.R.styleable#LinearLayout_Layout LinearLayout Attributes} * for a list of all child view attributes that this class supports.</p> * */ public static class LayoutParams extends LinearLayout.LayoutParams { /** * [email protected]} */ public LayoutParams(Context c, AttributeSet attrs) { super(c, attrs); } /** * [email protected]} */ public LayoutParams(int w, int h) { super(w, h); } /** * [email protected]} */ public LayoutParams(int w, int h, float initWeight) { super(w, h, initWeight); } /** * [email protected]} */ public LayoutParams(ViewGroup.LayoutParams p) { super(p); } /** * [email protected]} */ public LayoutParams(MarginLayoutParams source) { super(source); } /** * <p>Fixes the child's width to * [email protected] android.view.ViewGroup.LayoutParams#WRAP_CONTENT} and the child's * height to [email protected] android.view.ViewGroup.LayoutParams#WRAP_CONTENT} * when not specified in the XML file.</p> * * @param a the styled attributes set * @param widthAttr the width attribute to fetch * @param heightAttr the height attribute to fetch */ @Override protected void setBaseAttributes(TypedArray a, int widthAttr, int heightAttr) { if (a.hasValue(widthAttr)) { width = a.getLayoutDimension(widthAttr, "layout_width"); } else { width = WRAP_CONTENT; } if (a.hasValue(heightAttr)) { height = a.getLayoutDimension(heightAttr, "layout_height"); } else { height = WRAP_CONTENT; } } } /** * <p>Interface definition for a callback to be invoked when the checked * radio button changed in this group.</p> */ public interface OnCheckedChangeListener { /** * <p>Called when the checked radio button has changed. When the * selection is cleared, checkedId is -1.</p> * * @param group the group in which the checked radio button has changed * @param checkedId the unique identifier of the newly checked radio button */ public void onCheckedChanged(RadioGroup group, int checkedId); } private class CheckedStateTracker implements CompoundButton.OnCheckedChangeListener { public void onCheckedChanged(CompoundButton buttonView, boolean isChecked) { // prevents from infinite recursion if (mProtectFromCheckedChange) { return; } mProtectFromCheckedChange = true; if (mCheckedId != -1) { setCheckedStateForView(mCheckedId, false); } mProtectFromCheckedChange = false; int id = buttonView.getId(); setCheckedId(id); } } /** * <p>A pass-through listener acts upon the events and dispatches them * to another listener. This allows the table layout to set its own internal * hierarchy change listener without preventing the user to setup his.</p> */ private class PassThroughHierarchyChangeListener implements ViewGroup.OnHierarchyChangeListener { private ViewGroup.OnHierarchyChangeListener mOnHierarchyChangeListener; /** * [email protected]} */ public void onChildViewAdded(View parent, View child) { if (parent == RadioGroup.this && child instanceof RadioButton) { int id = child.getId(); // generates an id if it's missing if (id == View.NO_ID) { id = View.generateViewId(); child.setId(id); } ((RadioButton) child).setOnCheckedChangeWidgetListener( mChildOnCheckedChangeListener); } if (mOnHierarchyChangeListener != null) { mOnHierarchyChangeListener.onChildViewAdded(parent, child); } } /** * [email protected]} */ public void onChildViewRemoved(View parent, View child) { if (parent == RadioGroup.this && child instanceof RadioButton) { ((RadioButton) child).setOnCheckedChangeWidgetListener(null); } if (mOnHierarchyChangeListener != null) { mOnHierarchyChangeListener.onChildViewRemoved(parent, child); } } }}
这就是RadioGroup的源码,加上注释什么的一共400来行代码,所以不是很多,然后就开始看源码。其中一开始在init()中,有这么一个监听,
mPassThroughListener = new PassThroughHierarchyChangeListener(); super.setOnHierarchyChangeListener(mPassThroughListener);
然后找到其对应的监听,
private class PassThroughHierarchyChangeListener implements ViewGroup.OnHierarchyChangeListener { private ViewGroup.OnHierarchyChangeListener mOnHierarchyChangeListener; /** * [email protected]} */ public void onChildViewAdded(View parent, View child) { if (parent == RadioGroup.this && child instanceof RadioButton) { int id = child.getId(); // generates an id if it's missing if (id == View.NO_ID) { id = View.generateViewId(); child.setId(id); } ((RadioButton) child).setOnCheckedChangeWidgetListener( mChildOnCheckedChangeListener); } if (mOnHierarchyChangeListener != null) { mOnHierarchyChangeListener.onChildViewAdded(parent, child); } } /** * [email protected]} */ public void onChildViewRemoved(View parent, View child) { if (parent == RadioGroup.this && child instanceof RadioButton) { ((RadioButton) child).setOnCheckedChangeWidgetListener(null); } if (mOnHierarchyChangeListener != null) { mOnHierarchyChangeListener.onChildViewRemoved(parent, child); } } }
这个监听继承了ViewGroup.OnHierarchyChangeListener接口,你通过查资料你就会发现,这个监听接口是对其 层次结构的监听,不像
onMeasure或onLayout,他只有在层次结构发生变化时,也就是说在添加view和移除view的时候才会调用,所以他有两个回调方法。onChildViewAdded和onChildViewRemoved。在初始化的时候,子布局是一个一个的被添加到RadioGroup,所以调用onChildViewAdded,可以得带其对应的孩子,就可以对其设置监听了。
这样设置就不会出现重复执行等问题。
然后这一步解决了就好说了。下一把就是我们触发监听后,要这几个控件协调控制,因为只有一个是能被选中。所以在监听的时候我们应该去改变子控件的状态等。
这一步就不细说了,应该都会顺着理清楚,就是只保持一个被选中就可以。附上代码,就是根据需求稍微改动了一下RadioGroup
public class RechargeValueGroup extends LinearLayout { private ArrayList<Integer> tabChildsId = new ArrayList<Integer>(); private OnItemTabClickListener listener; private PassThroughHierarchyChangeListener mPassThroughListener; private CheckedStateTracker mChildOnCheckedChangeListener; /** * 记录当前id,默认id为-1 */ private int mCheckedId = -1; public RechargeValueGroup(Context context, AttributeSet attrs, int defStyle) { super(context, attrs, defStyle); } public RechargeValueGroup(Context context, AttributeSet attrs) { super(context, attrs); init(); } public RechargeValueGroup(Context context) { super(context); } private void init() { // radiobutton的监听 mChildOnCheckedChangeListener = new CheckedStateTracker(); // 层次结构的监听 mPassThroughListener = new PassThroughHierarchyChangeListener(); // 设置监听 super.setOnHierarchyChangeListener(mPassThroughListener); } /** * 设置tab数据 * * @param datas */ public void setDataOfTabs(List<RechargeNumInfo> datas) { Log.i("TAG2","getChildCount()===>>>"+getChildCount()); Log.i("TAG2","datas()===>>>"+datas.size()); int count = 0; if (datas.size() >= getChildCount()) { count = getChildCount();// return; }else{ count = datas.size(); } for (int i = 0; i < count; i++) { Log.i("TAG2","data=1111==>>>"); RechargeValueLayout view = (RechargeValueLayout) findViewById(tabChildsId.get(i)); RechargeNumInfo data = datas.get(i); Log.i("TAG2","data===>>>"+data); view.setMoneyValue(data.chargeNum); view.setCordsValue(data.gzyNum); view.setZengsValue(data.giftNum); } } /** * [email protected]} */ @Override protected void onFinishInflate() { super.onFinishInflate(); Log.i("TAG2", "onFinishInflate=111==>>>>"); check(mCheckedId); } /** * 改变item的选择状态 * * @param viewId * @param checked * true 为选择,false 为不选择 */ private void setCheckedStateForView(int viewId, boolean checked) { Log.i("TAG2", "setCheckedStateForView====>>>"); View checkedView = findViewById(viewId); Log.i("TAG2", "setCheckedStateForView===checkedView=>>>" + checkedView); if (checkedView != null && checkedView instanceof RechargeValueLayout) { ((RechargeValueLayout) checkedView).setChecked(checked); Log.i("TAG2", "setCheckedStateForView===checkedView=111>>>" + checkedView); } } public void check(int id) { // don't even bother Log.i("TAG2", "check=000======>>>" + id); Log.i("TAG2", "check=000=11=====>>>" + mCheckedId); if (id != -1 && (id == mCheckedId)) { Log.i("TAG2", "check=111======>>>" + id); return; } if (mCheckedId != -1) { Log.i("TAG2", "check=222======>>>" + id); setCheckedStateForView(mCheckedId, false); } if (id != -1) { Log.i("TAG2", "check=333======>>>" + id); setCheckedStateForView(id, true); } setCheckedId(id); } /** * 选择Item后要执行的操作 * * @param id */ private void setCheckedId(int id) { // 更新当前选择的Item的id mCheckedId = id; if (listener != null) { RechargeValueLayout view = (RechargeValueLayout)findViewById(id); listener.onItemClick(this, id,view.getMoneyValue()); } } /** * 设置点击item的监听 * * @param l */ public void setOnItemTabClickListener(OnItemTabClickListener l) { this.listener = l; } /** * item选择监听 Title: RechargeValueGroup.java Description: * * @author Liusong * @date 2015-6-26 * @version V1.0 */ public interface OnItemTabClickListener { public void onItemClick(RechargeValueGroupview, int checkedId,String money); } /** * 图层变换监听 Title: RechargeValueGroup.java Description: * * @author Liusong * @date 2015-6-26 * @version V1.0 */ private class PassThroughHierarchyChangeListener implements ViewGroup.OnHierarchyChangeListener { private ViewGroup.OnHierarchyChangeListener mOnHierarchyChangeListener; /** * [email protected]} */ public void onChildViewAdded(View parent, View child) { if (parent == RechargeValueTabHost.this && child instanceof RechargeValueLayout) { int id = child.getId();// Log.i("TAG2", "onChildViewAdded=111==>>>>" + id); // generates an id if it's missing if (id == View.NO_ID) { id = View.generateViewId(); child.setId(id); } tabChildsId.add(id); ((RechargeValueLayout) child) .setOnClickListener(mChildOnCheckedChangeListener); } if (mOnHierarchyChangeListener != null) { mOnHierarchyChangeListener.onChildViewAdded(parent, child); } } /** * [email protected]} */ public void onChildViewRemoved(View parent, View child) { if (parent == RechargeValueTabHost.this && child instanceof RechargeValueLayout) { ((RechargeValueLayout) child).setOnClickListener(null); tabChildsId.remove(child.getId()); }// Log.i("TAG2", "onChildViewRemoved=111==>>>>" + child.getId()); if (mOnHierarchyChangeListener != null) { mOnHierarchyChangeListener.onChildViewRemoved(parent, child); } } } /** * 每一项Item的点击事件 Title: RechargeValueGroup.java Description: * * @author Liusong * @date 2015-6-26 * @version V1.0 */ class CheckedStateTracker implements OnClickListener { @Override public void onClick(View v) {// setCheckedId(v.getId()); check(v.getId()); } };// /**// * Item的具体数据值 Title: <strong>RechargeValueGroup</strong>.java Description:// * // * @author Liusong// * @date 2015-6-26// * @version V1.0// */// class RechargeValueBean {// public int zengs;// public int money;// public int cords;// }}
就上上面的代码,由于我是使用的在Xml里面添加子控件,所以就没写addView方法,有兴趣的可以自己写一下addview方法。
然后,我有加了一个public void setDataOfTabs(List<RechargeNumInfo> datas)这个方法,就是把得到的数据直接付给这个控件,这样,就会自动把所有子控件附上值。
这样比较方便,因为数据是从服务器拿到的,使用Gson工具类,直接把数据封装成了集合,只要把集合传入就可实现自动赋值。非常方便,自己不需要一个一个的去赋值了。
根据RadioCroup修改的,只要根据不同的情况稍作修改就可以满足很多情况,例如,我们常见的底部导航,tab选择等等,只要我们稍把不同的item子控件改动一下,我们就会很快的实现一个单选样式的按钮组。
使用方法也很简单,在代码中
mRechargeGroup= (RechargeValueGroup) findViewById(R.id.rechargeGroup); mRechargeGroup.setOnItemTabClickListener(new OnItemTabClickListener() { @Override public void onItemClick(RechargeValueGroupview, int checkedId,String money) { // TODO Auto-generated method stub Log.i("TAG2", "checkedId===>>>"+checkedId); realPrice = money; } });
找到控件设置监听,然后回掉回来各种参数,id等,我们也可以根据自己的需求去修改OnItemTabClickListener监听接口中的onItemClick传递的参数来满足自己的需求,
然后我们在适当的地方调用setDataOfTabs(List<RechargeNumInfo> datas)这个方法来设置数据就好了。
xml里面,就是上面的那段代码
<com.song.components.RechargeValueGroup android:id="@+id/rechargeGroup" android:layout_width="fill_parent" android:layout_height="wrap_content" > <com.song.components.RechargeValueLayout android:id="@+id/tab1" android:layout_width="wrap_content" android:layout_height="wrap_content" android:layout_weight="1" > </com.song.components.RechargeValueLayout> <com.song.components.RechargeValueLayout android:id="@+id/tab2" android:layout_width="wrap_content" android:layout_height="wrap_content" android:layout_weight="1" > </com.song.components.RechargeValueLayout> <com.song.components.RechargeValueLayout android:id="@+id/tab3" android:layout_width="wrap_content" android:layout_height="wrap_content" android:layout_weight="1" > </com.song.components.RechargeValueLayout> <!-- <com.song.components.RechargeValueLayout android:id="@+id/tab4" android:layout_width="wrap_content" android:layout_height="wrap_content" android:layout_weight="1" > </com.song.components.RechargeValueLayout> --> </com.song.components.RechargeValueGroup>
就这么简单,大家可以在这个基础上来进行其他扩展什么的。
版权声明:本文为博主原创文章,未经博主允许不得转载。