Android Bitmap 加载与像素操作
一:加载与像素读写
在Android SDK中,图像的像素读写可以通过getPixel与setPixel两个Bitmap的API实现。Bitmap API读取像素的代码如下:
int pixel = bitmap.getPixel(col, row);// ARGBint red = Color.red(pixel); // same as (pixel >> 16) &0xffint green = Color.green(pixel); // same as (pixel >> 8) &0xffint blue = Color.blue(pixel); // same as (pixel & 0xff)int alpha = Color.alpha(pixel); // same as (pixel >>> 24)得到像素pixel是32位的整数,四个字节分别对应透明通道、红色、绿色、蓝色通道。Bitmap API 写入像素,代码如下:
bm.setPixel(col, row, Color.argb(alpha, red, green, blue));通过Color.argb重新组装成一个int的像素值。
使用BitmapFactory.decodeFile或者decodeResource等方法实现加载图像的Bitmap对象时,这些方法就会为要构建的Bitmap对象分配合适大小的内存,如果原始的图像文件数据很大,就会导致DVM不能分配请求的内存大小,从而导致OOM(out of memory)问题。而通过配置BitmapFactory.Option预先读取图像高度与宽带,图像进行适当的下采样,就可以避免OOM问题的发生。预先只获取图像高度与宽带的代码如下:
// 获取Bitmap图像大小与类型属性 BitmapFactory.Options options = new BitmapFactory.Options(); options.inJustDecodeBounds = true; BitmapFactory.decodeResource(getResources(), R.drawable.shar_03, options); int height = options.outHeight; int width = options.outWidth; String imageType = options.outMimeType;基于下采样加载超大Bitmap图像的缩小版本:
// 下采样 int inSampleSize = 1; if (height > reqHeight || width > reqWidth) { final int halfHeight = height / 2; final int halfWidth = width / 2; // Calculate the largest inSampleSize value // that is a power of 2 and keeps both // height and width larger than the requested height and width. while ((halfHeight / inSampleSize) > reqHeight && (halfWidth / inSampleSize) > reqWidth) { inSampleSize *= 2; } } // 获取采样后的图像显示,避免OOM问题 options.inJustDecodeBounds = false; srcImage = BitmapFactory.decodeResource(getResources(), R.drawable.shar_03, options);二:像素操作
android彩色图像灰度化的三个简单方法
灰度化方法一:
灰度值GRAY = (max(red, green, blue) + min(red, green, blue))/2
灰度化方法二:
灰度值GRAY = (red + green + blue)/3
灰度化方法三:
灰度值GRAY = red*0.3 + green*0.59 + blue*0.11
代码实现如下:
public Bitmap gray(Bitmap bitmap, int schema){ Bitmap bm = Bitmap.createBitmap(bitmap.getWidth(),bitmap.getHeight(), bitmap.getConfig()); int width = bitmap.getWidth(); int height = bitmap.getHeight(); for(int row=0; row<height; row++){ for(int col=0; col<width; col++){ int pixel = bitmap.getPixel(col, row);// ARGB int red = Color.red(pixel); // same as (pixel >> 16) &0xff int green = Color.green(pixel); // same as (pixel >> 8) &0xff int blue = Color.blue(pixel); // same as (pixel & 0xff) int alpha = Color.alpha(pixel); // same as (pixel >>> 24) int gray = 0; if(schema == 0) { gray = (Math.max(blue, Math.max(red, green)) + Math.min(blue, Math.min(red, green))) / 2; } else if(schema == 1) { gray = (red + green + blue) / 3; } else if(schema == 2) { gray = (int)(0.3 * red + 0.59 * green + 0.11 * blue); } bm.setPixel(col, row, Color.argb(alpha, gray, gray, gray)); } } return bm;}Bitmap图像镜像映射与亮度调整的代码实现如下:
public Bitmap brightness(Bitmap bitmap, double depth){ Bitmap bm = Bitmap.createBitmap(bitmap.getWidth(),bitmap.getHeight(), bitmap.getConfig()); int width = bitmap.getWidth(); int height = bitmap.getHeight(); for(int row=0; row<height; row++){ for(int col=0; col<width; col++){ int pixel = bitmap.getPixel(col, row);// ARGB int red = Color.red(pixel); // same as (pixel >> 16) &0xff int green = Color.green(pixel); // same as (pixel >> 8) &0xff int blue = Color.blue(pixel); // same as (pixel & 0xff) int alpha = Color.alpha(pixel); // same as (pixel >>> 24) double gray = (0.3 * red + 0.59 * green + 0.11 * blue); red += (depth * gray); if(red > 255) { red = 255; } green += (depth * gray); if(green > 255) { green = 255; } blue += (depth * gray); if(blue > 255) { blue = 255; } bm.setPixel(col, row, Color.argb(alpha, red, green, blue)); } } return bm;}public Bitmap flip(Bitmap bitmap){ Bitmap bm = Bitmap.createBitmap(bitmap.getWidth(),bitmap.getHeight(), bitmap.getConfig()); int width = bitmap.getWidth(); int height = bitmap.getHeight(); for(int row=0; row<height; row++){ for(int col=0; col<width; col++){ int pixel = bitmap.getPixel(col, row);// ARGB int red = Color.red(pixel); // same as (pixel >> 16) &0xff int green = Color.green(pixel); // same as (pixel >> 8) &0xff int blue = Color.blue(pixel); // same as (pixel & 0xff) int alpha = Color.alpha(pixel); // same as (pixel >>> 24) int ncol = width - col - 1; bm.setPixel(ncol, row, Color.argb(alpha, red, green, blue)); } } return bm;}运行截图: 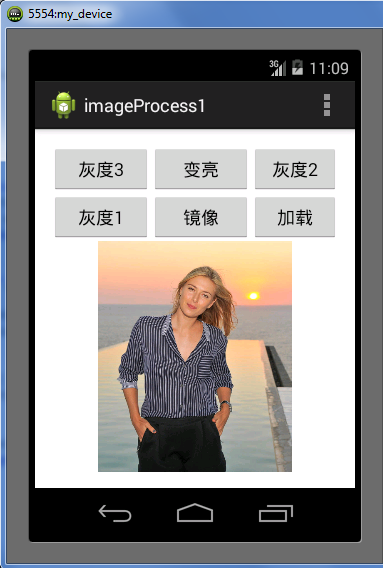
布局XML文件内容如下:
<LinearLayout xmlns:android="http://schemas.android.com/apk/res/android" xmlns:tools="http://schemas.android.com/tools" android:layout_width="match_parent" android:layout_height="match_parent" android:orientation="vertical" android:paddingBottom="@dimen/activity_vertical_margin" android:paddingLeft="@dimen/activity_horizontal_margin" android:paddingRight="@dimen/activity_horizontal_margin" android:paddingTop="@dimen/activity_vertical_margin" tools:context="com.example.imageprocess1.MainActivity" > <RelativeLayout android:layout_width="wrap_content" android:layout_height="wrap_content"> <Button android:id="@+id/button_gray_3" android:layout_width="100dp" android:layout_height="wrap_content" android:text="@string/process" /> <Button android:id="@+id/button_inverse" android:layout_width="100dp" android:layout_height="wrap_content" android:layout_toRightOf="@+id/button_gray_3" android:layout_alignTop="@+id/button_gray_3" android:text="@string/inverse" /> <Button android:id="@+id/button_gray_1" android:layout_width="100dp" android:layout_height="wrap_content" android:layout_toRightOf="@+id/button_inverse" android:layout_alignTop="@+id/button_gray_3" android:text="@string/nored" /> <Button android:id="@+id/button_gray_2" android:layout_width="100dp" android:layout_below="@+id/button_gray_3" android:layout_height="wrap_content" android:text="@string/noblue" /> <Button android:id="@+id/button_flip" android:layout_width="100dp" android:layout_height="wrap_content" android:layout_below="@+id/button_inverse" android:layout_toRightOf="@+id/button_gray_2" android:text="@string/flip" /> <Button android:id="@+id/button_save" android:layout_width="100dp" android:layout_height="wrap_content" android:layout_below="@+id/button_gray_3" android:layout_toRightOf="@+id/button_flip" android:text="@string/save" /> </RelativeLayout> <ImageView android:id="@+id/image_content" android:layout_width="fill_parent" android:layout_height="fill_parent" android:scaleType="fitCenter" android:src="@drawable/ic_launcher" /></LinearLayout>MainActivity中的onCreate方法的代码如下:
super.onCreate(savedInstanceState);setContentView(R.layout.activity_main);ImageView iView = (ImageView) this.findViewById(R.id.image_content);Bitmap b = Bitmap.createBitmap(400, 400, Bitmap.Config.ARGB_8888);Paint paint = new Paint(Paint.ANTI_ALIAS_FLAG);paint.setColor(Color.BLACK);Canvas c = new Canvas(b);c.drawText("Load Image from here...", 50, 200, paint);iView.setImageBitmap(b);Button saveBtn = (Button) this.findViewById(R.id.button_save);saveBtn.setOnClickListener(new OnClickListener() { @Override public void onClick(View view) { Toast toast = Toast.makeText(getApplicationContext(), "Please load the image firstly...", Toast.LENGTH_SHORT); toast.show(); loadImage(); ImageView iView = (ImageView) findViewById(R.id.image_content); iView.setImageBitmap(srcImage); if(srcImage != null) { //saveFile(srcImage); } }});Button processBtn = (Button) this.findViewById(R.id.button_gray_3);processBtn.setOnClickListener(new OnClickListener() { @Override public void onClick(View view) { if(srcImage == null) { loadImage(); } ImagePixelsProcessor processor = new ImagePixelsProcessor(); Bitmap bm = processor.gray(srcImage, 2); // 有不同的灰度化策略 final ImageView iView = (ImageView) findViewById(R.id.image_content); iView.setImageBitmap(bm); }});Button inverseBtn = (Button) this.findViewById(R.id.button_inverse);inverseBtn.setOnClickListener(new OnClickListener() { @Override public void onClick(View view) { if(srcImage == null) { loadImage(); } ImagePixelsProcessor processor = new ImagePixelsProcessor(); Bitmap bm = processor.brightness(srcImage, 0.3); final ImageView iView = (ImageView) findViewById(R.id.image_content); iView.setImageBitmap(bm); }});Button noRedBtn = (Button) this.findViewById(R.id.button_gray_1);noRedBtn.setOnClickListener(new OnClickListener() { @Override public void onClick(View view) { if(srcImage == null) { loadImage(); } ImagePixelsProcessor processor = new ImagePixelsProcessor(); Bitmap bm = processor.gray(srcImage, 0); // 有不同的灰度化策略 final ImageView iView = (ImageView) findViewById(R.id.image_content); iView.setImageBitmap(bm); }});Button gray2Btn = (Button) this.findViewById(R.id.button_gray_2);gray2Btn.setOnClickListener(new OnClickListener() { @Override public void onClick(View view) { if(srcImage == null) { loadImage(); } ImagePixelsProcessor processor = new ImagePixelsProcessor(); Bitmap bm = processor.gray(srcImage, 1); // 有不同的灰度化策略 final ImageView iView = (ImageView) findViewById(R.id.image_content); iView.setImageBitmap(bm); }});Button flipBtn = (Button) this.findViewById(R.id.button_flip);flipBtn.setOnClickListener(new OnClickListener() { @Override public void onClick(View view) { if(srcImage == null) { loadImage(); } ImagePixelsProcessor processor = new ImagePixelsProcessor(); Bitmap bm = processor.flip(srcImage); final ImageView iView = (ImageView) findViewById(R.id.image_content); iView.setImageBitmap(bm); }});-第一次尝试用CSDN-markdown编辑器写文章,发现这个东西真好用!赞!!!
-[email protected]
版权声明:本文为博主原创文章,未经博主允许不得转载。