��ĿǰΪֹ�������Ѿ�ѧϰ��View�IJ��������ֹ��̣��������Ǿ���ѧϰһ�����һ�����̣��滭
�滭���̺�ǰ�����������һ����������ViewRoot��performTraversals��������е��õģ�����Ȥ��ͬѧ�������ҿ���������Ͳ������������ˣ�����ֱ�ӿ�View��draw������
View��draw���̵��岿��
/** * Manually render this view (and all of its children) to the given Canvas. * The view must have already done a full layout before this function is * called. When implementing a view, do not override this method; instead, * you should implement [email protected] #onDraw}. * * @param canvas The Canvas to which the View is rendered. */ public void draw(Canvas canvas) { if (ViewDebug.TRACE_HIERARCHY) { ViewDebug.trace(this, ViewDebug.HierarchyTraceType.DRAW); } final int privateFlags = mPrivateFlags; final boolean dirtyOpaque = (privateFlags & DIRTY_MASK) == DIRTY_OPAQUE && (mAttachInfo == null || !mAttachInfo.mIgnoreDirtyState); mPrivateFlags = (privateFlags & ~DIRTY_MASK) | DRAWN; /* * Draw traversal performs several drawing steps which must be executed * in the appropriate order: * * 1. Draw the background * 2. If necessary, save the canvas' layers to prepare for fading * 3. Draw view's content * 4. Draw children * 5. If necessary, draw the fading edges and restore layers * 6. Draw decorations (scrollbars for instance) */ // Step 1, draw the background, if needed int saveCount; if (!dirtyOpaque) { final Drawable background = mBGDrawable; if (background != null) { final int scrollX = mScrollX; final int scrollY = mScrollY; if (mBackgroundSizeChanged) { background.setBounds(0, 0, mRight - mLeft, mBottom - mTop); mBackgroundSizeChanged = false; } if ((scrollX | scrollY) == 0) { background.draw(canvas); } else { canvas.translate(scrollX, scrollY); background.draw(canvas); canvas.translate(-scrollX, -scrollY); } } } // skip step 2 & 5 if possible (common case) final int viewFlags = mViewFlags; boolean horizontalEdges = (viewFlags & FADING_EDGE_HORIZONTAL) != 0; boolean verticalEdges = (viewFlags & FADING_EDGE_VERTICAL) != 0; if (!verticalEdges && !horizontalEdges) { // Step 3, draw the content if (!dirtyOpaque) onDraw(canvas); // Step 4, draw the children dispatchDraw(canvas); // Step 6, draw decorations (scrollbars) onDrawScrollBars(canvas); // we're done... return; } /* * Here we do the full fledged routine... * (this is an uncommon case where speed matters less, * this is why we repeat some of the tests that have been * done above) */ boolean drawTop = false; boolean drawBottom = false; boolean drawLeft = false; boolean drawRight = false; float topFadeStrength = 0.0f; float bottomFadeStrength = 0.0f; float leftFadeStrength = 0.0f; float rightFadeStrength = 0.0f; // Step 2, save the canvas' layers int paddingLeft = mPaddingLeft; int paddingTop = mPaddingTop; final boolean offsetRequired = isPaddingOffsetRequired(); if (offsetRequired) { paddingLeft += getLeftPaddingOffset(); paddingTop += getTopPaddingOffset(); } int left = mScrollX + paddingLeft; int right = left + mRight - mLeft - mPaddingRight - paddingLeft; int top = mScrollY + paddingTop; int bottom = top + mBottom - mTop - mPaddingBottom - paddingTop; if (offsetRequired) { right += getRightPaddingOffset(); bottom += getBottomPaddingOffset(); } final ScrollabilityCache scrollabilityCache = mScrollCache; int length = scrollabilityCache.fadingEdgeLength; // clip the fade length if top and bottom fades overlap // overlapping fades produce odd-looking artifacts if (verticalEdges && (top + length > bottom - length)) { length = (bottom - top) / 2; } // also clip horizontal fades if necessary if (horizontalEdges && (left + length > right - length)) { length = (right - left) / 2; } if (verticalEdges) { topFadeStrength = Math.max(0.0f, Math.min(1.0f, getTopFadingEdgeStrength())); drawTop = topFadeStrength >= 0.0f; bottomFadeStrength = Math.max(0.0f, Math.min(1.0f, getBottomFadingEdgeStrength())); drawBottom = bottomFadeStrength >= 0.0f; } if (horizontalEdges) { leftFadeStrength = Math.max(0.0f, Math.min(1.0f, getLeftFadingEdgeStrength())); drawLeft = leftFadeStrength >= 0.0f; rightFadeStrength = Math.max(0.0f, Math.min(1.0f, getRightFadingEdgeStrength())); drawRight = rightFadeStrength >= 0.0f; } saveCount = canvas.getSaveCount(); int solidColor = getSolidColor(); if (solidColor == 0) { final int flags = Canvas.HAS_ALPHA_LAYER_SAVE_FLAG; if (drawTop) { canvas.saveLayer(left, top, right, top + length, null, flags); } if (drawBottom) { canvas.saveLayer(left, bottom - length, right, bottom, null, flags); } if (drawLeft) { canvas.saveLayer(left, top, left + length, bottom, null, flags); } if (drawRight) { canvas.saveLayer(right - length, top, right, bottom, null, flags); } } else { scrollabilityCache.setFadeColor(solidColor); } // Step 3, draw the content if (!dirtyOpaque) onDraw(canvas); // Step 4, draw the children dispatchDraw(canvas); // Step 5, draw the fade effect and restore layers final Paint p = scrollabilityCache.paint; final Matrix matrix = scrollabilityCache.matrix; final Shader fade = scrollabilityCache.shader; final float fadeHeight = scrollabilityCache.fadingEdgeLength; if (drawTop) { matrix.setScale(1, fadeHeight * topFadeStrength); matrix.postTranslate(left, top); fade.setLocalMatrix(matrix); canvas.drawRect(left, top, right, top + length, p); } if (drawBottom) { matrix.setScale(1, fadeHeight * bottomFadeStrength); matrix.postRotate(180); matrix.postTranslate(left, bottom); fade.setLocalMatrix(matrix); canvas.drawRect(left, bottom - length, right, bottom, p); } if (drawLeft) { matrix.setScale(1, fadeHeight * leftFadeStrength); matrix.postRotate(-90); matrix.postTranslate(left, top); fade.setLocalMatrix(matrix); canvas.drawRect(left, top, left + length, bottom, p); } if (drawRight) { matrix.setScale(1, fadeHeight * rightFadeStrength); matrix.postRotate(90); matrix.postTranslate(right, top); fade.setLocalMatrix(matrix); canvas.drawRect(right - length, top, right, bottom, p); } canvas.restoreToCount(saveCount); // Step 6, draw decorations (scrollbars) onDrawScrollBars(canvas); }�÷����Ƚϳ��������ڲ���ִ����������Դ����ע�͵ģ���Ҫ��Ϊ5����
- ���Ʊ���������ʹ����dirtyOpaque��ʾdirty���Ƿ��Dz����ģ���������ģ���ô���Ʊ�������Androidϵͳ�У�������dirtyOpaque�����϶���false�ģ����Ա����������϶������
- ������ͼ�Ľ�����Ǵ��������¶�����Ҫ���ƽ�����������ֱ������
- ������ͼ������������ͼ�������õ���
onDraw()������View������߿�����onDraw()�����и����Լ�����Ҫ���������� - ����
dispatchDraw()������������ͼ�������ͼ��û������ͼ������Ҫ���ƣ�Ҳ����˵����ViewGroup��������Ҫ����dispatchDraw���� - ����
onDrawScrollbars()�������ƹ���������Ȼǰ������Ҫ��ʾ������
���������5�����裬View�Ļ��ƹ��̲��ͽ����ˡ����������ص�Ҫ��ע��3���͵�4������Ϊ�������Զ���View����ViewGroup��ʱ������Ͼ��Ǹ�д���������漰���ķ���
����View�Ļ��ƻ��ƾ��㽲�����ˣ����������ǽ���LayoutParams���������֪ʶ��
LayoutParams�����֪��������
LayoutParams��������Ŷ���ÿ��Android������Ա������Ϥ�����ˣ����Dz�����ÿ���˶���������������⡣�������Ǿ���ѧϰһ��LayoutParams�����֪�������ܡ�
���������ٷ����������Ľ��ͣ�
LayoutParams are used by views to tell their parents how they want to be laid out. See ViewGroup Layout Attributes for a list of all child view attributes that this class supports.
�������������ͼ�������ǵĸ���ͼ��������Ҫ��ô��ʾ������Ҳ���Ǹ��߸����Լ���һЩ���ԡ�
�ȴ�һ�������ӿ�ʼ����LinearLayotu������һ��View
�����ļ����£�
<LinearLayout xmlns:android="http://schemas.android.com/apk/res/android" xmlns:tools="http://schemas.android.com/tools" android:id="@+id/line_parent" android:layout_width="match_parent" android:layout_height="match_parent" android:orientation="vertical" ></LinearLayout><?xml version="1.0" encoding="utf-8"?><TextView xmlns:android="http://schemas.android.com/apk/res/android" android:id="@+id/tv_child" android:layout_height="match_parent" android:layout_width="match_parent" android:background="#ffccee" android:text="hello my name is yuanzeyao" ></TextView>�������£�
LinearLayout parent= (LinearLayout) this.findViewById(R.id.line_parent); View view= LayoutInflater.from(this).inflate(R.layout.layout,null); parent.addView(view);����Ч�����£� 
����ܼ�������ʹ��LayoutInflater����һ��View,Ȼ�����ӵ�LinearLayout��ȥ��ע���������Dz�û�д���LayoutParams������ͽ�ȥ�ģ���View����θ���LinearLayout����LayoutParams�ء����ǽ��뵽addView������������ᷢ�����յ��õ���ViewGroup�е����·���
public void addView(View child, int index) { LayoutParams params = child.getLayoutParams(); if (params == null) { params = generateDefaultLayoutParams(); if (params == null) { throw new IllegalArgumentException("generateDefaultLayoutParams() cannot return null"); } } addView(child, index, params); }����Ƚϼ���ͨ��getLayoutParams�����õ�LayoutParams��������˶���Ϊ�գ���ôֱ�ӵ���addView(child,index,params) ���Ϊ�գ���ô�õ���generateDefaultLayoutParams��������һ��LayoutParams�������ǽ���Դ�뿴��ViewGroup�е�generaterDefaultLayoutParams ��������������һ��LayoutParams�İ�
protected LayoutParams generateDefaultLayoutParams() { return new LayoutParams(LayoutParams.WRAP_CONTENT, LayoutParams.WRAP_CONTENT); }������ǼĴ�����һ��ViewGroup.Layoutparams������Ҫ֪�����������ǵ��õ�LinearLayout��generateDefaultLayoutParams�������������ǿ���LinearLayout����θ�д�˷����ġ�
@Override protected LayoutParams generateDefaultLayoutParams() { if (mOrientation == HORIZONTAL) { return new LayoutParams(LayoutParams.WRAP_CONTENT, LayoutParams.WRAP_CONTENT); } else if (mOrientation == VERTICAL) { return new LayoutParams(LayoutParams.MATCH_PARENT, LayoutParams.WRAP_CONTENT); } return null; }LinearLayout������������Ҳ�ܼ�Ψһ��ͬ�ľ�������������LinearLayout.LayoutParams������������ôLinearLayout.LayoutParams��ViewGroup.LayoutParams��ʲô��ϵ�أ�ͬ��������Դ���֪���ˡ�ͨ���鿴Դ����ᷢ�֣�LinearLayout.LayoutParams������Ǽ̳���ViewGroup.MarginLayoutParams����࣬��������ּ̳���ViewGroup.LayoutParams����࣬��ʵLinearLayout,RelativeLayout��FrameLayout�Ȳ��������LayoutParams���Ǽ̳���ViewGroup.MarginLayoutParams���̳й�ϵ���£� 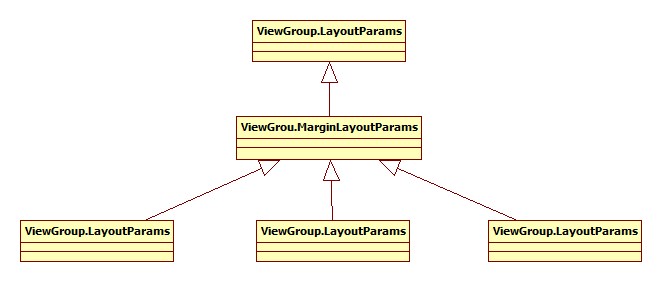
��ʵͨ�����ƣ����Ǿʹ�ſ��Բ³�ViewGroup.LayoutParams��ViewGroup.MarginLayoutParmas�������ˣ��Ǿ���MarginLayoutParams֧��margin�����ˣ�Ҳ����������xml�ļ������õ�leftMargin��topMargin�����ԡ����ǿ���Դ���Dz������������
public MarginLayoutParams(Context c, AttributeSet attrs) { super(); TypedArray a = c.obtainStyledAttributes(attrs, R.styleable.ViewGroup_MarginLayout); setBaseAttributes(a, R.styleable.ViewGroup_MarginLayout_layout_width, R.styleable.ViewGroup_MarginLayout_layout_height); int margin = a.getDimensionPixelSize( com.android.internal.R.styleable.ViewGroup_MarginLayout_layout_margin, -1); if (margin >= 0) { leftMargin = margin; topMargin = margin; rightMargin= margin; bottomMargin = margin; } else { leftMargin = a.getDimensionPixelSize( R.styleable.ViewGroup_MarginLayout_layout_marginLeft, 0); topMargin = a.getDimensionPixelSize( R.styleable.ViewGroup_MarginLayout_layout_marginTop, 0); rightMargin = a.getDimensionPixelSize( R.styleable.ViewGroup_MarginLayout_layout_marginRight, 0); bottomMargin = a.getDimensionPixelSize( R.styleable.ViewGroup_MarginLayout_layout_marginBottom, 0); } a.recycle(); }������Ȼ�������ڽ���leftMargin��topMargin�����ԡ�������MarginLayoutParams�Ĺ��ܺ����ǿ���LinearLayout.LayoutParams������ڸ���Ļ��������������湦��
public LayoutParams(Context c, AttributeSet attrs) { super(c, attrs); TypedArray a = c.obtainStyledAttributes(attrs, com.android.internal.R.styleable.LinearLayout_Layout); weight = a.getFloat(com.android.internal.R.styleable.LinearLayout_Layout_layout_weight, 0); gravity = a.getInt(com.android.internal.R.styleable.LinearLayout_Layout_layout_gravity, -1); a.recycle(); }��Ҫ�������������ԣ�weight���Ժ�gravity���ԣ������ٿ���RelatvieLayout.LayoutParams������������������
public LayoutParams(Context c, AttributeSet attrs) { super(c, attrs); TypedArray a = c.obtainStyledAttributes(attrs, com.android.internal.R.styleable.RelativeLayout_Layout); final int[] rules = mRules; final int N = a.getIndexCount(); for (int i = 0; i < N; i++) { int attr = a.getIndex(i); switch (attr) { case com.android.internal.R.styleable.RelativeLayout_Layout_layout_alignWithParentIfMissing: alignWithParent = a.getBoolean(attr, false); break; case com.android.internal.R.styleable.RelativeLayout_Layout_layout_toLeftOf: rules[LEFT_OF] = a.getResourceId(attr, 0); break; case com.android.internal.R.styleable.RelativeLayout_Layout_layout_toRightOf: rules[RIGHT_OF] = a.getResourceId(attr, 0); break; case com.android.internal.R.styleable.RelativeLayout_Layout_layout_above: rules[ABOVE] = a.getResourceId(attr, 0); break; case com.android.internal.R.styleable.RelativeLayout_Layout_layout_below: rules[BELOW] = a.getResourceId(attr, 0); break; case com.android.internal.R.styleable.RelativeLayout_Layout_layout_alignBaseline: rules[ALIGN_BASELINE] = a.getResourceId(attr, 0); break; case com.android.internal.R.styleable.RelativeLayout_Layout_layout_alignLeft: rules[ALIGN_LEFT] = a.getResourceId(attr, 0); break; case com.android.internal.R.styleable.RelativeLayout_Layout_layout_alignTop: rules[ALIGN_TOP] = a.getResourceId(attr, 0); break; case com.android.internal.R.styleable.RelativeLayout_Layout_layout_alignRight: rules[ALIGN_RIGHT] = a.getResourceId(attr, 0); break; case com.android.internal.R.styleable.RelativeLayout_Layout_layout_alignBottom: rules[ALIGN_BOTTOM] = a.getResourceId(attr, 0); break; case com.android.internal.R.styleable.RelativeLayout_Layout_layout_alignParentLeft: rules[ALIGN_PARENT_LEFT] = a.getBoolean(attr, false) ? TRUE : 0; break; case com.android.internal.R.styleable.RelativeLayout_Layout_layout_alignParentTop: rules[ALIGN_PARENT_TOP] = a.getBoolean(attr, false) ? TRUE : 0; break; case com.android.internal.R.styleable.RelativeLayout_Layout_layout_alignParentRight: rules[ALIGN_PARENT_RIGHT] = a.getBoolean(attr, false) ? TRUE : 0; break; case com.android.internal.R.styleable.RelativeLayout_Layout_layout_alignParentBottom: rules[ALIGN_PARENT_BOTTOM] = a.getBoolean(attr, false) ? TRUE : 0; break; case com.android.internal.R.styleable.RelativeLayout_Layout_layout_centerInParent: rules[CENTER_IN_PARENT] = a.getBoolean(attr, false) ? TRUE : 0; break; case com.android.internal.R.styleable.RelativeLayout_Layout_layout_centerHorizontal: rules[CENTER_HORIZONTAL] = a.getBoolean(attr, false) ? TRUE : 0; break; case com.android.internal.R.styleable.RelativeLayout_Layout_layout_centerVertical: rules[CENTER_VERTICAL] = a.getBoolean(attr, false) ? TRUE : 0; break; } } a.recycle(); }��RelativeLayout.LayoutParams�����ӵ����ԱȽ϶��ˣ���Ҫ�ǹ��ڶ��뷽ʽ�ģ�������Ҫע��ඣ���RelativeLayout.LayoutParams�в�û��weight���Ժ�gravity���ԡ���������������Ӧ��֪��ΪʲôLineayLayout��֧�ֶ��뷽ʽ���ԣ�RelativeLayot��֧��gravity��weight�����ˡ�
������LinearLayout.gener��generateDefaultLayoutParams �����е��õ���
public LayoutParams(int width, int height) { super(width, height); weight = 0; }�������������Ĭ��weight=0,gravity=-1��
�����������Dz��ǻ���һ�����ʣ��������addView() �У�����child.getLayoutParams() ���������Ƿ�Ϊnull,���Ǵ�ӡһ��log��֪�����������£�
protected void onCreate(Bundle savedInstanceState) { super.onCreate(savedInstanceState); setContentView(R.layout.activity_main); LinearLayout parent= (LinearLayout) this.findViewById(R.id.line_parent); View view= LayoutInflater.from(this).inflate(R.layout.layout,null); Log.d("yzy","LayoutParams is null:"+(view.getLayoutParams()==null)); parent.addView(view); }�����
07-25 14:48:11.842 26143-26143/? D/yzy�s LayoutParams is null:trueҲ����˵���õ���LinearLayout��generateDefaultLayoutParams������
�����ﲻ֪����ҷ�����һ������û���ҵIJ����ļ����£�
<?xml version="1.0" encoding="utf-8"?><TextView xmlns:android="http://schemas.android.com/apk/res/android" android:id="@+id/tv_child" android:layout_height="match_parent" android:layout_width="match_parent" android:background="#ffccee" android:text="hello my name is yuanzeyao" ></TextView>����TextView������ȫ���ģ�������Ϊ�����ڼ���TextView��ʱ��û�д���LayoutParams�������������ͨ��generateDefaultLayoutParams������һ��Ĭ�ϵ�LayoutParams
new LayoutParams(LayoutParams.MATCH_PARENT, LayoutParams.WRAP_CONTENT);����ô��ʲôʱ��addView ��ʱ��getLayoutParams �������ֵ������null����͵ÿ������View����ô�����ˣ��������Ǿ�������View�Ĵ������̡�
LayoutInflater����View���̷���
ͨ��LayoutInflater����View��ʵ���ǵ���inflate ���������ǿ����˷�����ԭ�Ͱ�
/** * Inflate a new view hierarchy from the specified xml resource. Throws * [email protected] InflateException} if there is an error. * * @param resource ID for an XML layout resource to load (e.g., * <code>R.layout.main_page</code>) * @param root Optional view to be the parent of the generated hierarchy. * @return The root View of the inflated hierarchy. If root was supplied, * this is the root View; otherwise it is the root of the inflated * XML file. */ public View inflate(int resource, ViewGroup root) { return inflate(resource, root, root != null); }�˷�������������
resource ����ʾ�����ļ�id
root : ������View�ĸ���ͼ
����ʵ��Ҳ�Ƿdz��ļ����õ�������һ��inflate�ķ������������£�
/** * Inflate a new view hierarchy from the specified xml resource. Throws * [email protected] InflateException} if there is an error. * * @param resource ID for an XML layout resource to load (e.g., * <code>R.layout.main_page</code>) * @param root Optional view to be the parent of the generated hierarchy (if * <em>attachToRoot</em> is true), or else simply an object that * provides a set of LayoutParams values for root of the returned * hierarchy (if <em>attachToRoot</em> is false.) * @param attachToRoot Whether the inflated hierarchy should be attached to * the root parameter? If false, root is only used to create the * correct subclass of LayoutParams for the root view in the XML. * @return The root View of the inflated hierarchy. If root was supplied and * attachToRoot is true, this is root; otherwise it is the root of * the inflated XML file. */ public View inflate(int resource, ViewGroup root, boolean attachToRoot) { if (DEBUG) System.out.println("INFLATING from resource: " + resource); XmlResourceParser parser = getContext().getResources().getLayout(resource); try { return inflate(parser, root, attachToRoot); } finally { parser.close(); } }�������һ��bool�������˲�������˼�ǣ��Ƿ�����View add���ƶ���root����ͼ�ϣ���inflate(int resource,ViewGroup root) ���������˵������ʵ�ǵ���inflate(int resource��ViewGroup root��bool attach�� �������������ֻҪroot ������null,��ô������View�ͻ�add��root�ϣ�������root��Ҳ����˵root������null,���������������true������������ǻ�ͷ���������ڴ���View��ʱ�����Ǵ���ĵڶ���������null�����Dz�������ΪLinearLayout���ԣ��������£�
protected void onCreate(Bundle savedInstanceState) { super.onCreate(savedInstanceState); setContentView(R.layout.activity_main); LinearLayout parent= (LinearLayout) this.findViewById(R.id.line_parent); View view= LayoutInflater.from(this).inflate(R.layout.layout,parent,false); Log.d("yzy","LayoutParams is null:"+(view.getLayoutParams()==null)); parent.addView(view); }�������ǽ���������������Ϊfalse����Ϊ��������ã�Ĭ����true�ģ����ǿ������н���ɣ� 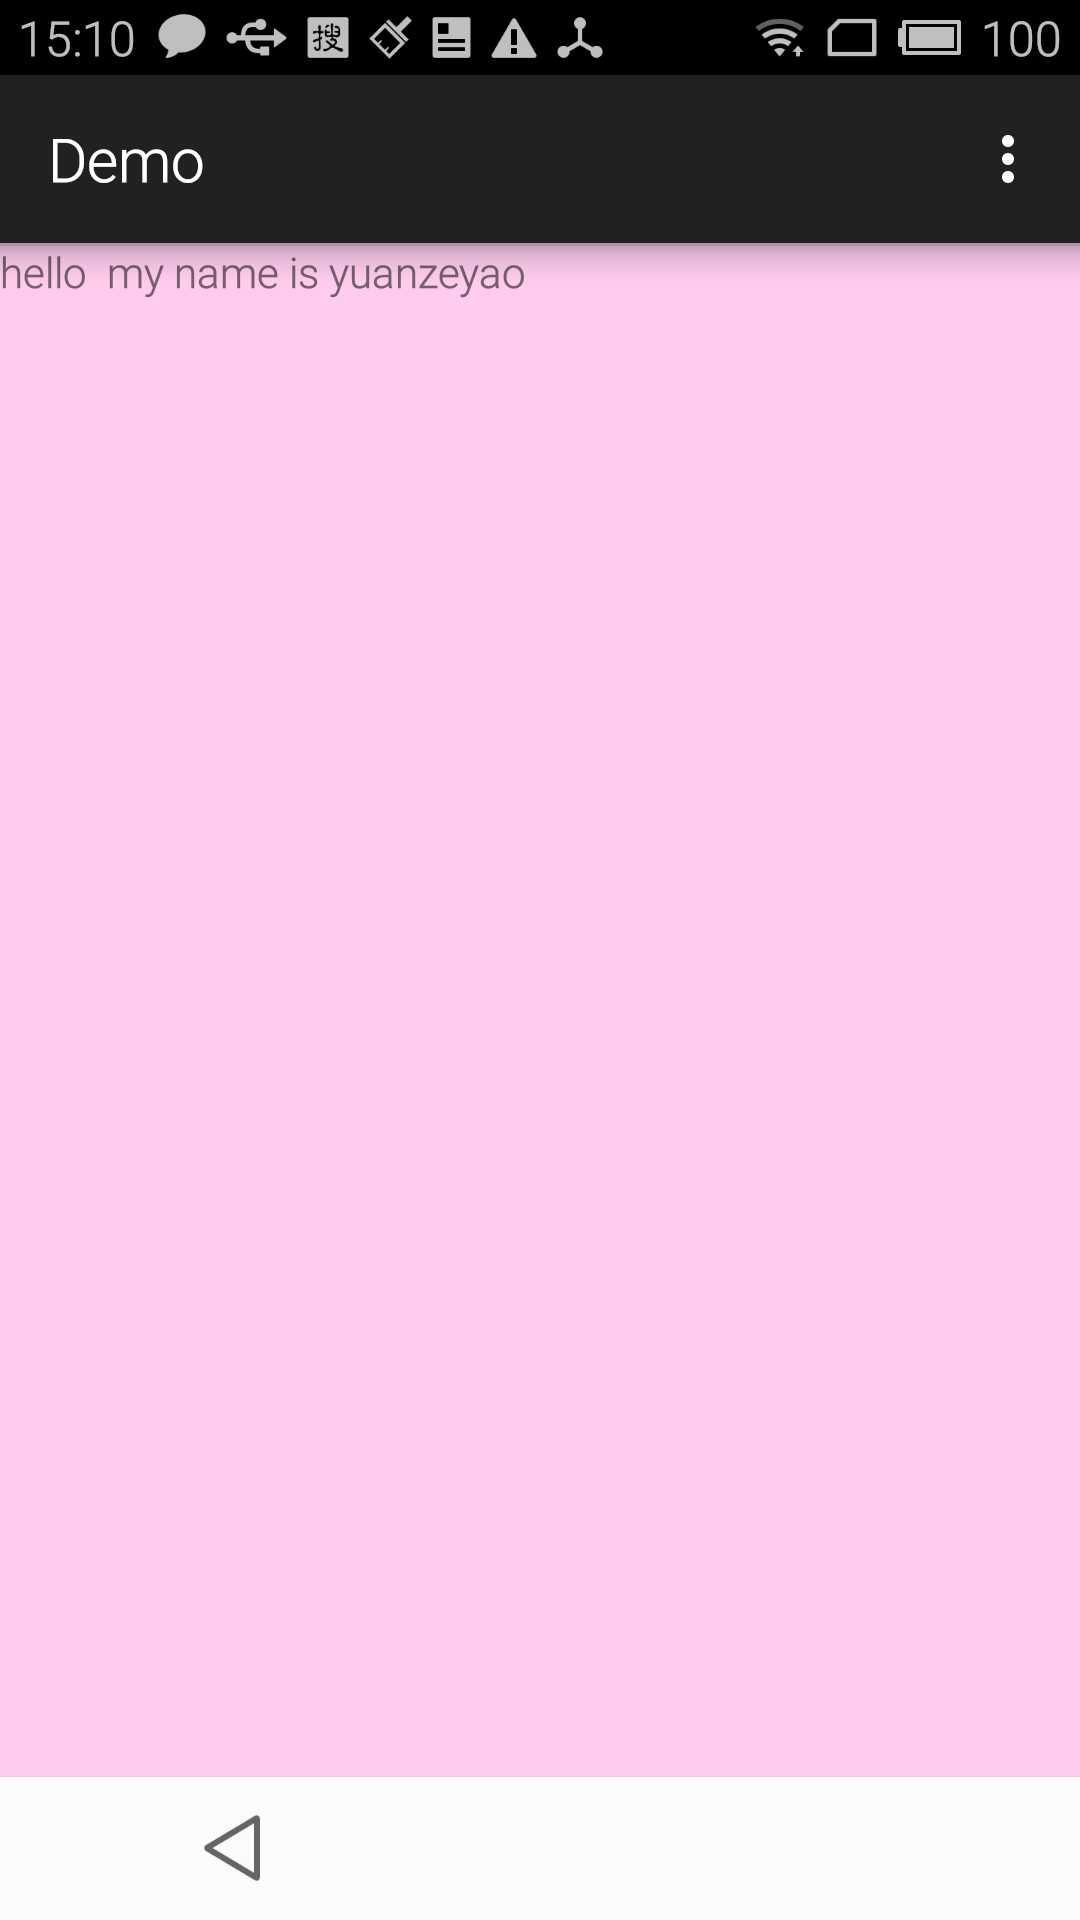
����û�������TextView��ȫ���ģ���������ǰѵ�������������Ϊtrue������ȥ��addView�������ԣ��������£�
protected void onCreate(Bundle savedInstanceState) { super.onCreate(savedInstanceState); setContentView(R.layout.activity_main); LinearLayout parent= (LinearLayout) this.findViewById(R.id.line_parent); View view= LayoutInflater.from(this).inflate(R.layout.layout,parent,true); Log.d("yzy","LayoutParams is null:"+(view.getLayoutParams()==null)); //parent.addView(view); }����� 
���Ƿ��֣�����������һ������֪��Ϊʲô������������ô�������¿��ɣ�����inflate���浽�������棬�������ϵĸ��٣���ᷢ�����յ��õ��˵������������
/** * Inflate a new view hierarchy from the specified XML node. Throws * {@link InflateException} if there is an error. * <p> * <em><strong>Important</strong></em> For performance * reasons, view inflation relies heavily on pre-processing of XML files * that is done at build time. Therefore, it is not currently possible to * use LayoutInflater with an XmlPullParser over a plain XML file at runtime. * * @param parser XML dom node containing the description of the view * hierarchy. * @param root Optional view to be the parent of the generated hierarchy (if * <em>attachToRoot</em> is true), or else simply an object that * provides a set of LayoutParams values for root of the returned * hierarchy (if <em>attachToRoot</em> is false.) * @param attachToRoot Whether the inflated hierarchy should be attached to * the root parameter? If false, root is only used to create the * correct subclass of LayoutParams for the root view in the XML. * @return The root View of the inflated hierarchy. If root was supplied and * attachToRoot is true, this is root; otherwise it is the root of * the inflated XML file. */ public View inflate(XmlPullParser parser, ViewGroup root, boolean attachToRoot) { synchronized (mConstructorArgs) { final AttributeSet attrs = Xml.asAttributeSet(parser); mConstructorArgs[0] = mContext; View result = root; try { // Look for the root node. int type; while ((type = parser.next()) != XmlPullParser.START_TAG && type != XmlPullParser.END_DOCUMENT) { // Empty } if (type != XmlPullParser.START_TAG) { throw new InflateException(parser.getPositionDescription() + ": No start tag found!"); } final String name = parser.getName(); if (DEBUG) { System.out.println("**************************"); System.out.println("Creating root view: " + name); System.out.println("**************************"); } if (TAG_MERGE.equals(name)) { if (root == null || !attachToRoot) { throw new InflateException("<merge /> can be used only with a valid " + "ViewGroup root and attachToRoot=true"); } rInflate(parser, root, attrs); } else { // Temp is the root view that was found in the xml View temp = createViewFromTag(name, attrs); ViewGroup.LayoutParams params = null; if (root != null) { if (DEBUG) { System.out.println("Creating params from root: " + root); } // Create layout params that match root, if supplied params = root.generateLayoutParams(attrs); if (!attachToRoot) { // Set the layout params for temp if we are not // attaching. (If we are, we use addView, below) temp.setLayoutParams(params); } } if (DEBUG) { System.out.println("-----> start inflating children"); } // Inflate all children under temp rInflate(parser, temp, attrs); if (DEBUG) { System.out.println("-----> done inflating children"); } // We are supposed to attach all the views we found (int temp) // to root. Do that now. if (root != null && attachToRoot) { root.addView(temp, params); } // Decide whether to return the root that was passed in or the // top view found in xml. if (root == null || !attachToRoot) { result = temp; } } } catch (XmlPullParserException e) { InflateException ex = new InflateException(e.getMessage()); ex.initCause(e); throw ex; } catch (IOException e) { InflateException ex = new InflateException( parser.getPositionDescription() + ": " + e.getMessage()); ex.initCause(e); throw ex; } return result; } }��������������Ƚϳ����������dz�����Ҫ�����²��裺
- ����View ��ͨ������
createViewFromTag��������View - ���root������null�������root��
generateLayoutParams�������������������Ϊfalse������������õ����洴����View�� - ����
rInflate��View����View���н�������ʱView�ͳ䵱��root�Ľ�ɫ��Ҳ����˵�ں���ı����еڶ���������Ϊnull,����������Ϊtrue - ������root!=null && attach ==true,��ô����root��addView����
root.addView(temp, params)����params���ǵڶ��������ġ�
���������root��=null && attach==true,��ô����root�����ص�һ��������View��
���ˣ������������й�View�Ļ��ƵĻ��ƶ��Ѿ�ѧϰ���ˣ���ʲôû��д���ĵط���ӭ����������ۡ�����
��Ȩ����������Ϊ����ԭ�����£�δ��������������ת�ء�