SharePoint 2013 平台 创建 Power view Report 共享数据源(RSDS)
由于项目需求,在SharePoint 门户上集成 BI部分,完成了所有Excel Power report 后,需要在SharePoint 页面上 开发、编辑power view 报表。
也就是 RSDS 当然如果你想插入其他类型数据愿 也可以按照此方法操作!
以下正文:由于项目可能是设计密码数据,请允许我打上噪点。也可以加入群交流:212099235
本文使用:平台 SharePoint 2013 数据库 SQL server 2014 BI:Excel 2013 power view 2013.
第一步:创建BI center
1,使用 SharePoint 平台管理员登录SharePoint 网站,创建一个BI Center。
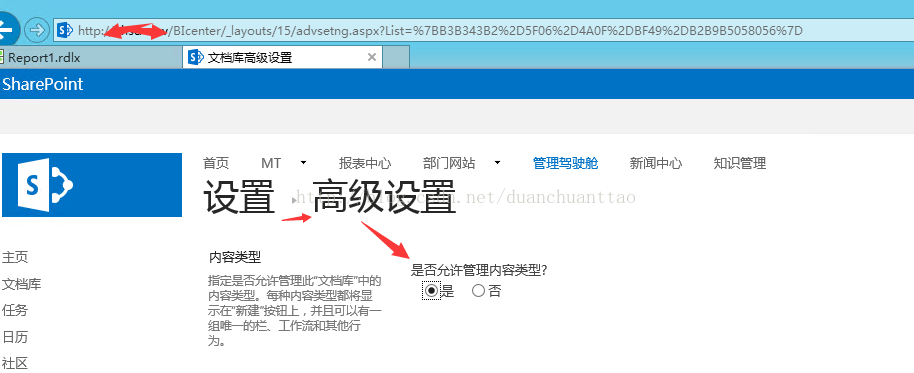
2,设置-- 网站内容--找到BI Center的 文档库。如下图

第二步:库设置

高级设置--是否允许管理管理内容类型,选中是
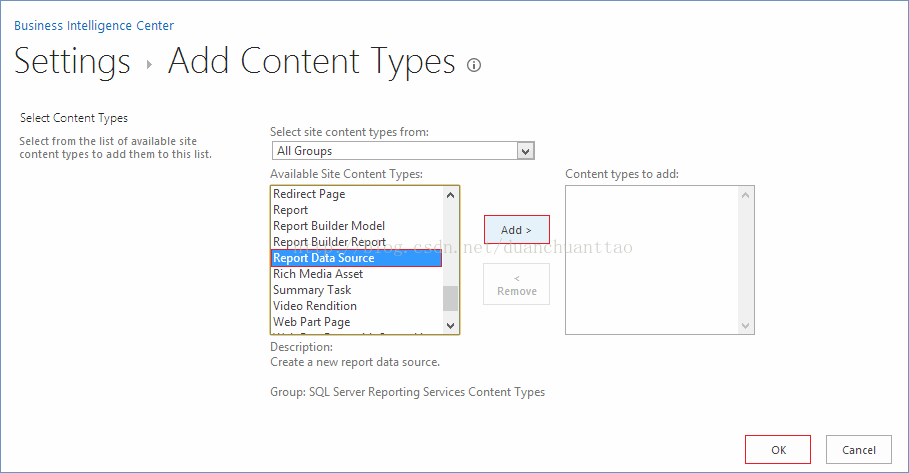
第三步:添加内容类型

添加类型; 这幅图我使用Azure, 就是报表数据源。
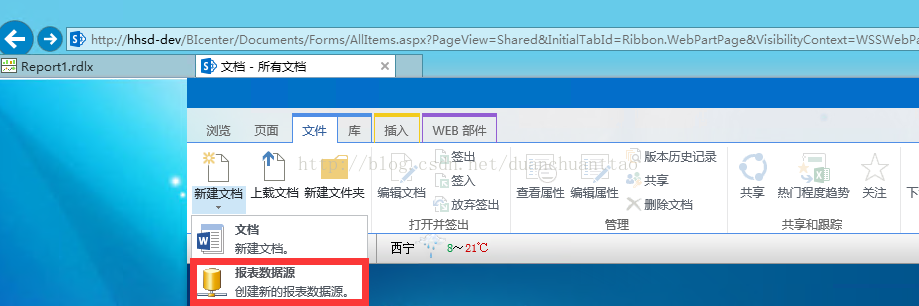
以步骤完成后就可以做在线编辑power view 了。
第四步: 操作RSDS
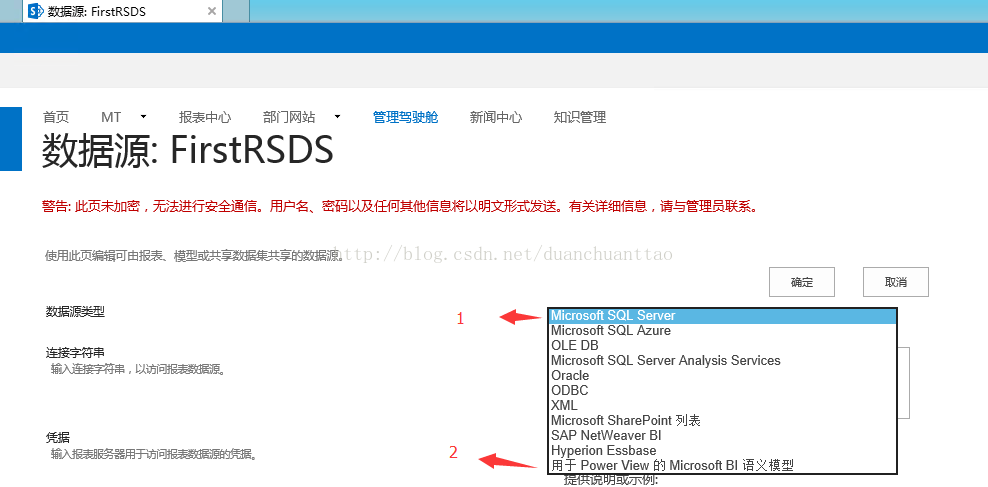
第五步配置报表数据源
1,选择一个数据源,如果选择的类型是 SQL server ,需要自己编写连接字符串:Data Source=192.0.0.13; Initial Catalog="DatabaseName"
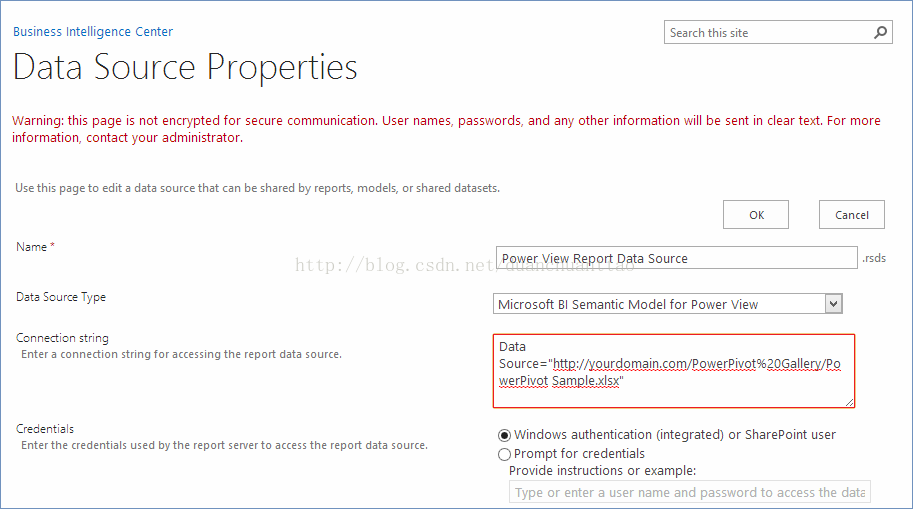
2, 如果选择的数据源是"用于Power View的Microsoft BI 语义模型" 编辑连接字符串:Data Source=xxx/xxxx/xxx.xlsx
如下列子:Data Source=http://yourdomain.com/Shared Documents/YourWorkbook.xlsx
如果使用的是 PowerPivot 工作簿 使用如下连接。Data Source=http://yourdomain.com/PowerPivot%20Gallery/YourWorkbook.xlsx
如果使用的是 PowerPivot 工作簿 使用如下连接。Data Source=http://yourdomain.com/PowerPivot%20Gallery/YourWorkbook.xlsx
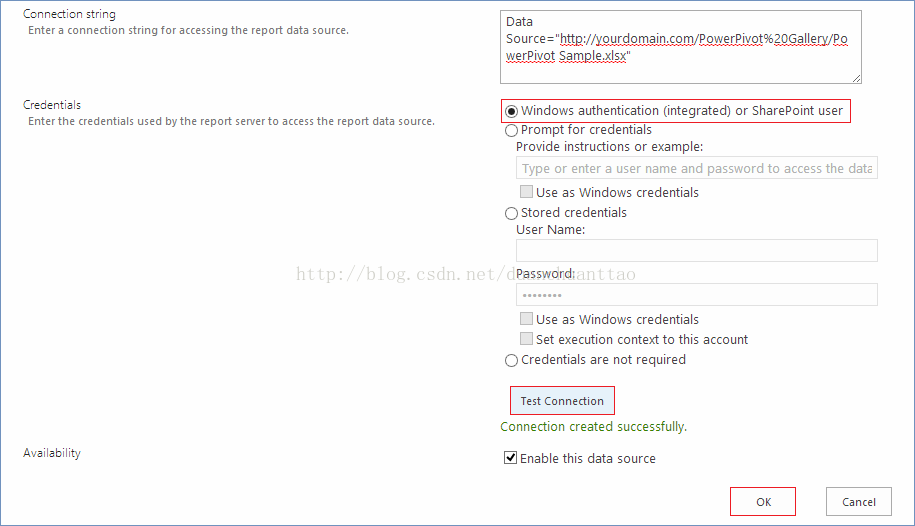
3,配置凭证,如下2幅图我的配置有客户信息,所以请 请允许是用Azure 抓图。
4,使用SQL server 别忘了录入用户名 ,密码。 是第二种 请注意 Data Source的 结尾xlsx.
第六步: 在浏览器里创建Power view:
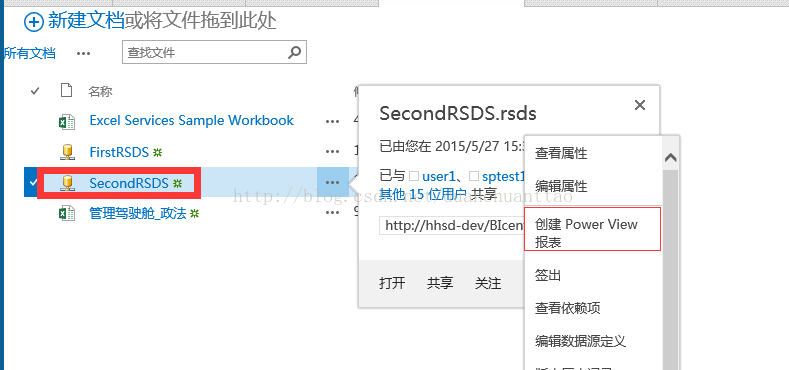
1,回到 BI Center 找到刚才创建的数据源,单击后面的更多--找到后面的创建Power View 报表。如下图
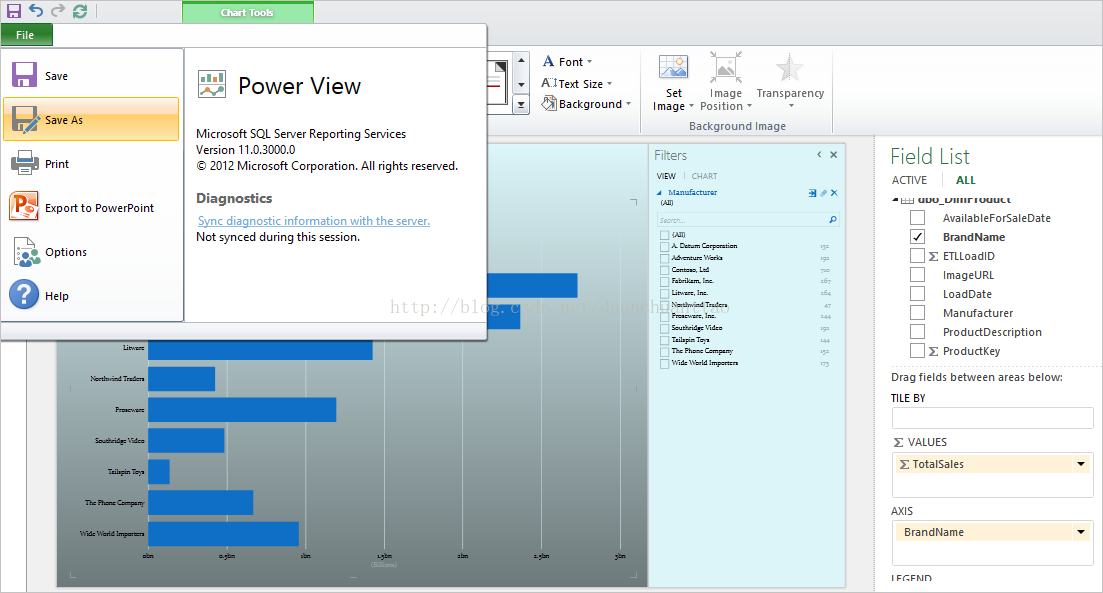
2,创建一个Power View
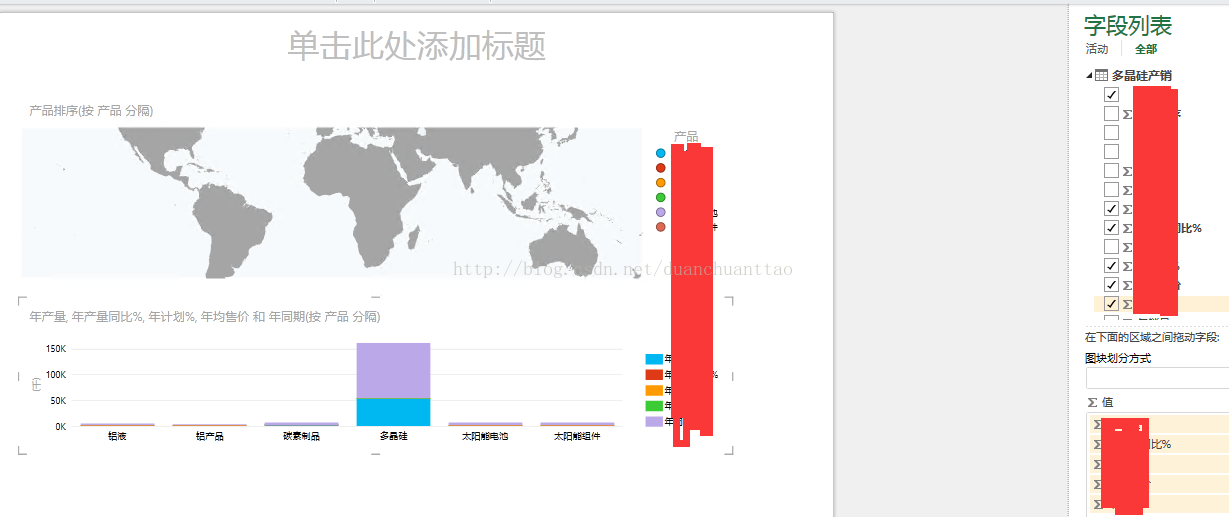
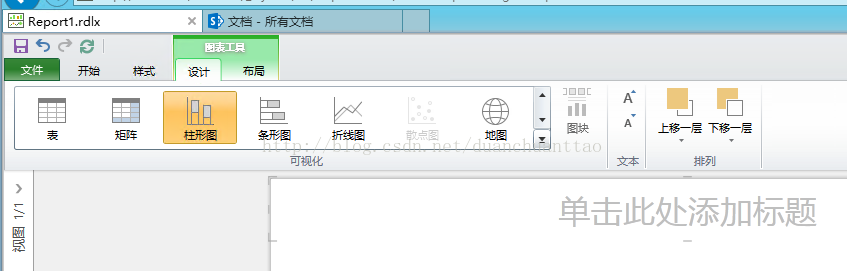
3,工具条
4,编辑完成后另存为 Azure 抓图
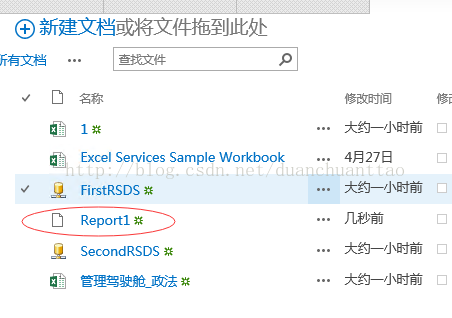
5,完成保存后如下图, 可以打开完成报表,因设计客户资料我不做打开显示的效果。 因为到这里 已经完成了 整个步骤。
参考信息来自于
https://support.office.com/en-sg/article/Create-a-connection-to-a-data-model-for-Power-View-c10d648d-0b7c-49c4-abcf-aa6ffc33c1c9?ui=en-US&rs=en-SG&ad=SG
使用SQL server 类型的连接错误 解决方法。
http://whitepages.unlimitedviz.com/2012/04/fixing-access-errors-when-creating-a-bism-connection-for-powerview/
