本文参考 intro-to-graphql 与 grapQL 官网 记录一次学习 graphQL 之旅。 项目API地址。
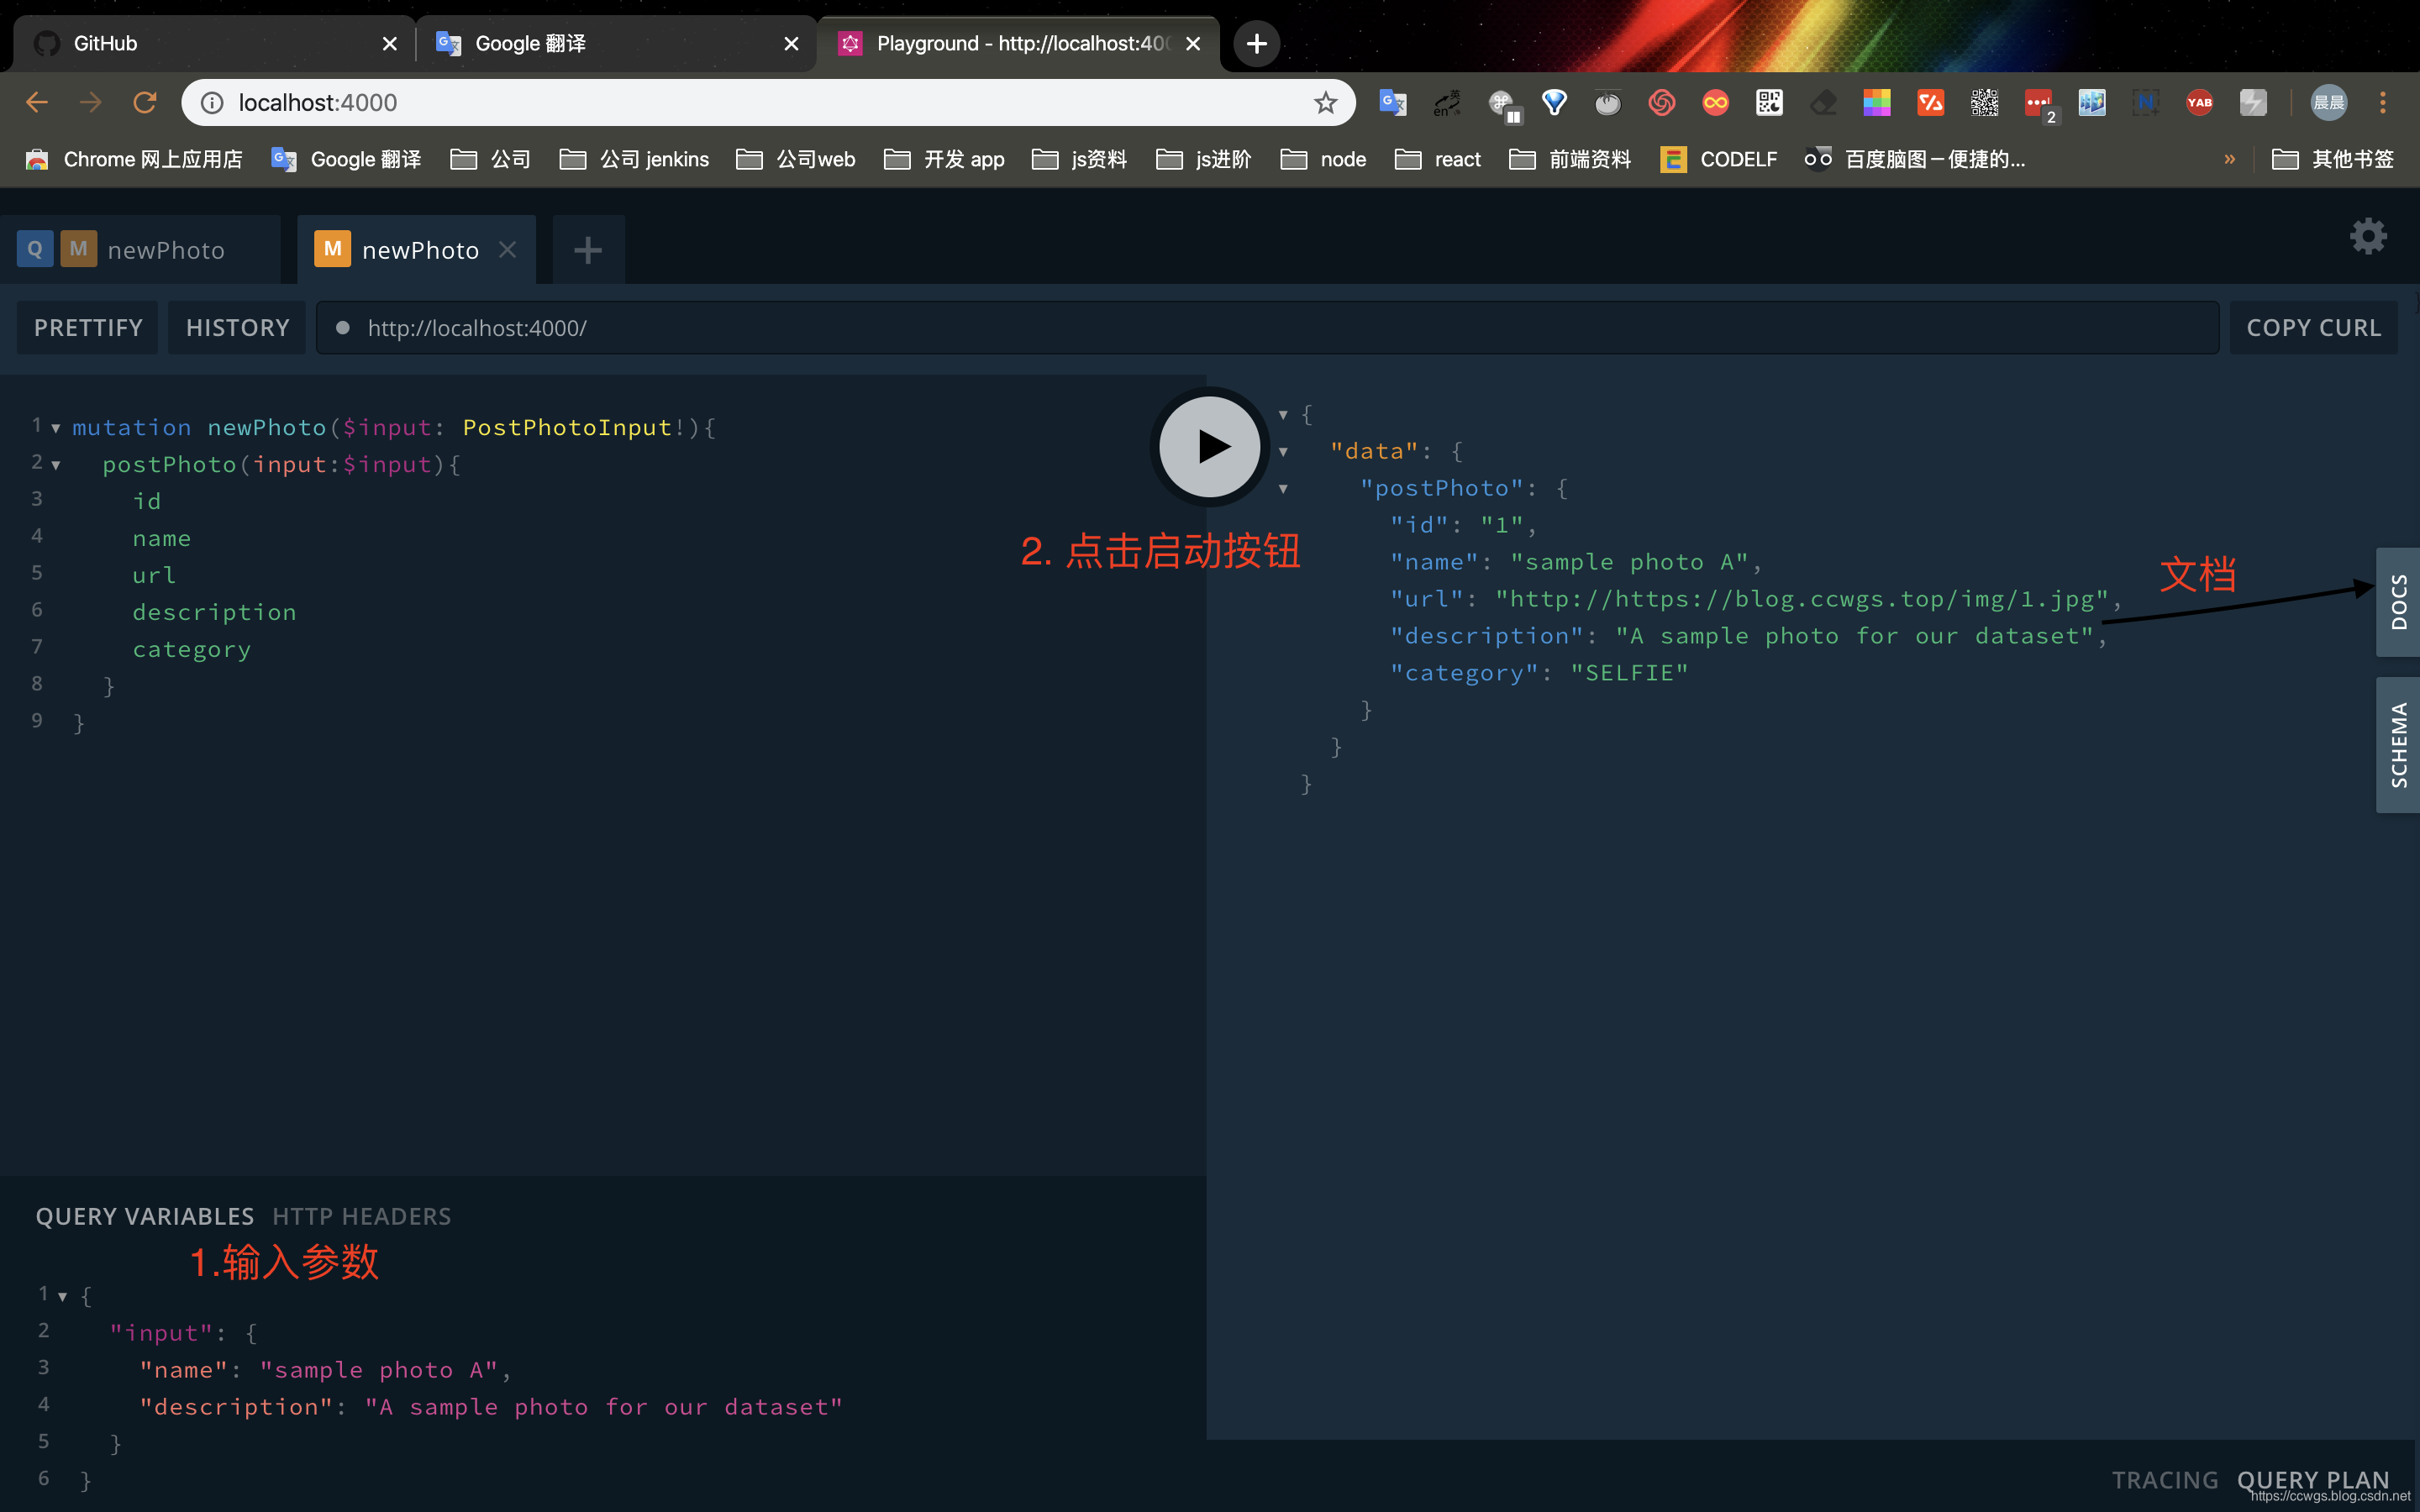
在学习语法时候,可以点开 Apollo playground进行实践。
文章目录
- 什么是GraphQL?
-
- 与 REST对比优势
- 基本语法
-
- schema与类型
- 客户端
- 服务端
-
- 搭建 Server API 环境
- 服务端开发
-
- 连接数据库
- 修改解析器(从数据库中获取数据)
- github OAuth
-
- 根解析器解析token
- 订阅
- 安全方面
-
- 超时
- 设置查询深度
- 查询复杂度
- 其它
- 参考
- 资料
什么是GraphQL?

- 新的API标准、它由Facebook 2015年开源
- 声明式数据获取、并能够准确获取描述中的数据
- 强类型(类似 typescript)
- GraphQL服务公开单个端点并相应查询
- 可以与任何编程语言和框架一起使用
与 REST对比优势
- 数据的关联性和结构化更好
- 实现订阅问题
- 适应快速产品迭代,无版本API
- 对于后端请求的数据有更细致的了解
- 强类型系统定义API的功能
- 前端后端可以根据Schema共同开发
- 强大的开发工具
? 要了解有关使用GraphQL的主要原因更多信息 click this
基本语法
- 字段
{
    me{
    nameavatargithubLogininPhotos{
    namedescription}}
}- 参数
{
    User(login:4){
    nameavatar}
}
- 字段别名
{
    User(login:4){
    userName: nameavatar}
}
返回结果如下:
{
    "data": {
    "User": {
    "userName": "???? ?????","avatar":"https://randomuser.me/api/portraits/thumb/women/50.jpg"}}
}
- 片段
片段允许重复使用常见的字段,从而减少了文档中的重复文本
Query noFragments{
    me{
    nameavatargithubLogininPhotos{
    namedescriptionpostedBy{
    nameavatargithubLogin}}}
}
使用 片段进行优化查询:
Query withFragments{
    me{
    ...userInfo inPhotos{
    namedescriptionpostedBy{
    ...userInfo }}}
}
fragment userInfo on User{
    nameavatargithubLogin
}
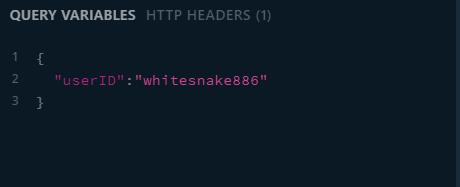
- 变量
- 使用
$userID代替查询中的静态值 - 将
$userID传递给要查询的值 - 将
userID作为请求体提交查询
- 使用
query getUser($userID:ID!){
    User(login:$userID){
    userName:name}
}

- 指令
GraphQL 核心规范中目前包含两个指令:
- @include(if: Boolean) 仅在参数为 true 时,包含此字段。
- @skip(if: Boolean) 如果参数为 true,跳过此字段。

- 变更
mutation addUser{
    addFakeUsers(count:1){
    githubLogin}
}
- 订阅
subscription{
    newPhoto{
    namedescriptionid}
}
schema与类型
schema是类型的集合,类型表示自定义对象,它是用于描述从服务端查询到的数据。
为了方便定义类型,GraphQL引入了模版定义语言(Schema Definition Language,SDL)。它和 GraphQL 的查询语言很相似,让我们能够和 GraphQL schema 之间可以无语言差异地沟通。
- GraphQL内置的标量类型
- Int:有符号 32 位整数。
- Float:有符号双精度浮点值。
- String:UTF‐8 字符序列。
- Boolean:true 或者 false。
- ID:ID 标量类型表示一个唯一标识符,通常用以重新获取对象或者作为缓存中的键。ID 类型使用和 String 一样的方式序列化;然而将其定义为 ID 意味着并不需要人类可读型。
type Photo {
    id: ID!url: String!name: String!description: Stringcategory: PhotoCategory! # 枚举类型
}
- 枚举类型
enum PhotoCategory {
    SELFIEPORTRAITACTIONLANDSCAPEGRAPHIC
}
- 自定义类型
scalar DateTimetype Photo{
    ...created: DateTime!
}
也可以采用[graphql-custom-types]库,其中包含了很多自定义类型。
构建自定义类型
- 列表
列表通过使用方括号包裹GraphQL类型创建。
type User{
    githubLogin: ID!name: Stringavatar: StringpostedPhotos:[Photo!]!inPhotos:[Photo!]!
}
| 列表声明 | 定义 | 无效实例 |
|---|---|---|
| [Int] | 可空的整数值列表 | 非整数 |
| [Int!] | 不可空的整数值列表 | [1,null] |
| [Int]! | 可空的整数值非空列表 | null |
| [Int!]! | 不可空的整数值非空列表 | null、[null] |
- 联合类型
和TS类似,它也是用来返回几种不同类型之一。
union AgendaItem=StudyGroup| Workout
type StudyGroup{
    name: String!subject: String!students: [User!]!
}
type Workout {
    name:String!reps:Int!
}
type Query{
    agenda:[AgendaItem!]!
}
书写查询语句如下:
query schedule{
    agenda{
    ...on Workout{
    name}...on StudyGroup{
    namesubjectstudents}}
}- 接口
接口是一种抽象类型,它可以由对象类型实现。接口规范了Schema中的代码,确保了某些类型总是包含特定字段,无论它返回什么类型这些字段都是可查询的。
scalar DataTimeinterface AgendaItem{
    name: String!start: DateTime!end: DateTime!
}type StudyGroup implements AgendaItem{
    name: String!start: DateTime!end: DateTime! topic: String
}type Workout implements AgendaItem{
    name: String!start: DateTime!end: DateTime! reps: Int!
}
- 参数
通过loginId 查询某一个用户信息。
type Query{
    User(login:ID!):User
}
- 输入类型
输入类型与GraphQL对象类型很相似,不过它仅仅是用于输入参数和规范输入参数。
input PostPhotoInput {
    name: String!category: PhotoCategory = SELFIEdescription: String
}
type Mutation {
    postPhoto(input: PostPhotoInput!): Photo!
}
- 订阅
subscription{
    newPhoto{
    namedescription}
}
- 返回类型
比如我们要使用gitHub授权(GitHub OAuth)登录时,当发送有效授权码进行身份验证。如果成功,我们将返回一个自定义类型该类型包含登录用户信息、以及token。
type AuthPayload {
    token: String!user: User!
}type Mutation{
    githubAuth(code:String!):AuthPayload!
}
- 订阅类型
我们添加一种订阅类型,通过它用户可以创建新的Photo或User类型。当发布照片时,新照片将推送给所有已订阅newPhoto的用户。
type Subscription {
    newPhoto:Photo!newUser: User!
}
- 查询与变更
type Query{
    ...
}
type Mutation{
    ...
}
客户端
使用 GraphQL Client 可以让我们专注于业务不用去关心网络请求、缓存等功能。
目前有两个主要的GraphQL客户端:
- Apollo Client:
它是由社区驱动开发,以处理缓存,更新UI等为目标构建客户端解决方案,目前包含React、Vue、Angular、ios和安卓系统的客户端包。 - Relay:是 Facebook在2015年开源。它囊括了生产中使用GraphQL所获得的一切,但是它仅兼容React和React-Native。
本文采用Apollo Client React构建应用,起步流程参考官网
下面实现一个简单查询demo构建查询基本流程:
- 创建 应用 引入依赖
npx create-react-app photo-client --typescript
npm i @apollo/client graphql react-router-dom @types/react-router-dom
Apollo Client核心包分为:
@apollo/client- 核心包集成了 React-hooks@apollo/react-components- React Apollo render Props 渲染组件@apollo/react-hoc: - React Apollo HOC API(已经废弃)
如果你只想用Hooks,那么只安装 @apollo/client即可
- 配置 client
//index.tsximport React from 'react'
import {
     render } from 'react-dom'
import {
     ApolloClient, HttpLink, InMemoryCache, ApolloProvider } from '@apollo/client';
import App from './App'const client = new ApolloClient({
    cache: new InMemoryCache(),link: new HttpLink({
    uri: 'http://ccwgs.top/graphql'})
})render(<ApolloProvider client={
    client}><App /></ApolloProvider>, document.getElementById('root')
)
- 书写查询语句
//app.tsximport React from 'react';
import {
     BrowserRouter } from 'react-router-dom'
import {
     gql } from '@apollo/client';
import Users from './User'export const ROOT_QUERT = gql`query userList{totalUsersallUsers{...userInfo}me{ ...userInfo}}fragment userInfo on User{githubLoginnameavatar} `
const App = () => (<BrowserRouter><Users /></BrowserRouter>
)
export default App;
- 引入查询组件
//user.tsximport React from 'react'
import {
     useQuery } from '@apollo/client'
import {
     ROOT_QUERT } from './App'const Users = () => {
    const {
     loading, error, data, refetch } = useQuery(ROOT_QUERT);if (error) return <>`Error! ${
      error}`</>if (loading) {
     return <p>loading users ...</p> }return (<><h2>总共 ${
    data.totalUsers}人</h2>{
    data.me && <img src={
    data.me.avatar} />}{
    data.allUsers.map((user:any) => <h3>{
    user.name}</h3>)}<button onClick={
    () => refetch()}>Refetch!</button></>)
}
后续待更新~
服务端
搭建 Server API 环境
npm i apollo-server
npm i typescript ts-node-dev -D
package.json
  "scripts": {
    "dev": "ts-node-dev --respawn --transpileOnly ./src/index.ts",},
import {
    ApolloServer} from 'apollo-server'const typeDefs=`enum PhotoCategory {SELFIEPORTRAITACTIONLANDSCAPEGRAPHIC}type Photo {id: ID!url: String!name: String!description: Stringcategory: PhotoCategory!}type Query{totalPhotos:Int!allPhotos: [Photo!]!}input PostPhotoInput {name: String!category: PhotoCategory=SELFIEdescription: String}type Mutation {postPhoto(input: PostPhotoInput!):Photo!} `;
//_id 模拟数据自增ID
let _id=0;
const photos=[];const resolvers={
    Photo:{
    url:parent=>`http://https://blog.ccwgs.top/img/${
      parent.id}.jpg`},Query:{
    totalPhotos:()=>photos.length,allPhotos:()=>photos},Mutation:{
    postPhoto(_,args){
    const newPhoto={
    id:_id++,...args.input};photos.push(newPhoto);return newPhoto;}}
}
const server=new ApolloServer({
    typeDefs,resolvers
});//开启服务监听 默认4000端口
server.listen().then(({
    url})=>console.log(`GraphQL Service running on ${
      url}`))
npm start
打开 连接 http://localhost:4000

喜欢ts伙伴可以查看?使用 node+typescript 搭建 GraphQL API
服务端开发
基于上面环境搭建将 apollo-server更换apollo-server-express
npm i apollo-server-express graphql express mongoose ncp dotenv node-fetch
npm i typescript ts-node-dev -D
package.json
  "scripts": {
    "build": "tsc && ncp src/schema dist/schema ","clear": "rimraf dist/","start": "npm run clear && npm run build && node ./dist/index.js"},
构建结构
src
├── index.ts    //入口
├── lib         //工具库
│   └── index.ts
├── resolvers   //解析器
│   ├── Mutation.ts
│   ├── Query.ts
│   ├── Type.ts
│   ├── index.ts
│   └── types.ts
└── schema      └── typeDefs.graphql
重写构建服务如下:
import * as express from 'express'
import {
     ApolloServer } from 'apollo-server-express'
import expressPlayground from 'graphql-playground-middleware-express'
import * as mongoose from 'mongoose'
import * as path from 'path'
import resolvers from './resolvers'
import {
     readFileSync } from 'fs'const typeDefs = readFileSync(path.resolve(__dirname, './schema/typeDefs.graphql'), 'UTF-8');async function start() {
    const app = express();const server = new ApolloServer({
    typeDefs,resolvers,context})server.applyMiddleware({
     app });app.get('/', (req, res) => {
    res.send('Welcome to the PhotoShare API');})app.get('/playground', expressPlayground({
     endpoint: '/graphql' }))app.listen({
     port: 4000 }, () => {
    console.log(`GraphQL server running @ http://localhost:4000${
      server.graphqlPath}`)})}start()
连接数据库
mongodb安装与使用
- 创建.env文件
DB_HOST=mongodb://localhost:27017/<Your-DataBase-Name>
- 连接数据库并创建上下文
require('dotenv').config()
function start(){

// ....
// const app = express();const MONGO_DB = process.env.DB_HOST;let db;try {
    const client= await mongoose.connect(MONGO_DB!,{
     useNewUrlParser: true })db=client.connection.db} catch (error) {
    console.log(`Mongo DB Host not found!please add DB_HOST environment variable to .env fileexiting...`)process.exit(1)}const context = {
     db }; //创建上下文const server = new ApolloServer({
    typeDefs,resolvers,context})//...
}
修改解析器(从数据库中获取数据)
shema如下:
type Query{
    totalPhotos:Int!allPhotos: [Photo!]!
}
//resolves/Query.tsconst totalPhotos:Fn=(_,arg,{
    db})=>db.collection('photos').estimatedDocumentCount()const allPhotos:Fn=(parent,args,{
    db})=>db.collection('photos').estimatedDocumentCount()
github OAuth
OAuth 介绍与使用
- 构建请求函数
//lib/index.tsimport  fetch from 'node-fetch'type ReqGithub={
    client_id:string;client_secret:String;code:String;
}const requestGithubToken=(credentials:ReqGithub)=>
fetch('https://github.com/login/oauth/access_token',{
    method:'POST',headers:{
    'Content-Type':'application/json',Accept:'application/json'},body:JSON.stringify(credentials)}
).then(res=>res.json())const requestGithubUserAccount=(token:string)=>
fetch(`https://api.github.com/user?access_token=${
      token}`)
.then(res => res.json())export const authorizeWithGithub=async(credentials:ReqGithub)=>{
    const {
    access_token}=await requestGithubToken(credentials);const githubUser=await requestGithubUserAccount(access_token);return {
    ...githubUser,access_token}
}
- 创建shema
//schema/typeDefs.graphqltype AuthPayload {
    token: String!user: User!
}
type Mutation {
    ...githubAuth(code:String!):AuthPayload!
}
- 构建解析器
//resolvers/Mutation.tsconst githubAuth:Fn=async(parent,{
    code},{
    db})=>{
    let {
    message,access_token,avatar_url,login,name} = await authorizeWithGithub({
    client_id: process.env.CLIENT_ID!,client_secret: process.env.CLIENT_SECRET!,code});if(message){
    throw new Error(message)}let latestUserInfo={
    name,githubLogin:login,githubToken:access_token,avatar:avatar_url}const {
    ops:[user]}=await db.collection('users').replaceOne({
    githubLogin:login},latestUserInfo,{
    upsert:true})return {
    user,token:access_token}
}
- 测试
https://github.com/login/oauth/authorize?client_id=**&scope=user
github 重定向地址
http://localhost:3000/oauth?code=***
mutation github{
    githubAuth(code: "***"){
    tokenuser{
    githubLoginnameavatar}}
}
根解析器解析token
我们通过根解析器解析token返回用户信息,如果无效则返回null。
//src/index.ts// const context = { db };const server = new ApolloServer({
    typeDefs,resolvers,context: async({
    req})=>{
    const githubToken=req.headers.authorization;const currentUser=await db.collection('users').findOne({
    githubToken})return {
    db,currentUser}}})
//schema/typeDefs.graphqltype Query {
    me:User
}
//resovles/Query.tsconst me:Fn=(_,args,{
    currentUser})=> currentUser
测试
query getCurrentUser{
    me{
    githubLoginnameavatar}
}
该仓库为学习分支,了解更多内容点击该仓库
订阅
Apollo Server 自身已经支持订阅。默认情况下在 ws://localhost:4000 下设置 WebSocket。本文使用Apollo-server-express, 其自身不包含订阅要进行配置如下:
修改 src/index.ts start 函数如下
// src/index.tsimport  {
    createServer} from 'http'server.applyMiddleware({
     app });
const httpServer=createServer(app);
server.installSubscriptionHandlers(httpServer)httpServer.listen({
     port: 5000 }, () => {
    console.log(`GraphQL server running @ http://localhost:5000${
      server.graphqlPath}`)
})
- 书写 schema
type Subscription {
    newPhoto: Photo!
}
- 在新增照片时发布给已订阅
// resolvers/Mutation.ts
const postPhoto:Fn=async(parent,args,{
    db,pubsub,currentUser})=>{
    //...const {
    insertedIds}=await db.collection('photos').insert(newPhoto)newPhoto.id=insertedIds[0] //发布pubsub.publish('photo-added', {
     newPhoto })return newPhoto
}
- 订阅解析器
// resolvers/Subscription.ts
module.exports = {
    newPhoto: {
    subscribe: (parent:any, args:any, {
     pubsub }:any) => pubsub.asyncIterator('photo-added')},
}
- 新增
pubsub实例
- new PubSub
- 修改上下文获取authorization
//src/index.ts
import {
     ApolloServer,PubSub } from 'apollo-server-express'async function start() {
    const pubsub=new PubSub();const server = new ApolloServer({
    typeDefs,resolvers,context: async ({
     req,connection }) => {
    const githubToken = req?req.headers.authorization:connection.context.Authorization;const currentUser = await db.collection('users').findOne({
     githubToken })return {
     db, currentUser,pubsub }}})
}
安全方面
一个应用可靠性一定是排在第一位的,那么如果提高GraphQL Server安全,可以考虑如下方面:
超时
第一个简单策略就是设置超时来防御大型查询。
下面我们添加一个五秒超时时间:
import {
    createServer} from 'http'const httpServer=createServer(app);
httpServer.timeout=5000;
接下来我们将查询开始时间传入上下文,之后所有解析器都知道开始时间,如果超过时长则抛出错误。
const context=async ({
    })=>{
    //...return {
    timestamp:performance.now()}
}
设置查询深度
有时候客户端滥用查询,写出如下查询
query IAmEvil {
    author(id: "abc") {
    posts {
    author {
    posts {
    author {
    posts {
    author {
    # that could go on as deep as the client wants!}}}}}}}
}
此时我们可以使用graphql-ruby、graphql-depth-limit等库来设置深度限制。
import depthLimit from 'graphql-depth-limit'...const server = new ApolloServer({
    typeDefs,resolvers,validationRules:[depthLimit(5)],context: async ({
     req }) => {
    ...}})
优点:
- 文档AST是静态分析,因此该查询不会被执行因此也不会给服务端带来压力
缺点:
- 只用深度限制不能阻止所有滥用查询情况,一般要结合复杂度。
查询复杂度
有时候客户端查询深度并不高,但是查询字段的数量庞大,性能也会造成浪费。
例如下面实例,查询深度不高,但是数据量特别大,由于每个字段映射都会调用解析器函数 因此非常耗费性能。
Query everthing ($id:ID!){
    totalUsersphoto(id:$id){
    name}allUsers{
    id,name,postedPhotos{
    name}taggedUsers{
    id,name}}
}
GraphQL对于复杂度校验中有个默认规则,每个标量字符赋值为1,如果该字段返回列表则乘以10.
Query everthing ($id:ID!){
    totalUsers  // complexity 1photo(id:$id){
    name   // complexity 1}allUsers{
    id,  // complexity 10name,  // complexity 10postedPhotos{
    name   // complexity 100}taggedUsers{
    id,  // complexity 100name  // complexity 100}}
}     // total complexity 322
下面我们可以借助量类似graphql-validation-complexity等库来解决。
其它
- 如果接口通过 Nginx部署时,注意要开通WS(webSocket),配置大致如下:
#websocket配置
map $http_upgrade $connection_upgrade {default upgrade;'' close;
}
upstream graphqlPhotoApi {server 127.0.0.1:4000;
}server {listen 80;server_name  ccwgs.top; location / {proxy_http_version 1.1;proxy_pass http://graphqlPhotoApi;#配置Nginx支持webSocket开始proxy_set_header Host $http_host;  proxy_set_header Upgrade $http_upgrade;proxy_set_header Connection "upgrade";proxy_redirect off;}}
- Apollo express server 2.0后不用集成
graphql-playground-middleware-express
import {
     ApolloServer,PubSub,gql } from 'apollo-server-express'
import  {
    createServer} from 'http'
function start(){
    ...const pubsub=new PubSub();const server = new ApolloServer({
    typeDefs,resolvers,context: async ({
     req,connection }) => {
    const githubToken = req?req.headers.authorization:connection!.context.Authorization;const currentUser = await db.collection('users').findOne({
     githubToken })return {
     db, currentUser,pubsub }},subscriptions:{
    path:'/graphql'}})server.applyMiddleware({
     app,path:'/graphql' });const httpServer=createServer(app);server.installSubscriptionHandlers(httpServer)httpServer.listen({
     port: 4000 }, () => {
    console.log(`GraphQL server running @ http://localhost:4000${
      server.graphqlPath}`)console.log(`? Subscriptions ready at ws://localhost:4000${
      server.subscriptionsPath}`)})}
参考
How TO GraphQL
intro-to-graphql
grapQL 官网
资料
randomuser: 生成mock user数据
graphQL playground
graphiQL
graqhQL公共接口
Snowtooth