Zuul 是 Netflix 开源的微服务网关。自身还整合了 Ribbon、Hystrix 和 Actuator。
前言
- 本文中涉及到的 Spring Cloud 内容,可以查看我的相关博客
- 使用的 Zuul 版本为 2.0.0M8
- 服务端指 Eureka Server 所在微服务,客户端指提供数据的微服务,消费端指获取数据的微服务
1、写 Zuul 网关
创建新项目,导入 Zuul 和 Eureka 依赖
compile('org.springframework.cloud:spring-cloud-starter-netflix-eureka-client')
compile('org.springframework.cloud:spring-cloud-starter-netflix-zuul')
启动类添加以下注解
@EnableZuulProxy写下配置文件 application.yml
server:port: 8040
spring:application:name: Geteway_Zuul
eureka:client:service-url:defaultZone: http://localhost:8761/eureka/
酱,这个 Zuul 微服务网关就写好了。从配置可知,它可以注册到 Eureka Server 上。
启动服务端、客户端(服务名:Port),启动本 Zuul 网关,访问 http://localhost:8040/port/ (port 为服务的全小写拼写,不能有大写字母。其后为微服务的服务路径)。结果请自行测试。
默认 Zuul 会代理所有注册到 Eureka Server 上的微服务。路由规则为 http://ZUUL_HOST:ZUUL_PORT/ 微服务 serviceId/**,具体如上所述。
2、负载均衡和 Hystrix 容错、监控
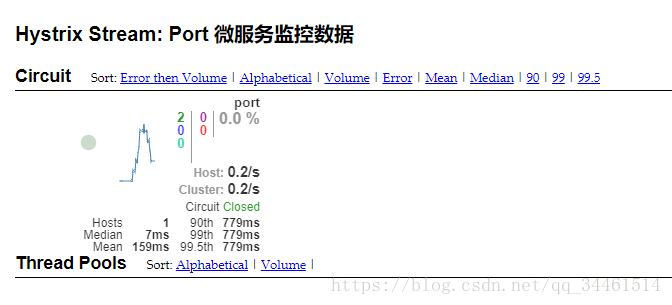
如开篇所说,Zuul 集成了 Ribbon 和 Hystrix 。可自行检测,此处跳过。
3、路由
据书上说,Zuul 会暴露管理端点 routes,博主测试没有。这不重要,跳过。
接下来,是路由的一些配置
我写的微服务名为 Port ,以下配置中 port 即为此服务名,特此提醒
i、指定微服务的访问路径,相当于给服务起了个昵称
zuul:routes:# serviceId: 路径port: /p/** # 映射 port 微服务到路径 /p/ii、另一种方式指定微服务访问路径
zuul:routes:user-route: # 这是路由名字,可以任意起service-id: port # 这是服务名port: /p/** # 映射 port 微服务到路径 /p/iii、忽略微服务、路径以及指定微服务
zuul:
# 忽略 port 微服务
# ignored-services: port ignored-services: '*'             # 忽略所有微服务ignored-patterns: /**/admin/**    # 忽略所有包含 /admin/ 的路径routes:port: /p/**                     # 指定微服务
iv、正则表达式指定 Zuul 的路由配置规则
public PatternServiceRouteMapper serviceRouteMapper(){return new PatternServiceRouteMapper("(?<name>^.+)-(?<version>v.+$)","${version}/${name}");
}
例如微服务名为 provider-v1 ,通过这段代码,可以映射到 /v1/provider/** 这个路径
v、前缀
- 示例 A
zuul:prefix: /user # 前缀strip-prefix: true routes:port:path: /p/**
- 示例 B
zuul:routes:port: # <-- 服务名path: /user/** # 此时 /user 就是前缀strip-prifix: truestrip-prefix=false 时, /user/a/b/c —> /a/b/user/c
strip-prefix=true 时, /user/a/b/c —> /user/a/b/c,即原地址
vi、Zuul 的安全和 Header
- 敏感 Header 的设置
zuul:routes:port:path: /user/**senstive-headers: Cookie,Set-Cookie,Authorization若 senstive-headers 在 zuul 配置子目录下,即为全局配置:
zuul:senstive-headers: Cookie,Set-Cookie,Authorization # 这几项其实也是默认值- 忽略Header
zuul:ignored-headers: HeaderA,HeaderB4、Zuul 过滤器
首先,来编写一个 Zuul 过滤器
public class PreRequestLogFilter extends ZuulFilter{
    private static final Logger LOGGER= LoggerFactory.getLogger(PreRequestLogFilter.class);@Overridepublic String filterType() {//指定过滤器类型,有 pre、route、post、error 等几种取值return "pre";}@Overridepublic int filterOrder() {//指定过滤器执行顺序,数字越大,越早执行return 0;}@Overridepublic boolean shouldFilter() {//决定是否要执行此过滤器return true;}@Overridepublic Object run() throws ZuulException {RequestContext ctx=RequestContext.getCurrentContext();HttpServletRequest request=ctx.getRequest();PreRequestLogFilter.LOGGER.info(String.format("send %s request to %s",request.getMethod(),request.getRequestURL().toString()));return null;}
}
启动类中增加:
@Beanpublic PreRequestLogFilter preRequestLogFilter(){return new PreRequestLogFilter();}控制台输出类似以下信息即表示过滤器已经被执行了
[nio-8040-exec-3] c.i.zuul.filter.PreRequestLogFilter : send GET request to http://localhost:8040/user/p/user/1如下配置可以禁用过滤器
zuul:PreRequestLogFilter: # 类名pre: # 类型disable: true5 、Zuul 容错和回退
Zuul 默认整合了 Hystrix,但和之前监控方法级别的粒度不同,Zuul 的 Hystrix 监控数据的粒度是微服务

所以回退方法也一定会有大不同,下面为 Zuul 添加回退
@Component
public class PortFallbackProvider implements FallbackProvider {
    @Overridepublic String getRoute() {// 指定为哪个微服务提供回退return "port";}@Overridepublic ClientHttpResponse fallbackResponse(String route, Throwable cause) {return new ClientHttpResponse() {@Overridepublic HttpStatus getStatusCode() throws IOException {return HttpStatus.OK;}@Overridepublic int getRawStatusCode() throws IOException {return this.getStatusCode().value();}@Overridepublic String getStatusText() throws IOException {return this.getStatusCode().getReasonPhrase();}@Overridepublic void close() {}@Overridepublic InputStream getBody() throws IOException {return new ByteArrayInputStream("微服务不可用!".getBytes());}@Overridepublic HttpHeaders getHeaders() {HttpHeaders headers=new HttpHeaders();MediaType mt=new MediaType("application","json", Charset.forName("UTF-8"));headers.setContentType(mt);return headers;}};}
}
若 Port 无法响应。浏览器会接收并显示“微服务不可用”
6、Sidecar 整合非 JVM 微服务
使用的 Sidecar 版本为 2.0.0.M8
首先,写一个非 JVM 的微服务。如下是一个名为 node-service.js 的文件
var http=require('http');
var url=require('url');
var path=require('path');
// 创建 Server
var server=http.createServer(function(req,res){
    // 获取路径var pathname=url.parse(req.url).pathname;res.writeHead(200,{
   'Content-Type':'application/json; charset=utf-8'});// 首页if(pathname==='/'){res.end(JSON.stringify({
   'index':'Welcome to the welcome page'}));}// health页else if(pathname==='/health.json'){res.end(JSON.stringify({
   'status':'UP'}));}// 404页else{res.end('404')}
});
// 监听并打印日志
server.listen(8060,function(){
    console.log('listening on localhost:8060');
});
在 Node.js 命令行中进入文件所在目录,然后执行以下命令来执行这个服务
$ node node-service.js分别访问 localhost:8060、localhost:8060/health.json 测试服务
然后,在 Zuul 项目中加入 Sidecar 依赖
compile('org.springframework.cloud:spring-cloud-netflix-sidecar')启动类上添加以下注解
@EnableSidecar
// @EnableSidecar 整合了 @EnableCircuitBreaker 、 @EnableDiscoveryClient 、 @EnableZuulProxy
配置文件添加如下内容
server:port: 8070
spring:application:name: Zuul_Sidecareureka:client:service-url:defaultZone: http://localhost:8761/eurekainstance:prefer-ip-address: true
sidecar:port: 8060                                    # Node.js 微服务的端口health-uri: http://localhost:8060/health.json # Node.js 微服务的健康检查 URL
启动服务端、客户端、node-service,然后启动 Sidecar,访问http://localhost:8070/zuul_sidecar/
首页显示“{‘index’:’Welcome to the welcome page’}”,即表示已成功使用 Sidecar(摩托挎斗)带上了 node-service 服务
后记
以上的代码大多数经过我的测试
引用内容源自 《Spring Cloud与Docker微服务架构实战》/周立 著