
**
搭建vuex环境
**
1.安装 npm i vuex
2. 引入store;
import store from ‘你的存放路径’
在new 中 写store使用store;
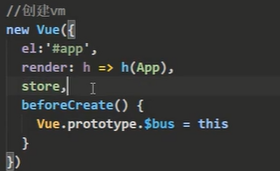
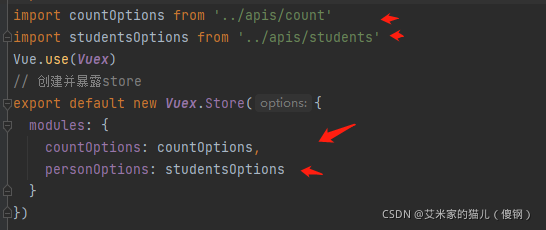
创建store的两种方式
src下创建store文件夹,新增一个index.js文件
编写index.js文件 创建三个对象分别是actions ,mutations,state
// 引入vuex
import Vue from 'vue'
import Vuex from 'vuex'Vue.use(Vuex)
// 准备actions - 用于响应组件中的动作; const actions = {
    }
// 准备mutations - 用于操作数据(state); const mutations = {
    }
// 准备state - 用于存储数据; const state= {
    }
// 准备state - 用于将state中的数据进行加工;有点像计算属性可以处理state中的值; const getters = {
    }
//创建并暴露store export default new Vuex.Store({
    actions,mutations,state,getters
})
**
基础使用
**
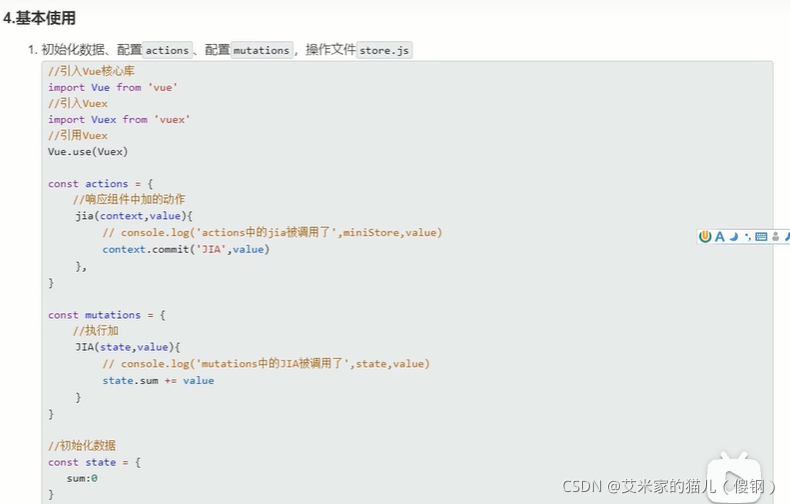

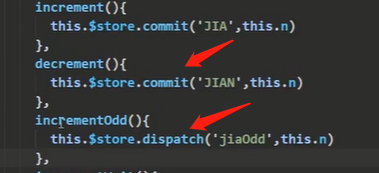
注意:第一个箭头,直接跳转到mutations中的方法可以直接改state,
第二个箭头是跳转到actions的方法中,然后再进入mutations方法再改变state;
**
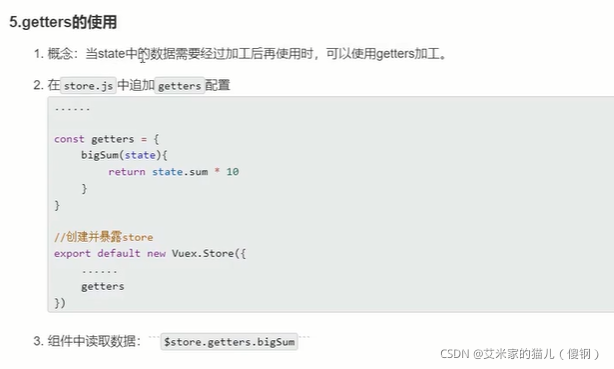
getter使用,有点像计算属性,可以处理state中的值
**

这个bigSum 怎么使用呢
this.$store.getters.bigSum (js中,html中去掉this也可使用)
**
mapState和mapGetters的使用
**
引入mapState
import { mapState ,mapGetters } from ‘vuex’


**
注意 重点来了 :自己复写
**
store-》index.js
// 引入vuex import Vue from 'vue' import Vuex from 'vuex' import {
    nanoid} from 'nanoid'Vue.use(Vuex)
// 准备actions - 用于响应组件中的动作; const actions = {
    oddJia (actionObJ, val) {
    console.log(actionObJ)if (actionObJ.number % 2 === 0) return alert('number为基数的时候才能加啊!')actionObJ.commit('jia', val)},setTJia (actionObJ, val) {
    setTimeout(() => {
    actionObJ.commit('jia', val)}, 1000)}
}
// 准备mutations - 用于操作数据(state); const mutations = {
    addStudent (state, value) {
    value.id = nanoid()state.studentList.unshift(value)},jia (state, value) {
    state.number += Number(value)},jiang (state, value) {
    state.number -= Number(value)}
}
// 准备state - 用于存储数据; const state = {
    number: 30,studentList: [{
    name: '桑三', id: '001'}]
}
// 准备state - 用于将state中的数据进行加工;有点像计算属性可以处理state中的值; const getters = {
    }
// 创建并暴露store export default new Vuex.Store({
    actions,mutations,state,getters
})
组件1,
<template><div class="hello"><h1>当前页面是Hello1</h1><h4>当前Number是:{
    {
    number}}</h4><h4>当前总人数是:{
    {
    studentList.length}}个学生</h4><select v-model= "selectNo"><option value="1">1</option><option value="2">2</option><option value="3">3</option></select><button @click="jia(selectNo)">加</button><button @click="jiang(selectNo)">减</button><button @click="oddJia(selectNo)">基加</button><button @click="setTJia(selectNo)">过段时间加</button><br><br><br><br><br><br><hr><h1>当前是Hello2</h1><HelloWorld2 /></div> </template><script> import HelloWorld2 from './HelloWorld2' import {
     mapState, mapMutations, mapActions } from 'vuex'export default {
    name: 'HelloWorld',components: {
    HelloWorld2},data () {
    return {
    selectNo: 1}},computed: {
    ...mapState(['number', 'studentList'])},methods: {
    ...mapMutations(['jia', 'jiang']),...mapActions(['oddJia', 'setTJia'])}
}
</script><!-- Add "scoped" attribute to limit CSS to this component only -->
<style scoped></style>
组件2
<template><div class="hello"><input type="text" placeholder="请输入学生姓名" v-model="value" @keyup.enter='addStudent()' /><div>当前的numer:{
    {
    $store.state.number}}</div><ul><li v-for= "item in studentList" :key="item.id">{
    {
    `${
    item.name}`}}</li></ul></div> </template><script> import {
     mapState } from 'vuex' export default {
    name: 'HelloWorld',data () {
    return {
    value: ''}},computed: {
    ...mapState(['number', 'studentList'])},methods: {
    addStudent () {
    this.$store.commit('addStudent', {
     name: this.value })this.value = ''}}
}
</script><!-- Add "scoped" attribute to limit CSS to this component only -->
<style scoped></style>
**
看完视频遇到的问题
**
1.mapState和mapGetter 在计算属性中写;
2.mapMutations和mapActions 在方法里写;
3.actions中的方法需要调用mutations中的方法,且名称保持一致;

**
1.模块化 + 命名空间
**
 注意:封装注意事项
1.namespaced:true
2.模块化后要用 :
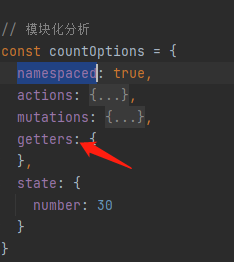
3.指定名称;

4.如果用的commit方法请求的注意要这么写下图

最后的最后,分别把学生和数分别放到不同得文件夹,方便管理
新建js

在store中引入 名字自己定义就行了随便定义,保持一致就行;
