一、普通的listview
1.主页面布局(就是一个listview控件):
<RelativeLayout xmlns:android="http://schemas.android.com/apk/res/android" xmlns:tools="http://schemas.android.com/tools" android:layout_width="match_parent" android:layout_height="match_parent" > <ListView android:id="@+id/lv" android:layout_width="match_parent" android:layout_height="match_parent" > </ListView></RelativeLayout>2.listview中每个条目的布局(只放了一个textview):
<?xml version="1.0" encoding="utf-8"?><LinearLayout xmlns:android="http://schemas.android.com/apk/res/android" xmlns:tools="http://schemas.android.com/tools" android:layout_width="match_parent" android:layout_height="match_parent" android:orientation="vertical" > <TextView android:id="@+id/tv" android:layout_width="match_parent" android:layout_height="wrap_content" android:padding="20dip" android:text="item" android:textSize="16sp" /></LinearLayout>3.为listview准备一个适配器:
public class LvAdapter extends BaseAdapter { private Context context; private List<String> datas; public LvAdapter(Context context, List<String> datas) { this.context = context; this.datas = datas; } @Override public int getCount() { return datas.size(); } @Override public Object getItem(int position) { return datas.get(position); } @Override public long getItemId(int position) { return position; } @Override public View getView(int position, View convertView, ViewGroup parent) { String itemData = datas.get(position); View view; if(convertView == null){ view = View.inflate(context, R.layout.lv_item, null); }else{ view = convertView; } tv = (TextView) view.findViewById(R.id.tv); tv.setText(itemData); return view; } private static TextView tv;}4.主函数准备好数据,设置到适配器中:
public class MainActivity extends Activity { private ListView lv; private LvAdapter lvAdapter; private List<String> datas; @Override protected void onCreate(Bundle savedInstanceState) { super.onCreate(savedInstanceState); setContentView(R.layout.main_activity); lv = (ListView) this.findViewById(R.id.lv); datas = new ArrayList<String>(); for (int i = 1; i <= 10; i++) { datas.add("item"+i); } lvAdapter = new LvAdapter(this, datas); lv.setAdapter(lvAdapter); }}至此,一个普通的listview就弄好了,看下效果图: 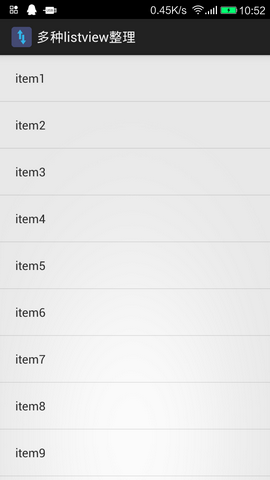
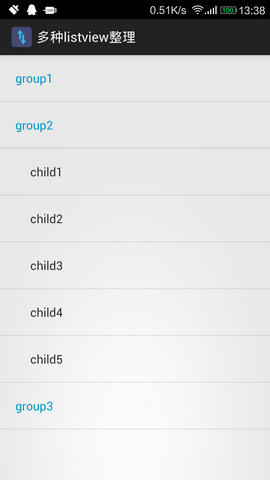
二、ExpandableListView 特点:每个组可点击,并展开子条目
1.主页面布局:
<ExpandableListView android:groupIndicator="@null" android:id="@+id/elv" android:layout_width="match_parent" android:layout_height="match_parent" > </ExpandableListView>2.组条目/子条目的布局(我的是2个xml文件分开的)
组条目:
<?xml version="1.0" encoding="utf-8"?><LinearLayout xmlns:android="http://schemas.android.com/apk/res/android" android:layout_width="match_parent" android:layout_height="match_parent" android:orientation="vertical" > <TextView android:id="@+id/tv_elv_group_item" android:layout_width="match_parent" android:layout_height="wrap_content" android:padding="20dip" android:text="group" android:textColor="@android:color/holo_blue_dark" android:textSize="16sp" /></LinearLayout>子条目:
<?xml version="1.0" encoding="utf-8"?><LinearLayout xmlns:android="http://schemas.android.com/apk/res/android" android:layout_width="match_parent" android:layout_height="match_parent" android:orientation="vertical" > <TextView android:id="@+id/tv_elv_child_item" android:layout_width="match_parent" android:layout_height="wrap_content" android:layout_marginLeft="20dip" android:padding="20dip" android:text="child" android:textSize="16sp" /></LinearLayout>3.为ExpandableListView准备一个适配器:
public class ElvAdapter extends BaseExpandableListAdapter{ private Context context; private List<String> group; private List<List<String>> child; public ElvAdapter(Context context, List<String> group, List<List<String>> child) { this.context = context; this.group = group; this.child = child; } /*-----------------Group----------------*/ @Override public int getGroupCount() { return group.size(); } @Override public Object getGroup(int groupPosition) { return group.get(groupPosition); } @Override public long getGroupId(int groupPosition) { return groupPosition; } @Override public View getGroupView(int groupPosition, boolean isExpanded, View convertView, ViewGroup parent) { String groupItem = group.get(groupPosition); View view; if(convertView == null){ view = View.inflate(context, R.layout.elv_group_item, null); }else{ view = convertView; } tv_elv_group_item = (TextView) view.findViewById(R.id.tv_elv_group_item); tv_elv_group_item.setText(groupItem); return view; } private static TextView tv_elv_group_item; /*-----------------Child----------------*/ @Override public int getChildrenCount(int groupPosition) { return child.get(groupPosition).size(); } @Override public Object getChild(int groupPosition, int childPosition) { return child.get(groupPosition).get(childPosition); } @Override public long getChildId(int groupPosition, int childPosition) { return childPosition; } @Override public View getChildView(int groupPosition, int childPosition, boolean isLastChild, View convertView, ViewGroup parent) { String childItem = child.get(groupPosition).get(childPosition); View view; if(convertView == null){ view = View.inflate(context, R.layout.elv_child_item, null); }else{ view = convertView; } tv_elv_child_item = (TextView) view.findViewById(R.id.tv_elv_child_item); tv_elv_child_item.setText(childItem); return view; } private static TextView tv_elv_child_item; @Override public boolean hasStableIds() { return false; } @Override public boolean isChildSelectable(int groupPosition, int childPosition) { return true; }}4.主函数准备好数据,设置到适配器中:
public class MainActivity extends Activity { private ExpandableListView elv; private ElvAdapter elvAdapter; private List<List<String>> child; private List<String> group; @Override protected void onCreate(Bundle savedInstanceState) { super.onCreate(savedInstanceState); setContentView(R.layout.main_activity); elv = (ExpandableListView) this.findViewById(R.id.elv); initData(); elvAdapter = new ElvAdapter(this, group, child); elv.setAdapter(elvAdapter); } private void initData() { group = new ArrayList<String>(); child = new ArrayList<List<String>>(); for (int i = 1; i <= 3; i++) { group.add("group"+i); List<String> childItemDatas = new ArrayList<String>(); for (int childCount = 1; childCount <= 5; childCount++) { childItemDatas.add("child"+childCount); } child.add(childItemDatas); } }}至此,一个ExpandableListView就好了,效果图如下: 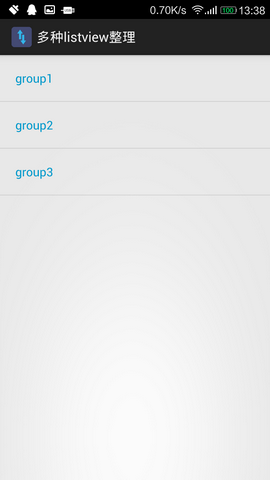
三、PinnedHeaderListView(开源框架) 特点:滑动时,头部固定
下载链接: https://github.com/JimiSmith/PinnedHeaderListView
1.主页面布局:
<RelativeLayout xmlns:android="http://schemas.android.com/apk/res/android" xmlns:tools="http://schemas.android.com/tools" android:layout_width="match_parent" android:layout_height="match_parent" > <za.co.immedia.pinnedheaderlistview.PinnedHeaderListView android:id="@+id/phlv" android:layout_width="match_parent" android:layout_height="match_parent" > </za.co.immedia.pinnedheaderlistview.PinnedHeaderListView></RelativeLayout>2.组条目/子条目的布局(我的2个xml文件还是分开的)
组条目(section):
<?xml version="1.0" encoding="utf-8"?><LinearLayout xmlns:android="http://schemas.android.com/apk/res/android" android:layout_width="match_parent" android:layout_height="match_parent" android:orientation="vertical" > <TextView android:id="@+id/tv_phlv_section_item" android:layout_width="match_parent" android:layout_height="wrap_content" android:background="@android:color/holo_blue_dark" android:padding="20dip" android:text="section" android:textColor="#FFFFFFFF" android:textSize="16sp" /></LinearLayout>子条目(item):
<?xml version="1.0" encoding="utf-8"?><LinearLayout xmlns:android="http://schemas.android.com/apk/res/android" android:layout_width="match_parent" android:layout_height="match_parent" android:orientation="vertical" > <TextView android:id="@+id/tv_phlv_item_item" android:layout_width="match_parent" android:layout_height="wrap_content" android:layout_marginLeft="5dip" android:padding="20dip" android:text="item" android:textSize="16sp" /></LinearLayout>3.准备数据适配器:
public class PhlvAdapter extends SectionedBaseAdapter { private Context context; private List<String> section; //相当于expandableListView的 group private List<List<String>> item; //相当于expandableListView的 child public PhlvAdapter(Context context, List<String> section, List<List<String>> item) { this.context = context; this.section = section; this.item = item; } @Override public Object getItem(int section, int position) { return item.get(section).get(position); } @Override public long getItemId(int section, int position) { return position; } @Override public int getSectionCount() { return section.size(); } @Override public int getCountForSection(int section) { return item.get(section).size(); } @Override public View getItemView(int section, int position, View convertView, ViewGroup parent) { String itemData = item.get(section).get(position); View view; if(convertView == null){ view = View.inflate(context, R.layout.phlv_item_item, null); }else{ view = convertView; } tv_item = (TextView) view.findViewById(R.id.tv_phlv_item_item); tv_item.setText(itemData); return view; } private static TextView tv_item; @Override public View getSectionHeaderView(int section, View convertView, ViewGroup parent) { String sectionData = this.section.get(section); View view; if(convertView == null){ view = View.inflate(context, R.layout.phlv_section_item, null); }else{ view = convertView; } tv_section = (TextView) view.findViewById(R.id.tv_phlv_section_item); tv_section.setText(sectionData); return view; } private static TextView tv_section;}4.主函数准备好数据,设置适配器:
public class PhlvDemoActivity extends Activity { private PinnedHeaderListView phlv; private PhlvAdapter phlvAdapter; private List<String> section; private List<List<String>> item; @Override protected void onCreate(Bundle savedInstanceState) { super.onCreate(savedInstanceState); setContentView(R.layout.main_activity); phlv = (PinnedHeaderListView) this.findViewById(R.id.phlv); initData(); phlvAdapter = new PhlvAdapter(this, section, item); phlv.setAdapter(phlvAdapter); } private void initData() { section = new ArrayList<String>(); item = new ArrayList<List<String>>(); for (int i = 1; i <= 5; i++) { section.add("section"+i); List<String> itemItemDatas = new ArrayList<String>(); for (int itemCount = 1; itemCount <= 5; itemCount++) { itemItemDatas.add("item"+itemCount); } item.add(itemItemDatas); } }}至此,PinnedHeaderListView就好了,效果类似于系统联系人列表的listview,看下图片: 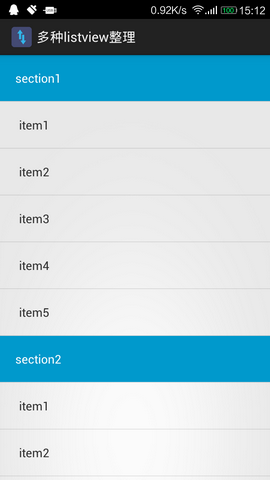
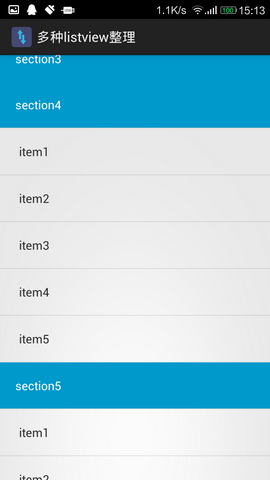
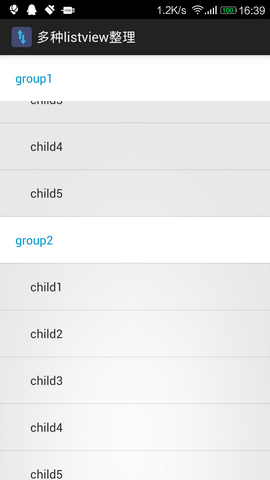
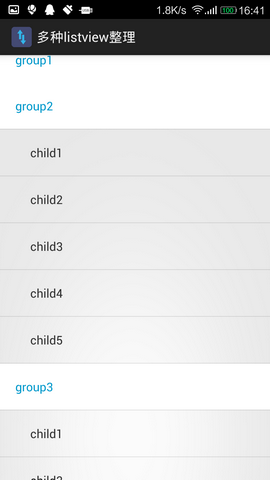
四、PinnedHeaderExpandableListView(开源框架) 特点:头部可固定,并且点击可展开。
下载链接: https://github.com/singwhatiwanna/PinnedHeaderExpandableListView
1.主页面布局:
<RelativeLayout xmlns:android="http://schemas.android.com/apk/res/android" xmlns:tools="http://schemas.android.com/tools" android:layout_width="match_parent" android:layout_height="match_parent" > <com.ryg.expandable.ui.PinnedHeaderExpandableListView android:id="@+id/phelv" android:layout_width="match_parent" android:layout_height="match_parent" android:groupIndicator="@null" > </com.ryg.expandable.ui.PinnedHeaderExpandableListView></RelativeLayout>2.组条目/子条目的布局文件:
组条目(一定要加个背景色,避免滑动错乱):
<?xml version="1.0" encoding="utf-8"?><LinearLayout xmlns:android="http://schemas.android.com/apk/res/android" android:layout_width="match_parent" android:layout_height="match_parent" android:background="@android:color/white" android:orientation="vertical" > <TextView android:id="@+id/tv_phelv_group_item" android:layout_width="match_parent" android:layout_height="wrap_content" android:padding="20dip" android:text="group" android:textColor="@android:color/holo_blue_dark" android:textSize="16sp" /></LinearLayout>子条目:
<?xml version="1.0" encoding="utf-8"?><LinearLayout xmlns:android="http://schemas.android.com/apk/res/android" android:layout_width="match_parent" android:layout_height="match_parent" android:orientation="vertical" > <TextView android:id="@+id/tv_phelv_child_item" android:layout_width="match_parent" android:layout_height="wrap_content" android:layout_marginLeft="20dip" android:padding="20dip" android:text="child" android:textSize="16sp" /></LinearLayout>3.准备一个数据适配器:
public class PhelvAdapter extends BaseExpandableListAdapter{ private Context context; private List<String> group; private List<List<String>> child; public PhelvAdapter(Context context, List<String> group, List<List<String>> child) { this.context = context; this.group = group; this.child = child; } /*-----------------Group----------------*/ @Override public int getGroupCount() { return group.size(); } @Override public Object getGroup(int groupPosition) { return group.get(groupPosition); } @Override public long getGroupId(int groupPosition) { return groupPosition; } @Override public View getGroupView(int groupPosition, boolean isExpanded, View convertView, ViewGroup parent) { String groupItem = group.get(groupPosition); View view; if(convertView == null){ view = View.inflate(context, R.layout.phelv_group_item, null); }else{ view = convertView; } tv_phelv_group_item = (TextView) view.findViewById(R.id.tv_phelv_group_item); tv_phelv_group_item.setText(groupItem); return view; } private static TextView tv_phelv_group_item; /*-----------------Child----------------*/ @Override public int getChildrenCount(int groupPosition) { return child.get(groupPosition).size(); } @Override public Object getChild(int groupPosition, int childPosition) { return child.get(groupPosition).get(childPosition); } @Override public long getChildId(int groupPosition, int childPosition) { return childPosition; } @Override public View getChildView(int groupPosition, int childPosition, boolean isLastChild, View convertView, ViewGroup parent) { String childItem = child.get(groupPosition).get(childPosition); View view; if(convertView == null){ view = View.inflate(context, R.layout.phelv_child_item, null); }else{ view = convertView; } tv_phelv_child_item = (TextView) view.findViewById(R.id.tv_phelv_child_item); tv_phelv_child_item.setText(childItem); return view; } private static TextView tv_phelv_child_item; @Override public boolean hasStableIds() { return false; } @Override public boolean isChildSelectable(int groupPosition, int childPosition) { return true; }}4.主函数准备好数据,设置适配器,并且添加OnHeaderUpdateListener监听组条目的变化:
public class PhelvDemoActivity extends Activity implements OnHeaderUpdateListener{ private PinnedHeaderExpandableListView phelv; private PhelvAdapter phelvAdapter; private List<String> group; private List<List<String>> child; @Override protected void onCreate(Bundle savedInstanceState) { super.onCreate(savedInstanceState); setContentView(R.layout.main_activity); phelv = (PinnedHeaderExpandableListView) this.findViewById(R.id.phelv); initData(); phelvAdapter = new PhelvAdapter(this, group, child); phelv.setAdapter(phelvAdapter); phelv.setOnHeaderUpdateListener(this); } private void initData() { group = new ArrayList<String>(); child = new ArrayList<List<String>>(); for (int i = 1; i <= 5; i++) { group.add("group"+i); List<String> childItemDatas = new ArrayList<String>(); for (int itemCount = 1; itemCount <= 5; itemCount++) { childItemDatas.add("child"+itemCount); } child.add(childItemDatas); } } @Override public View getPinnedHeader() { View headerView = getLayoutInflater().inflate(R.layout.phelv_group_item, null); headerView.setLayoutParams(new LayoutParams(LayoutParams.MATCH_PARENT, LayoutParams.WRAP_CONTENT)); return headerView; } @Override public void updatePinnedHeader(View headerView, int firstVisibleGroupPos) { String firstVisibleGroup = group.get(firstVisibleGroupPos); TextView textView = (TextView) headerView.findViewById(R.id.tv_phelv_group_item); textView.setText(firstVisibleGroup); }}至此,头部可固定,并且可点击的效果就实现了。看下效果图: 